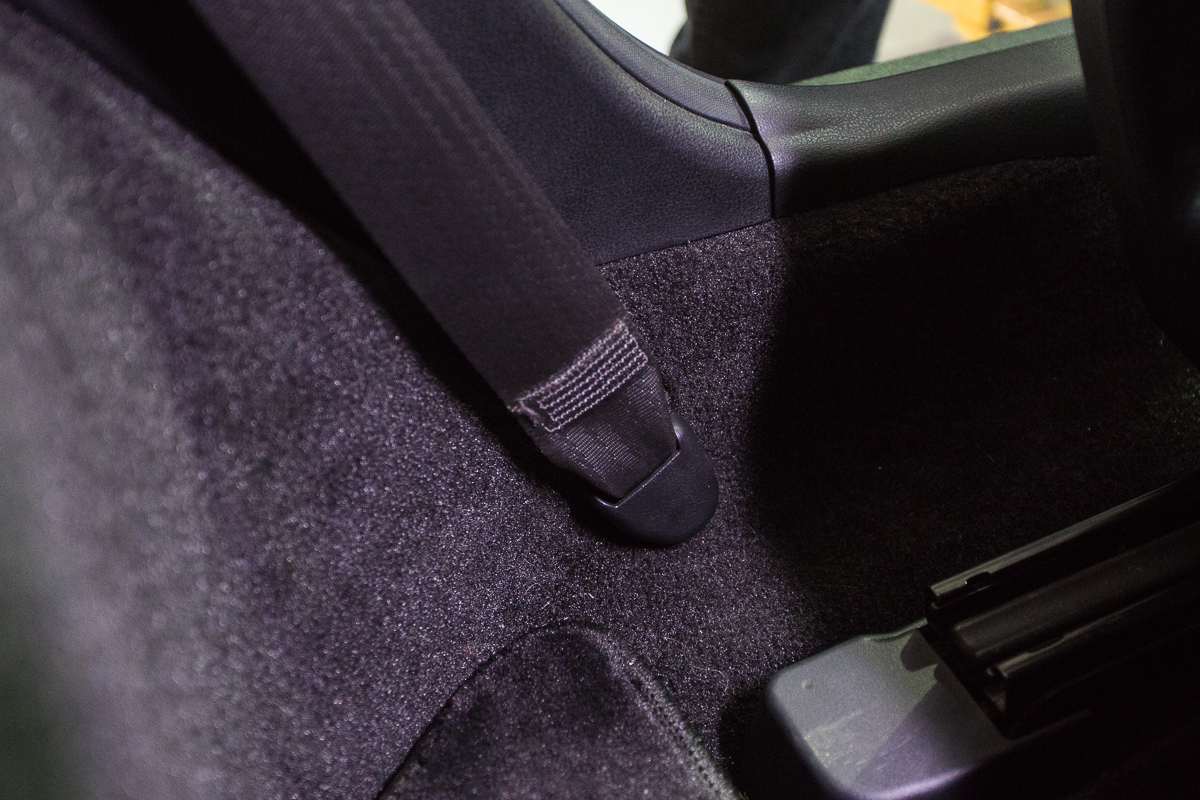
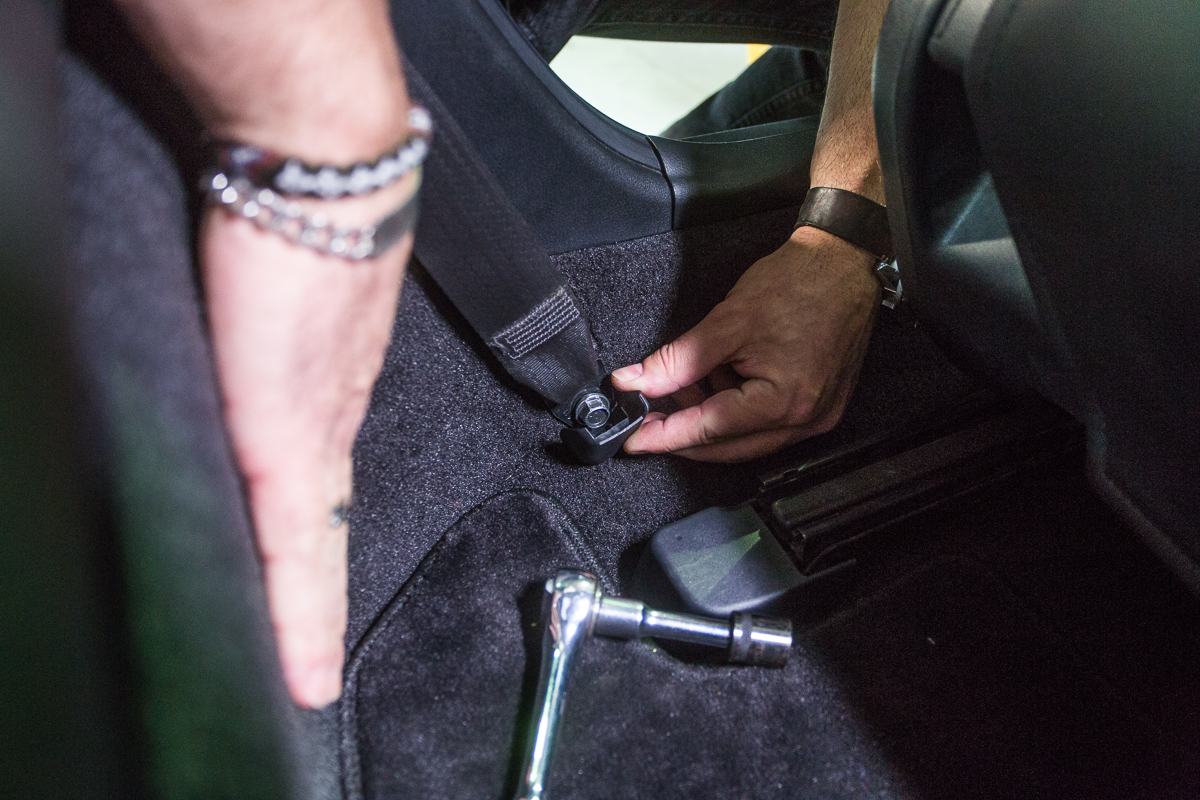
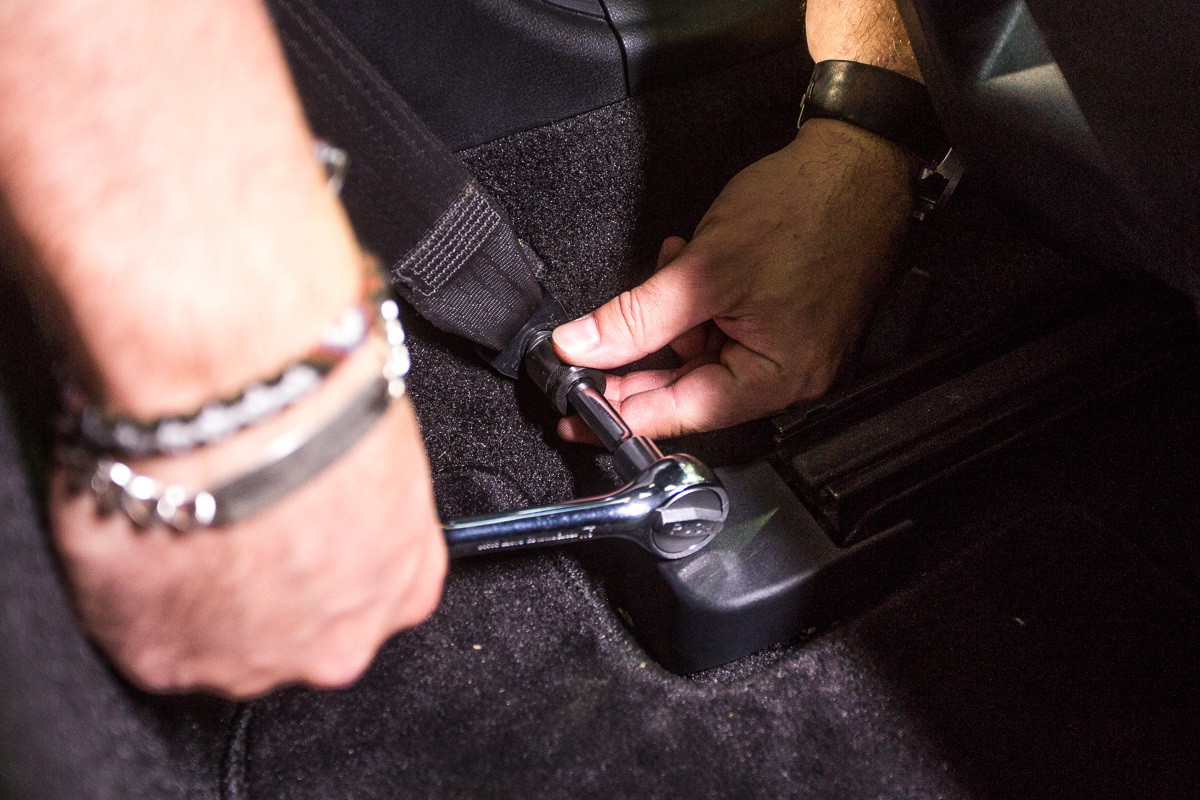
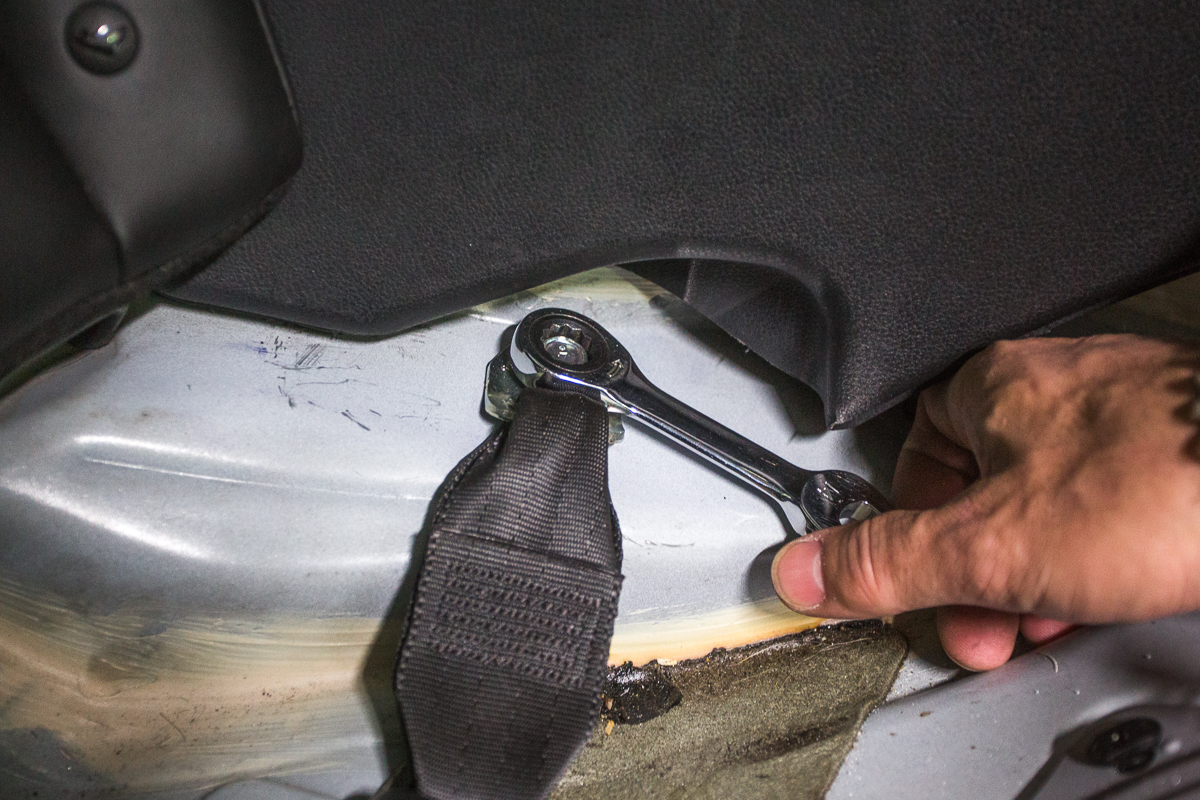
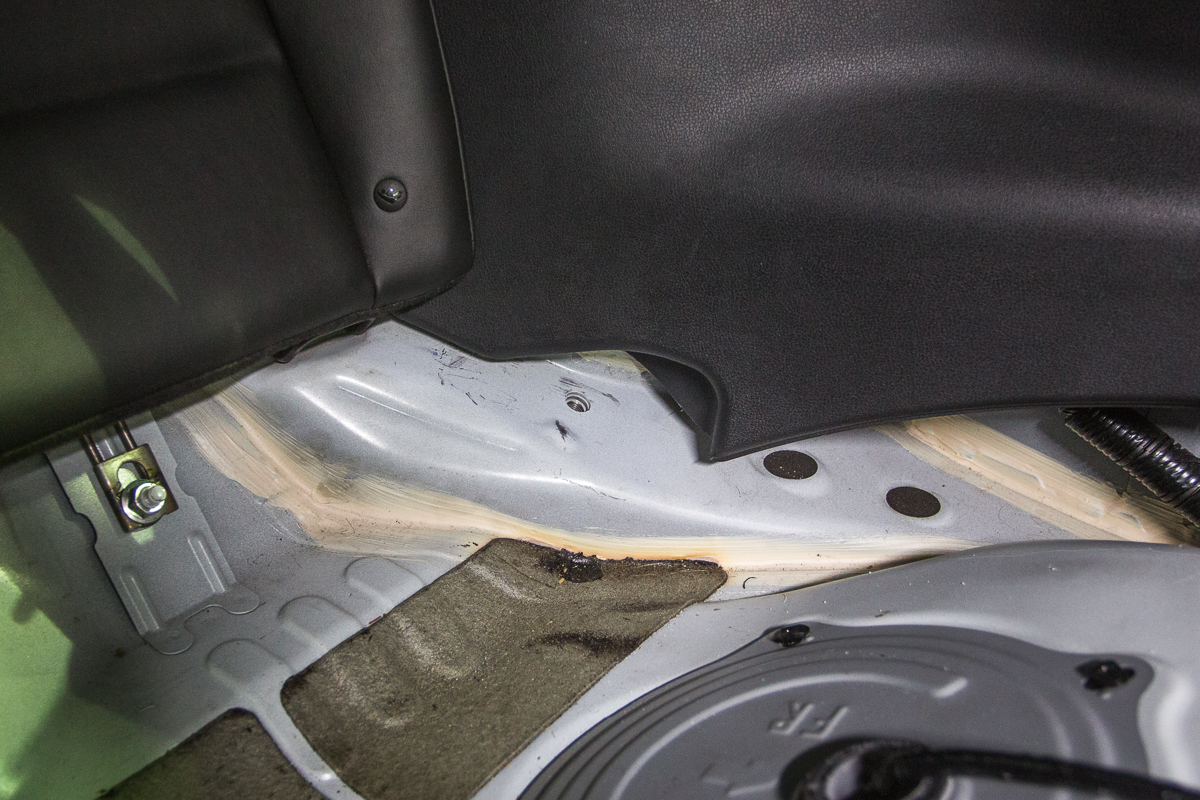
Step 1: Pop off the plastic trim piece to expose the lower B-pillar seat belt bracket & hardware. Remove this hardware and set it aside. This hardware will be reused later during install of the Harness Bar.
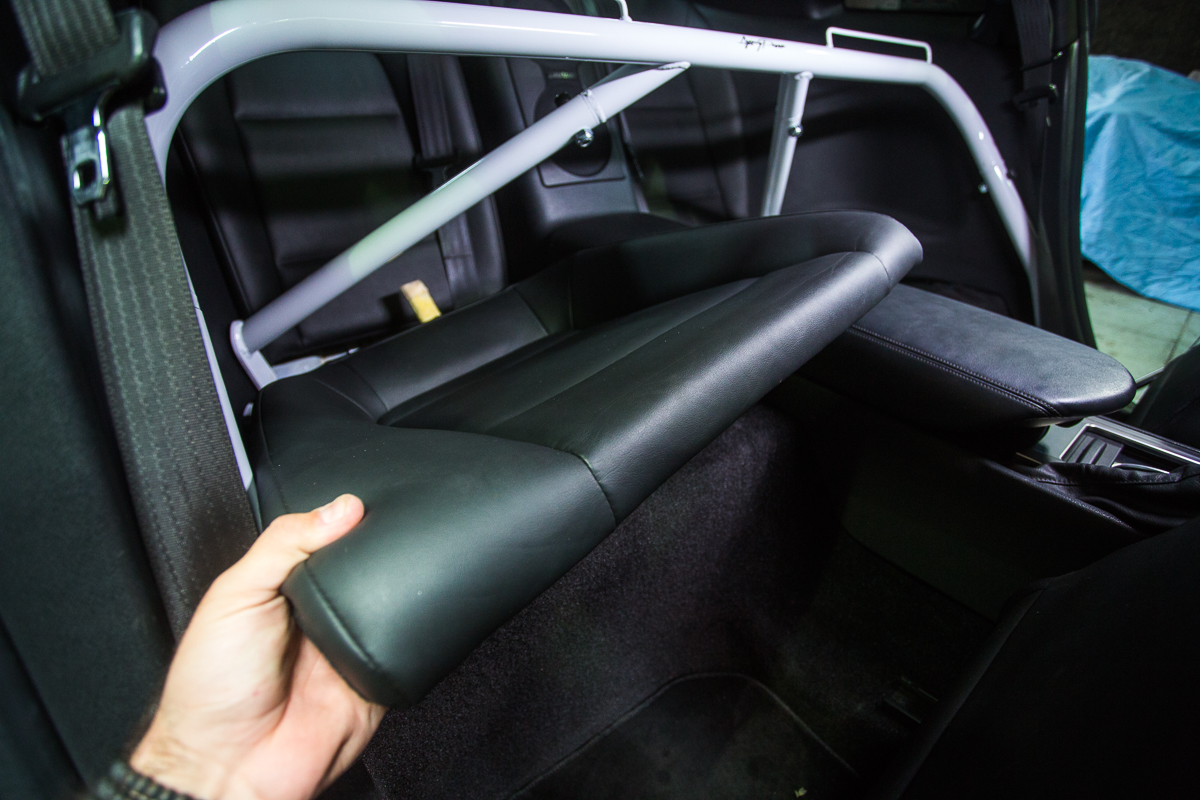
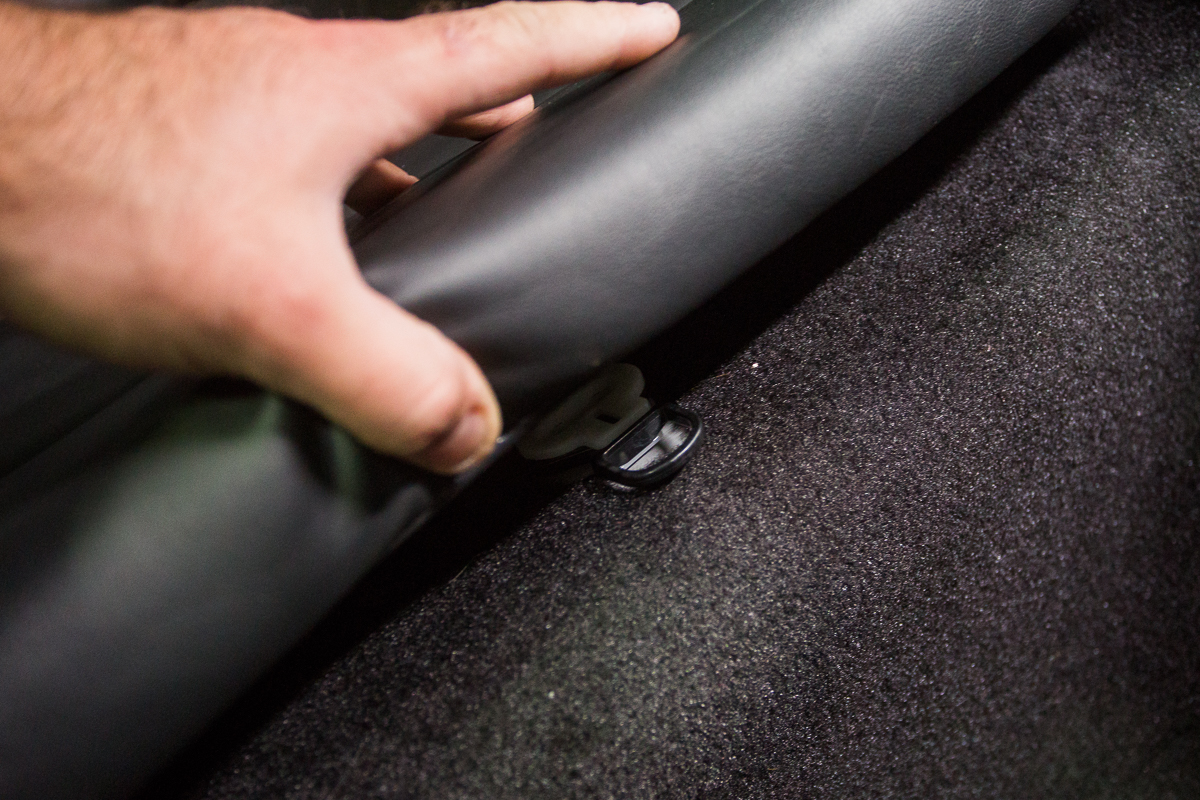
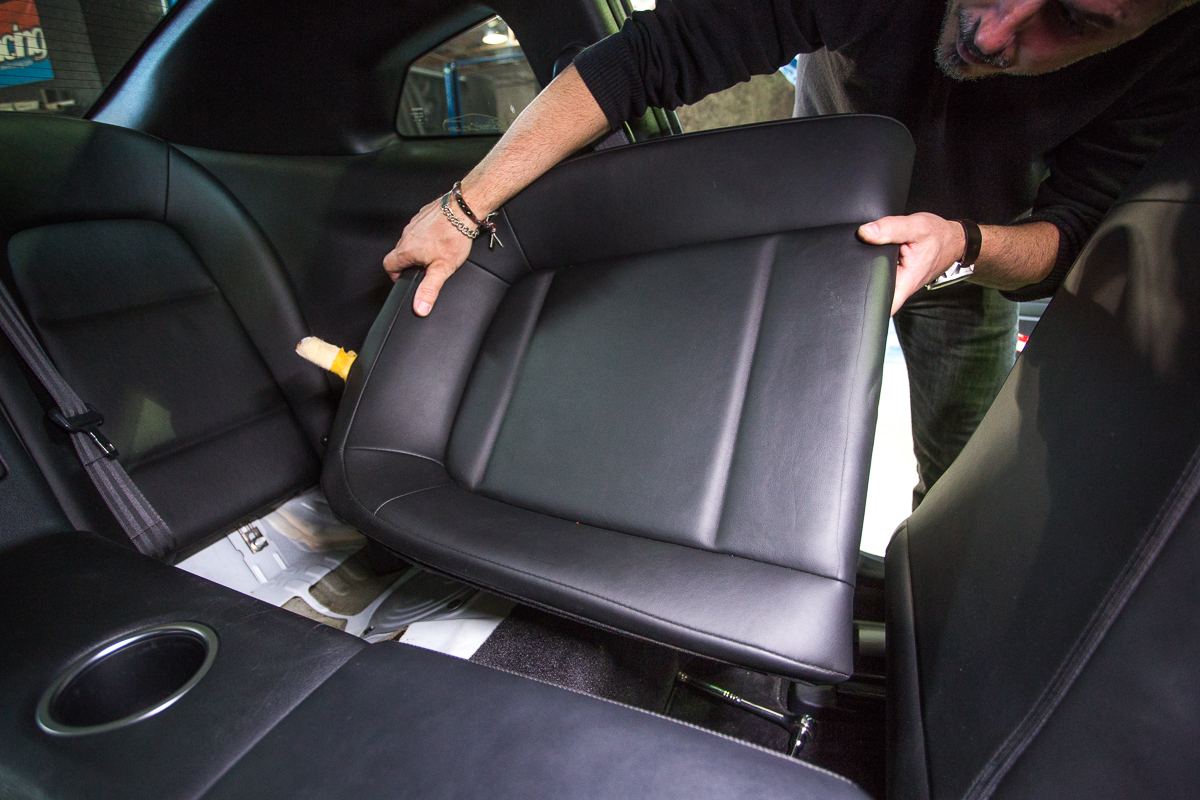
Step 2: Remove both passenger and driver side rear seat cushions by pulling the release tab located at the front center of each cushion.
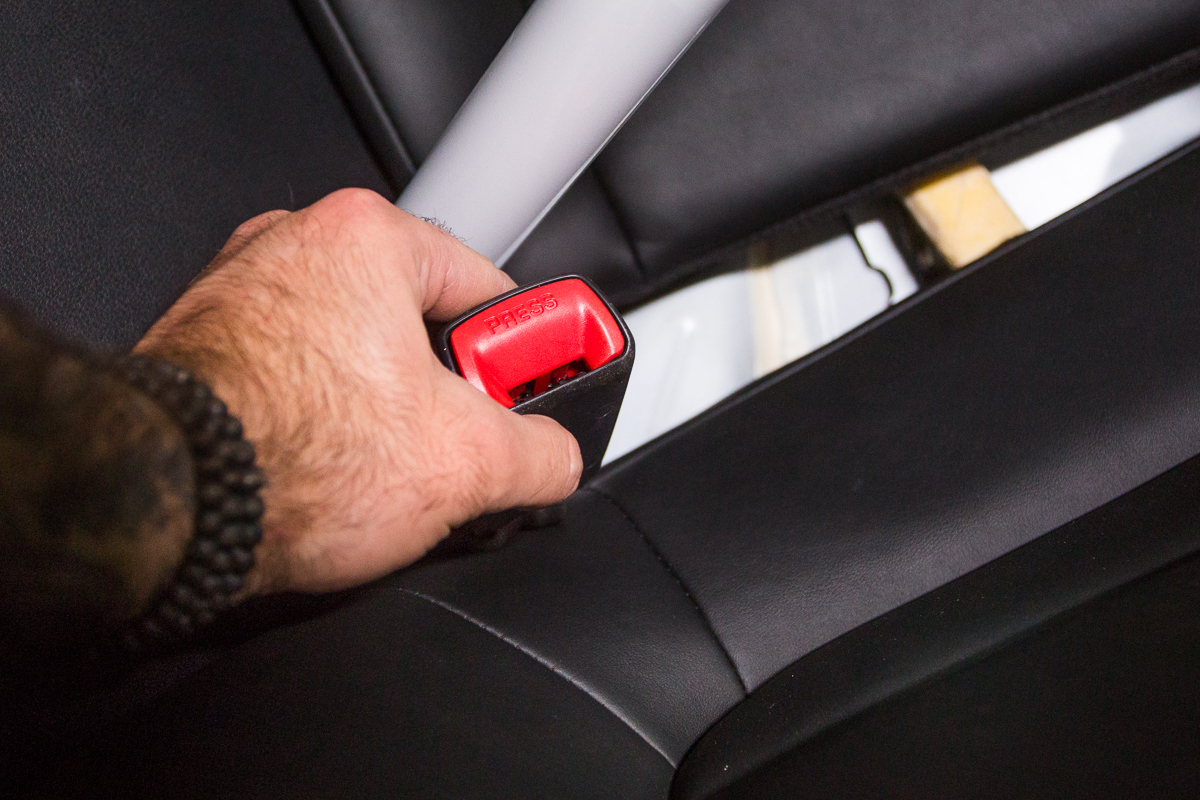
Step 3: Remove both passenger and driver side rear seat belt buckles.
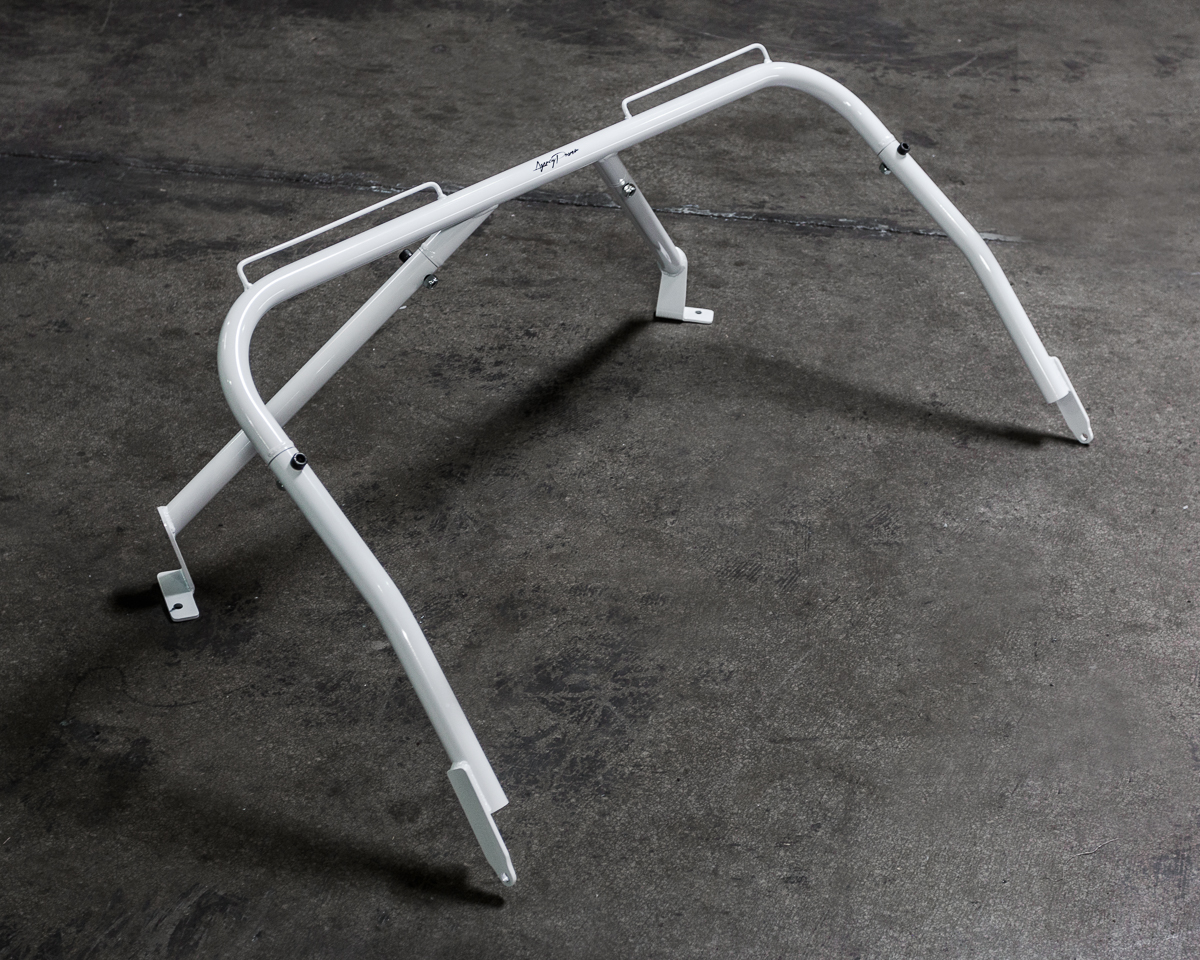
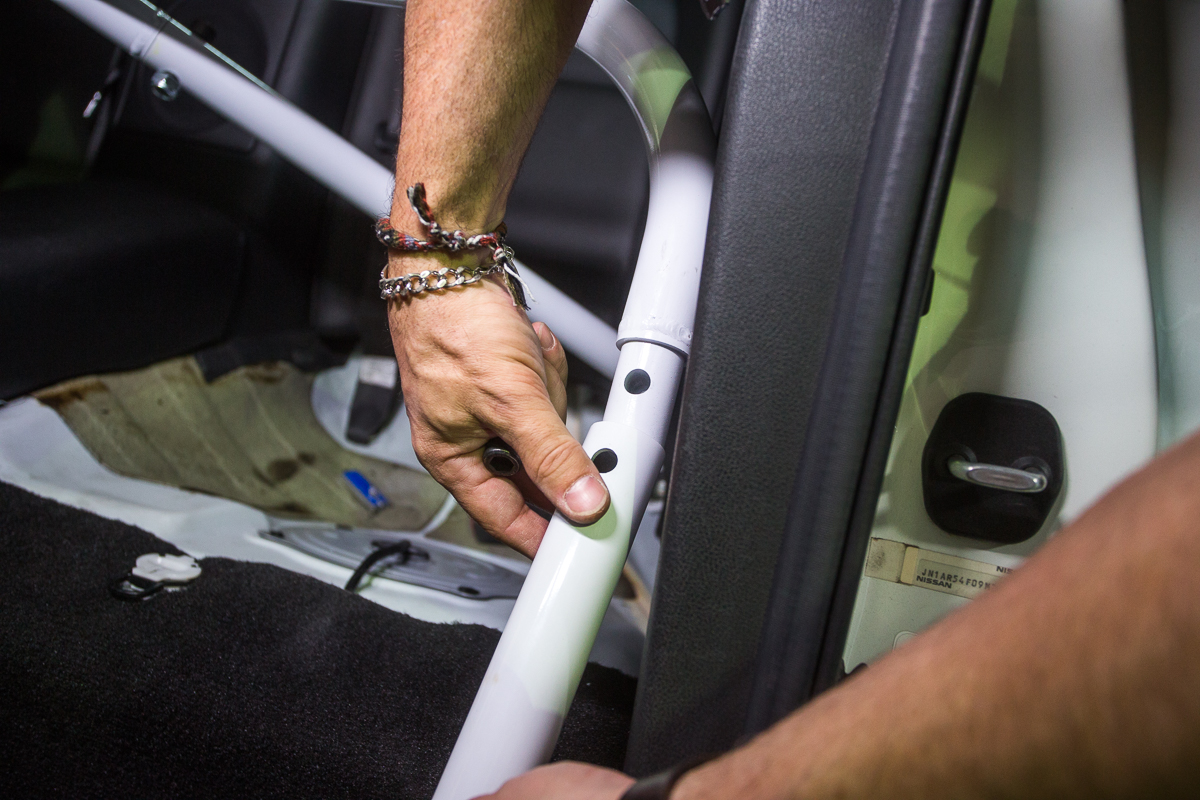
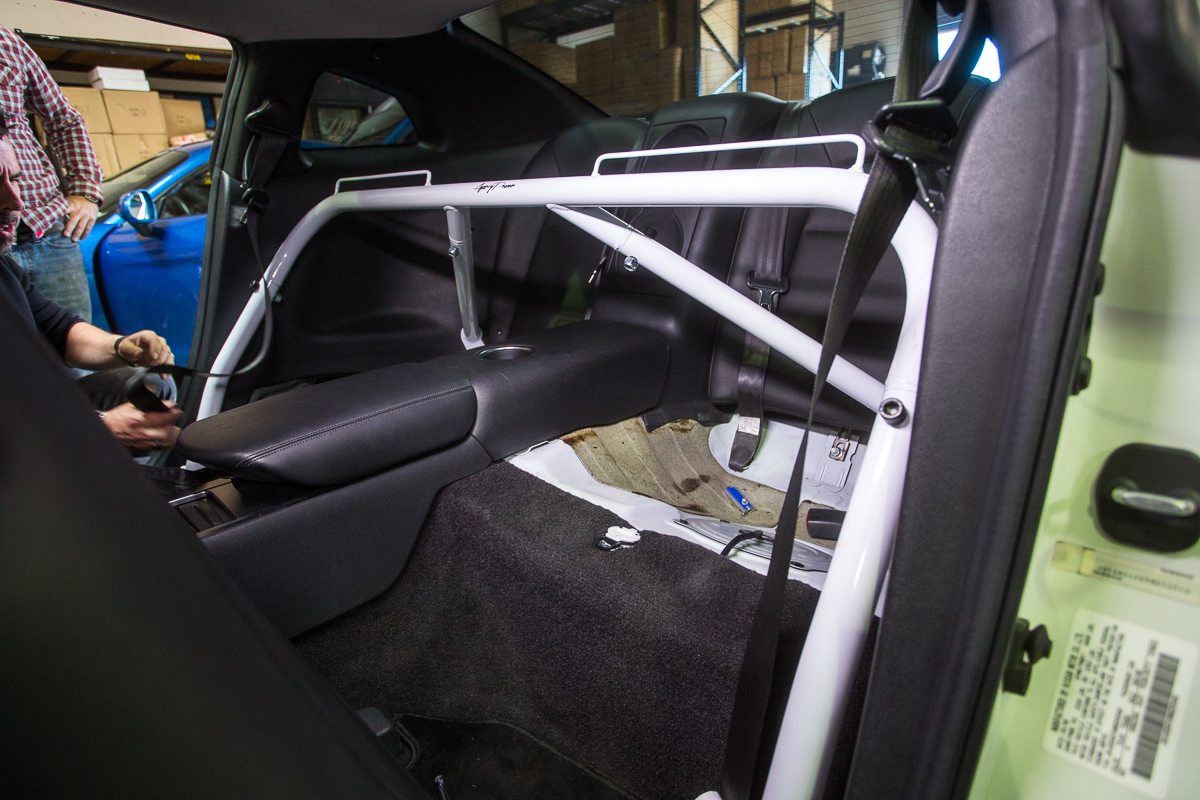
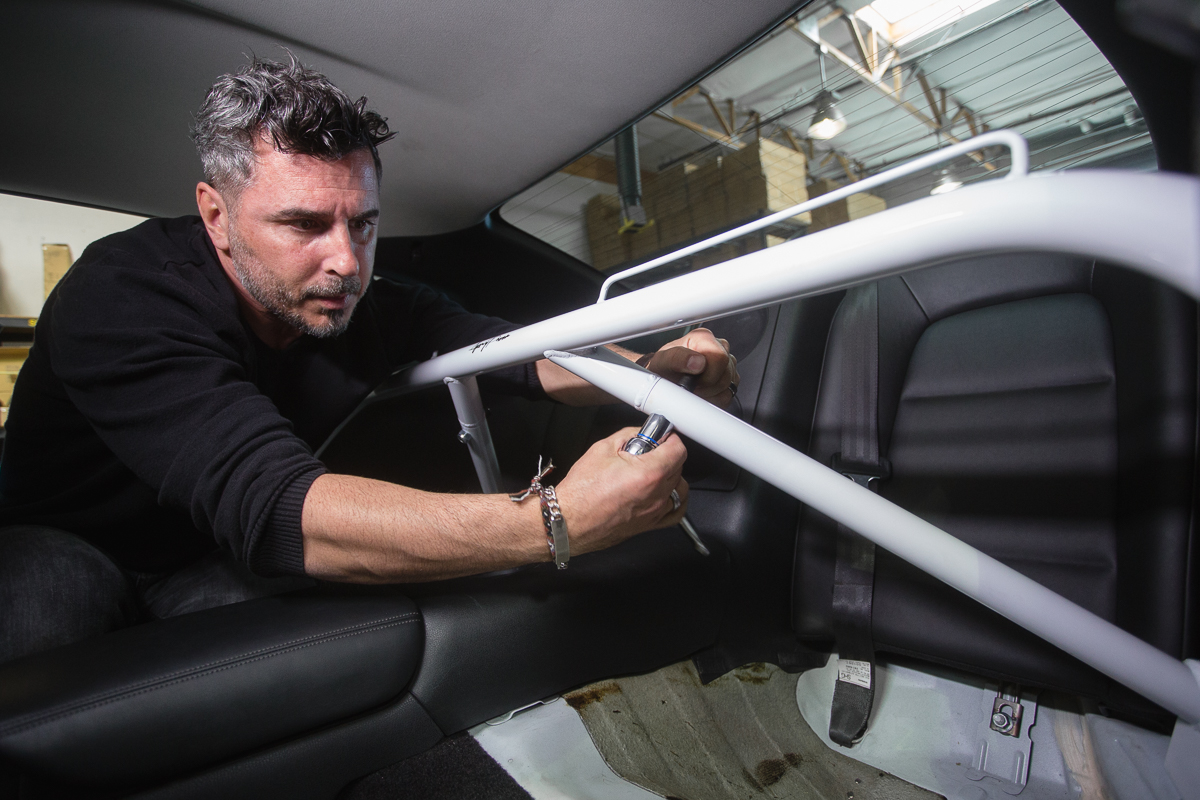
Step 4: Carefully insert and set the harness bar into the vehicle. Have a friend assist with this portion of the install.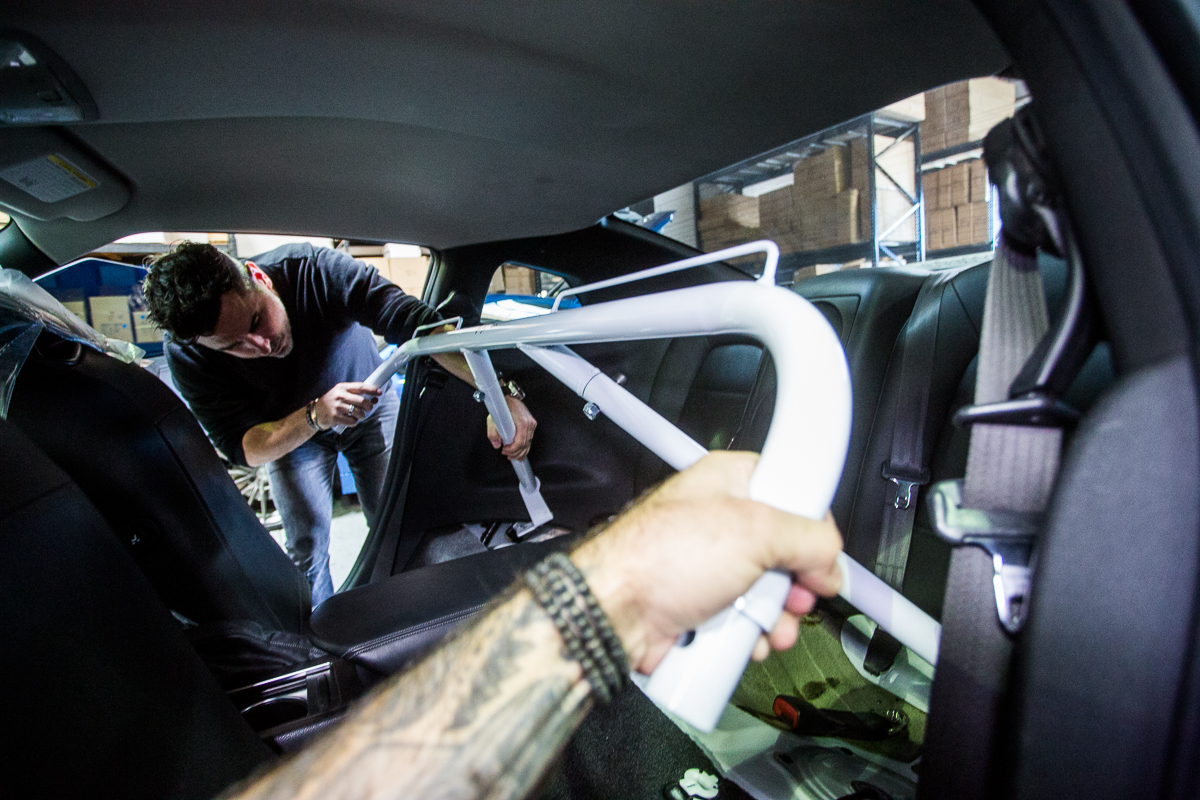
Step 5: Insert the front lower legs of the harness bar and use the provided hardware to hold the bar in place (Do not tighten any of the hardware yet)

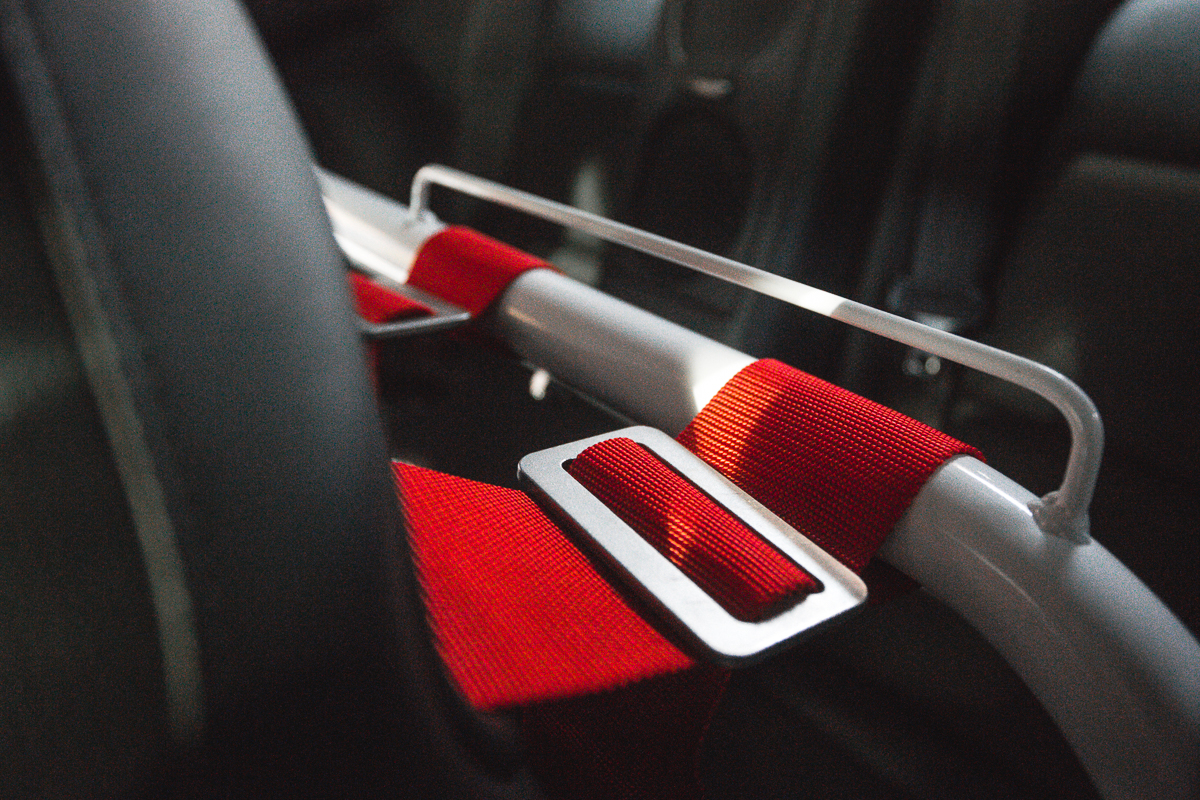
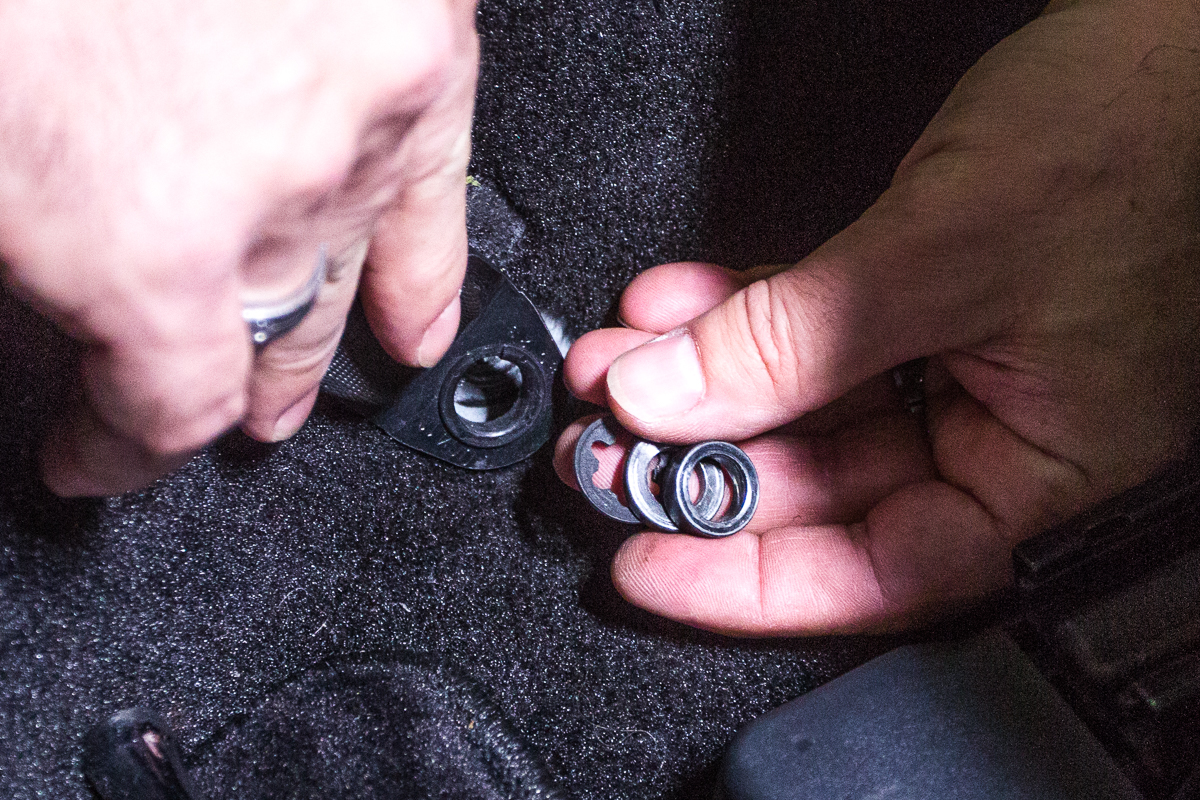
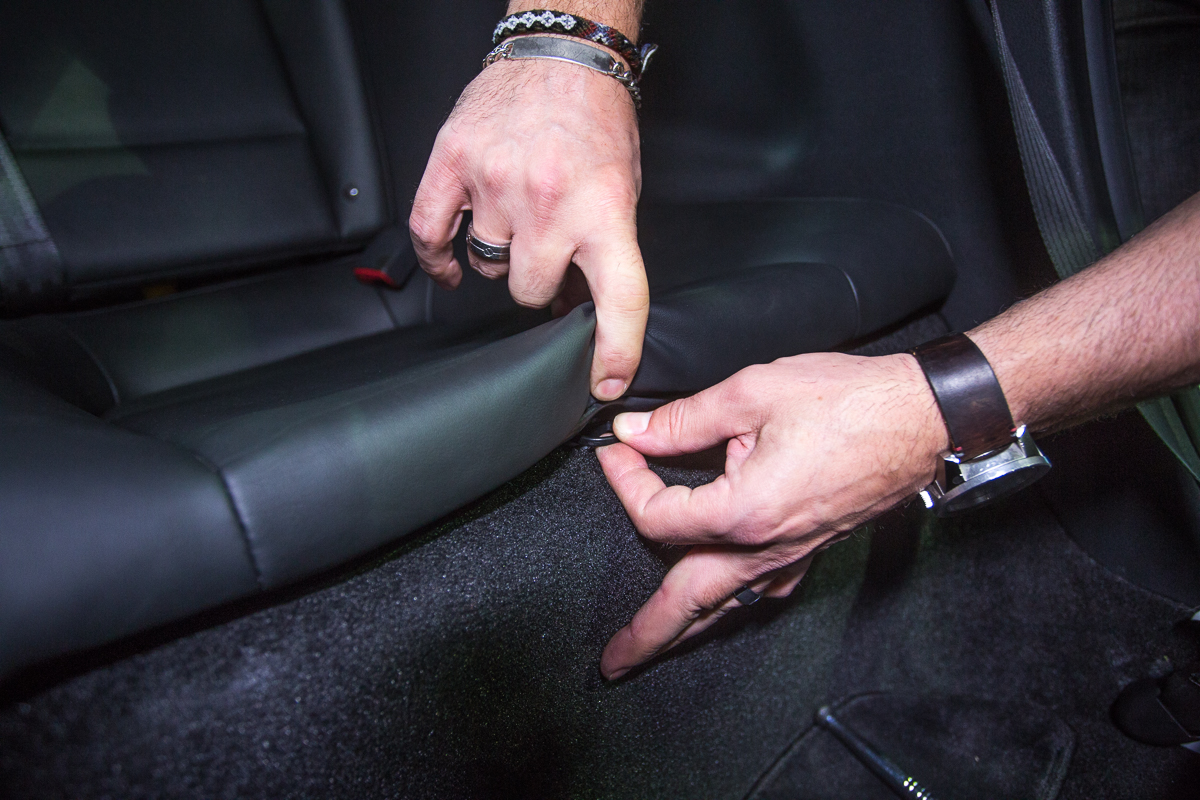
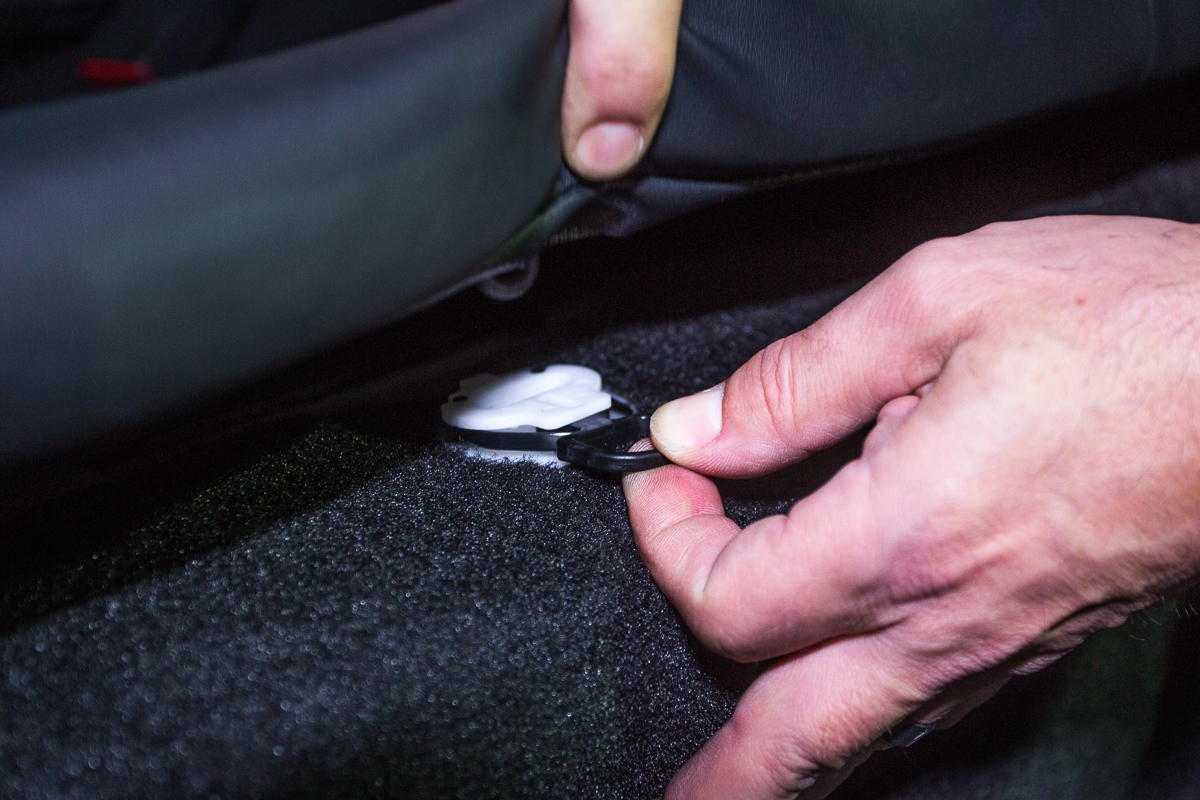
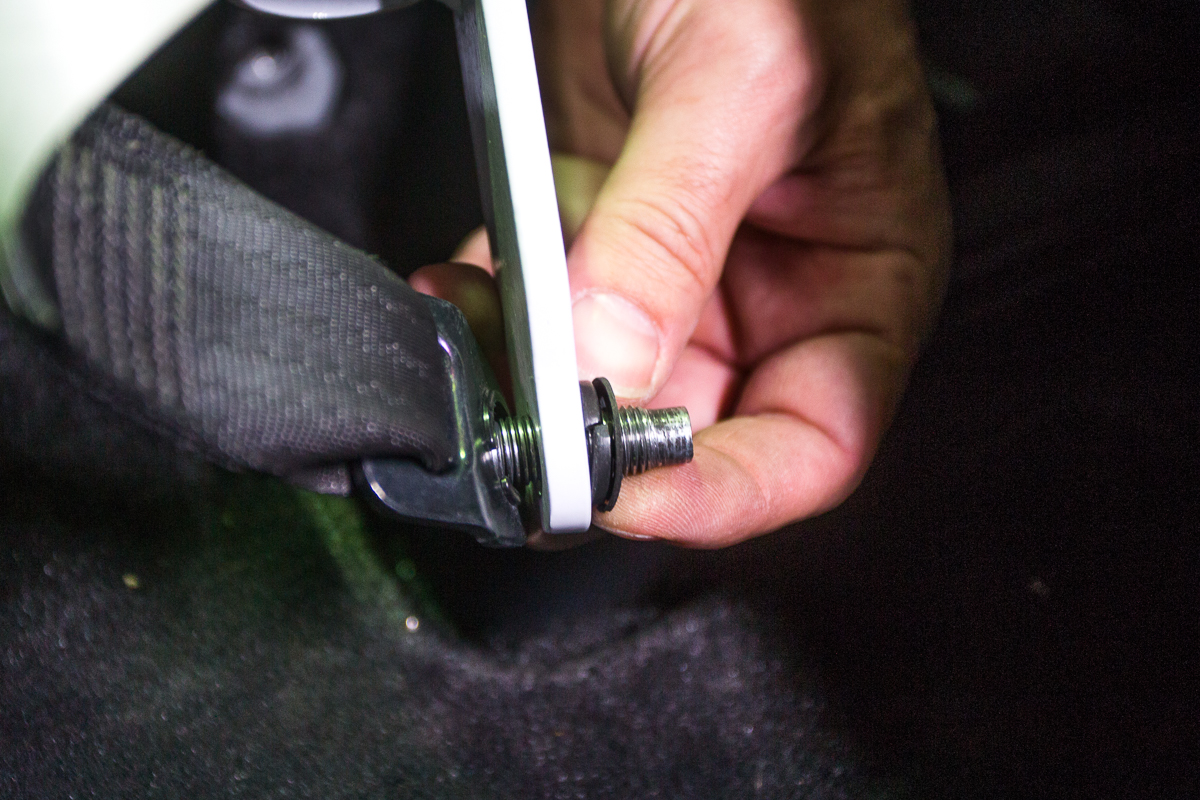
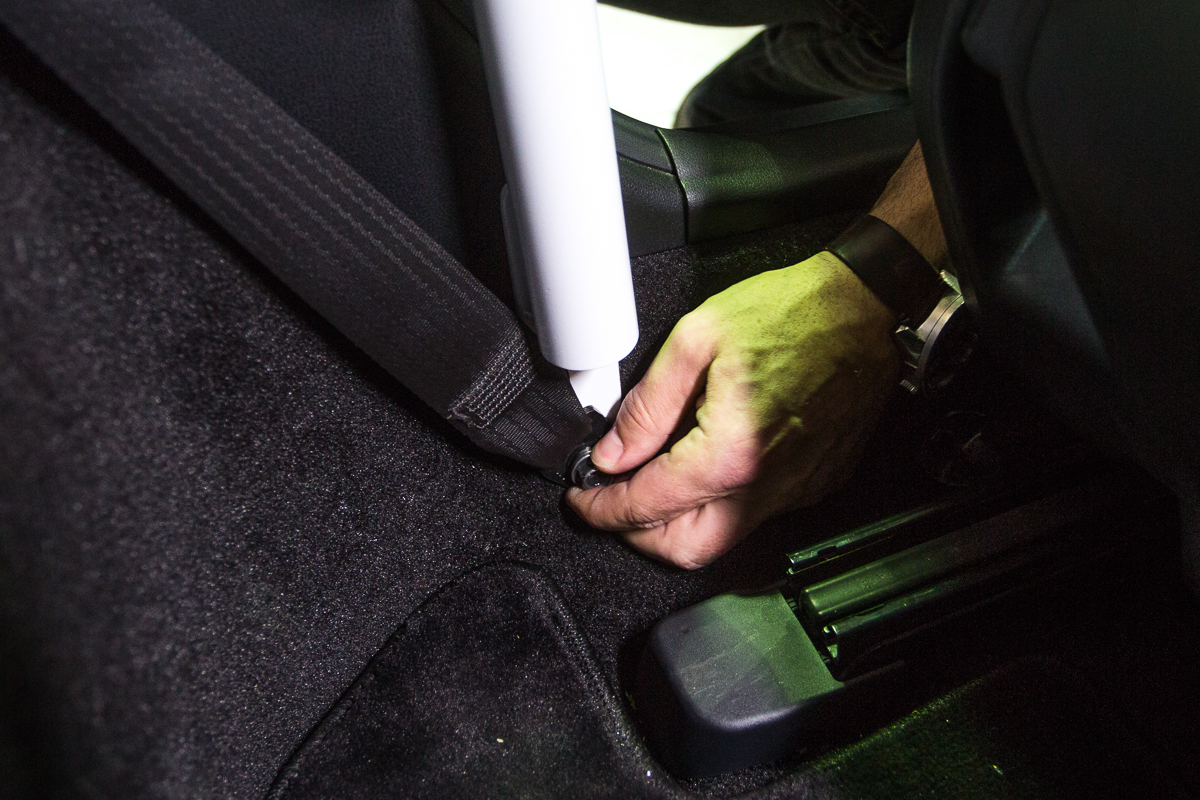
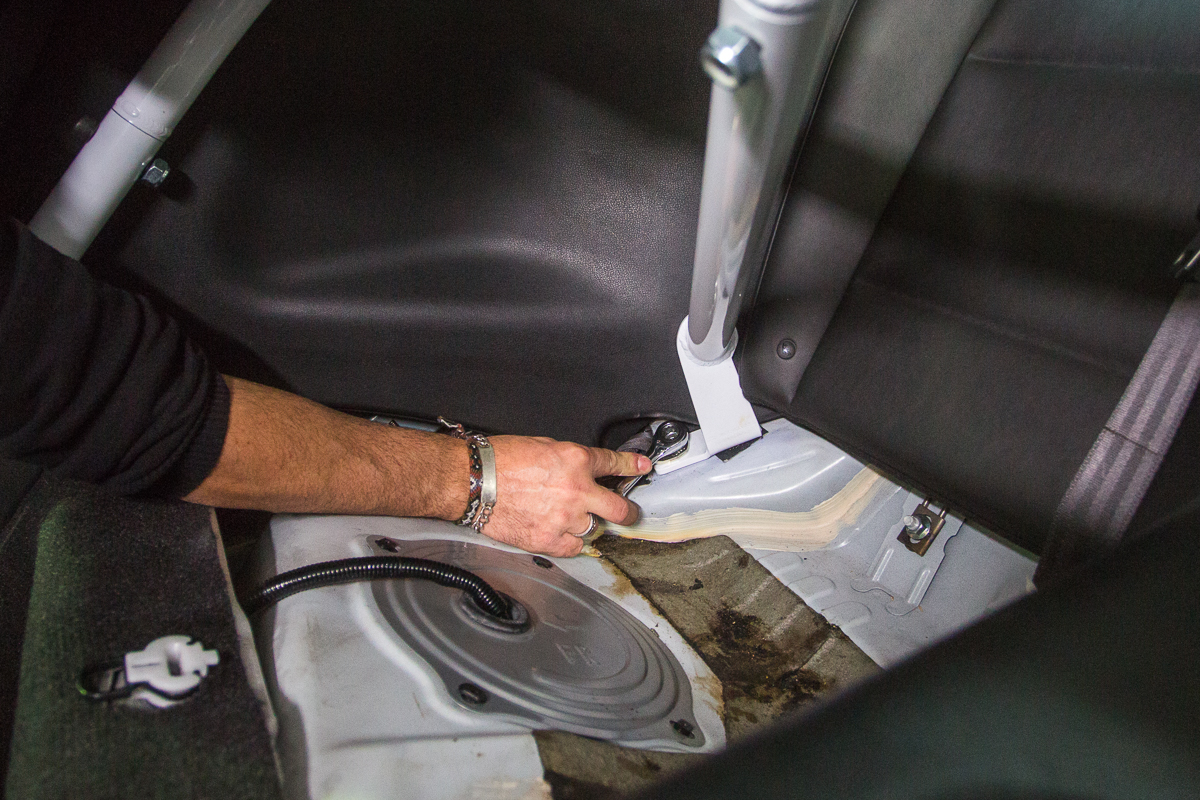
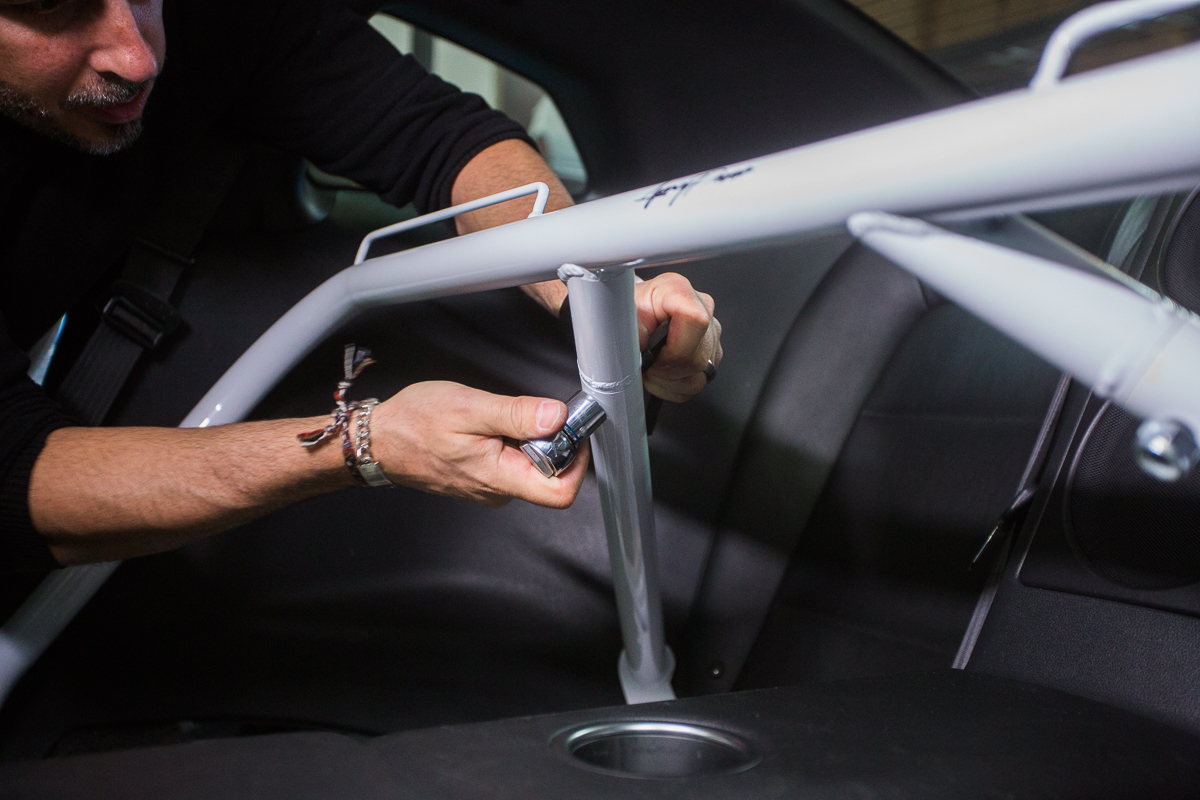
Step 6: Use the OEM hardware that was removed earlier from the driver/passenger front lower B pillar seat belt brackets and reattach the hardware as shown in the images shown below. The spacer/washer shown on the right in illustration (a) will not be reused. The lower seat belt bracket needs to be on the inside of the harness bar with the locking washer and retaining washer placed on the outside of the harness bar in the same orientation as shown in both illustrations (b) & (c) Start the bolt by hand but do not tighten any of the hardware yet.
Illustration (a) 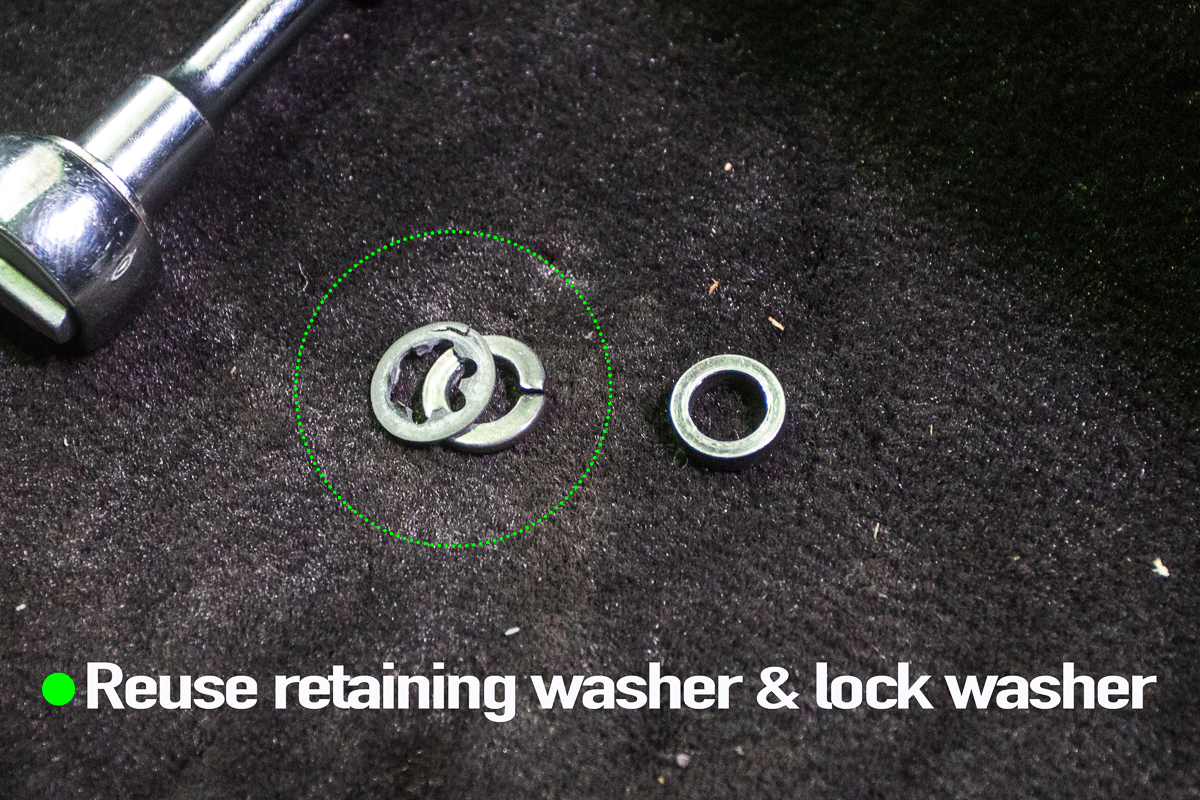
Illustration (b)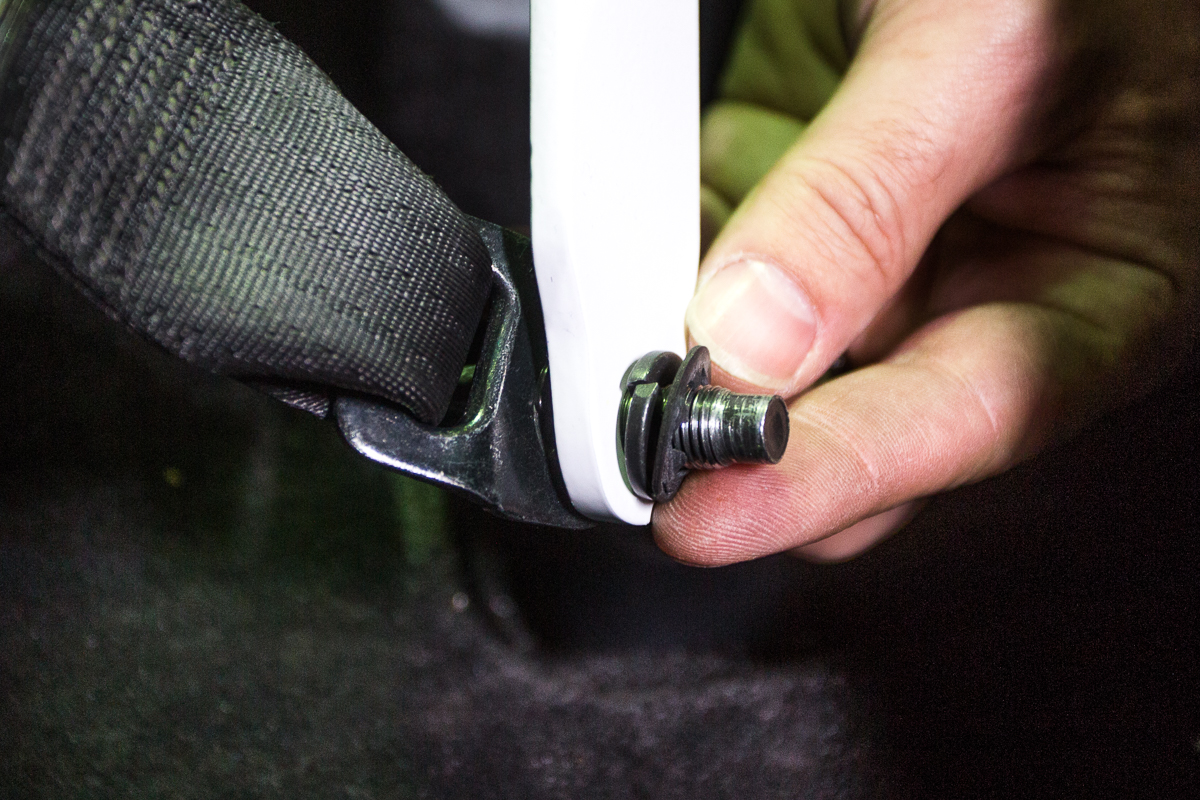
Illustration (c)
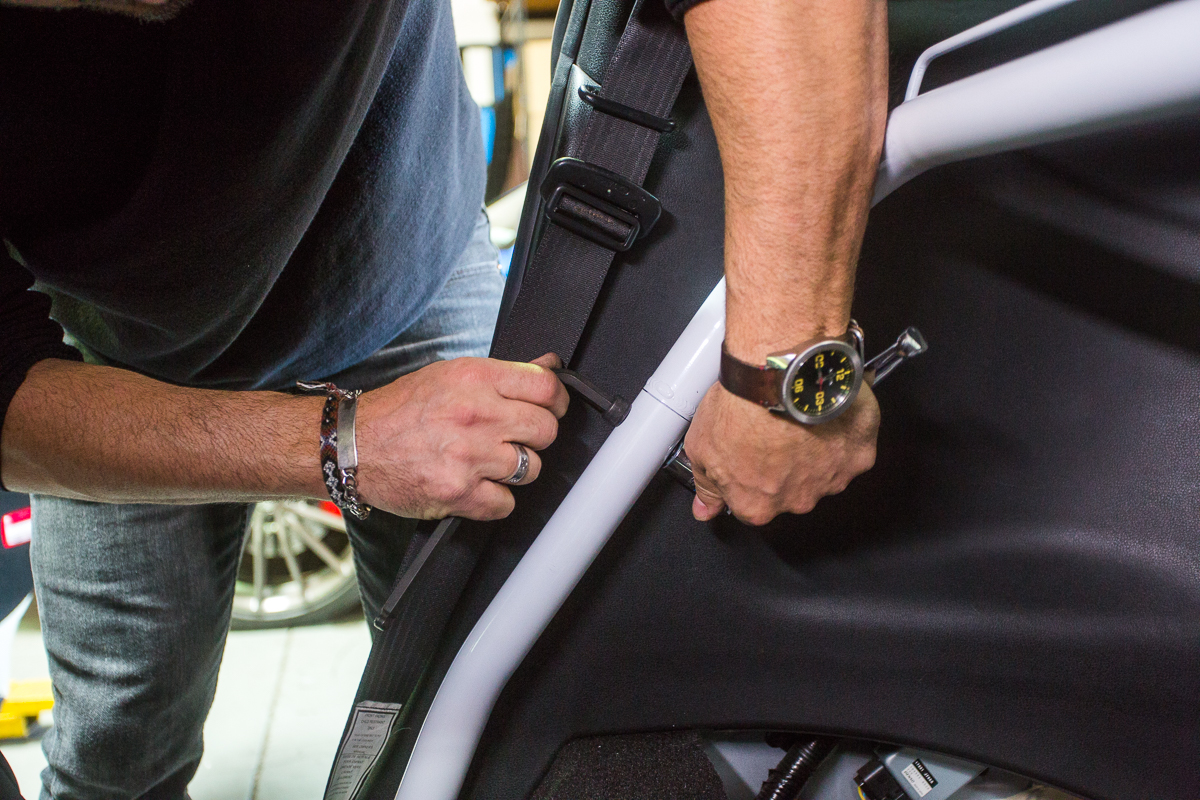
Step 7: Use the provided extended hardware for the rear harness bar mounts. The seat belt bracket needs to be placed on top of the harness bar mounting bracket. Do this on both the passenger and driver side. Once everything is in place and you can begin to tighten everything down.
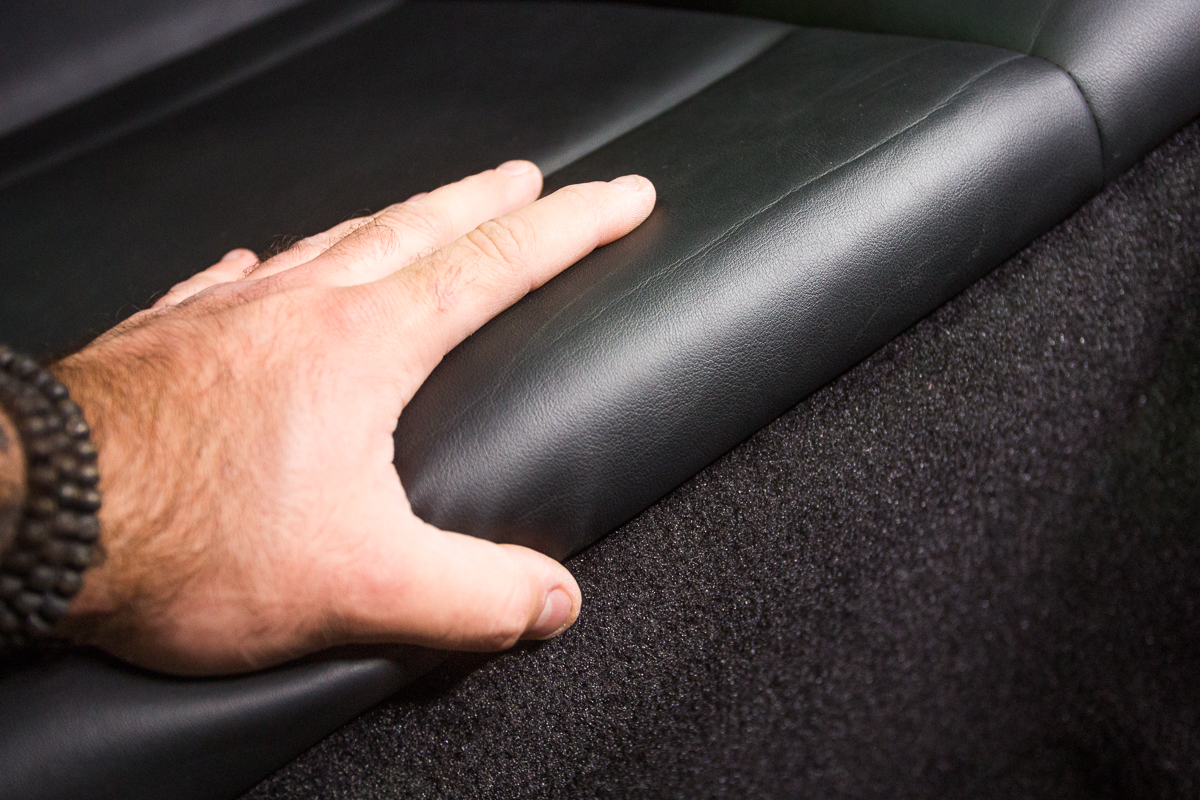
Step 8: Reinstall rear seat cushions.