This Install Guide is intended to help with the installation of the VR Performance Cold Air Intake on the 2010-2019 Toyota 4Runner 4.0L V6 and 2010-2014 FJ Cruiser.
Installation Difficulty:

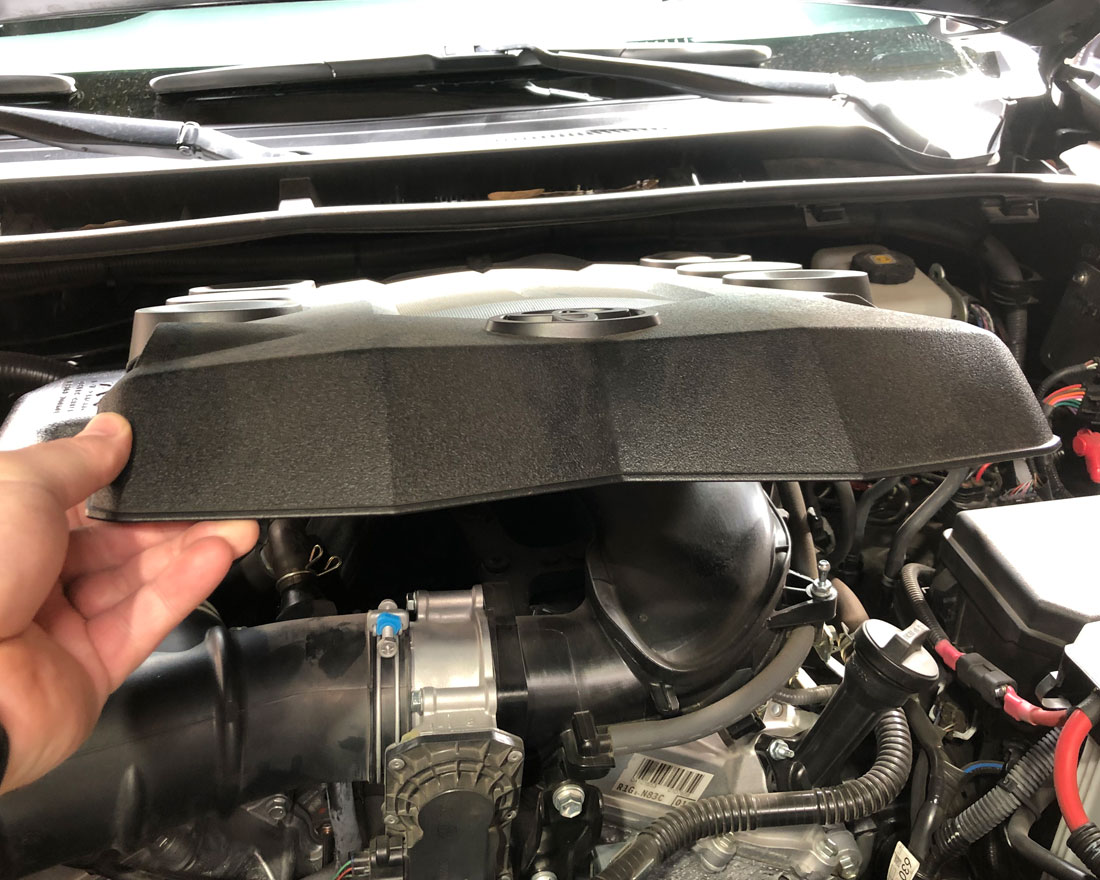
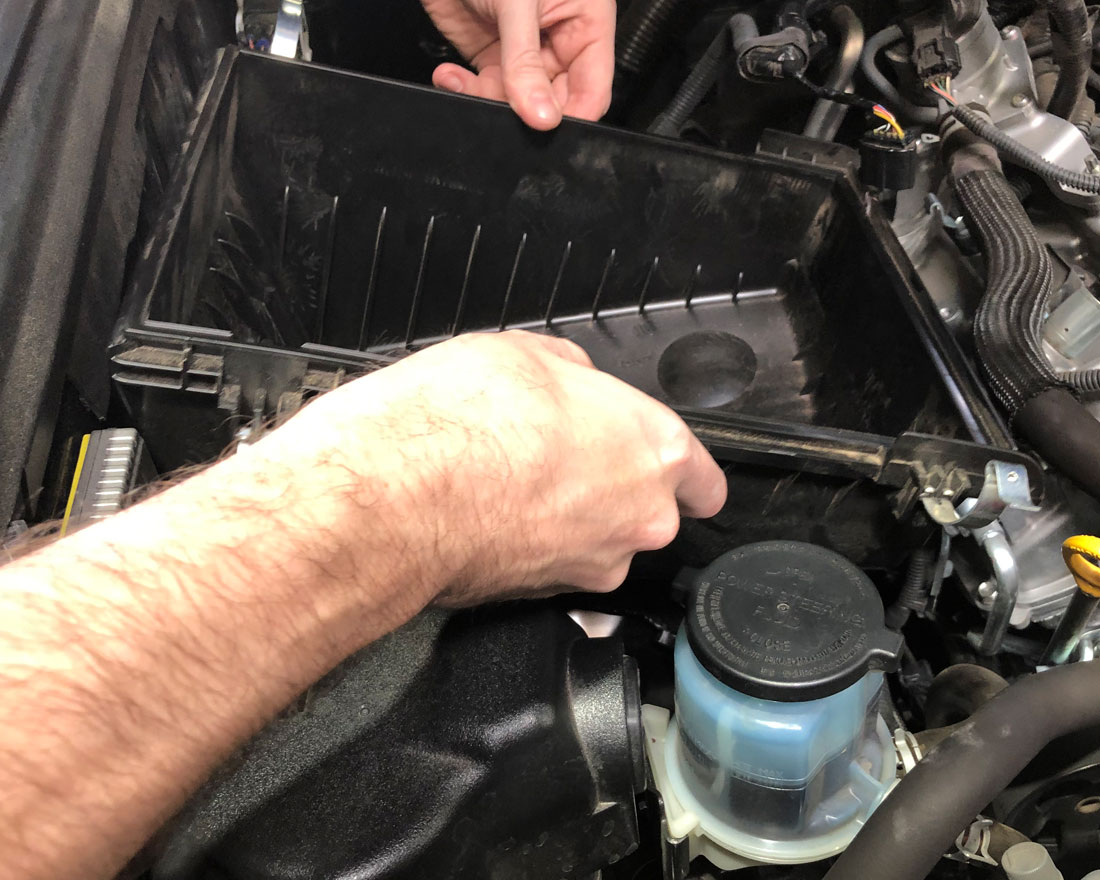
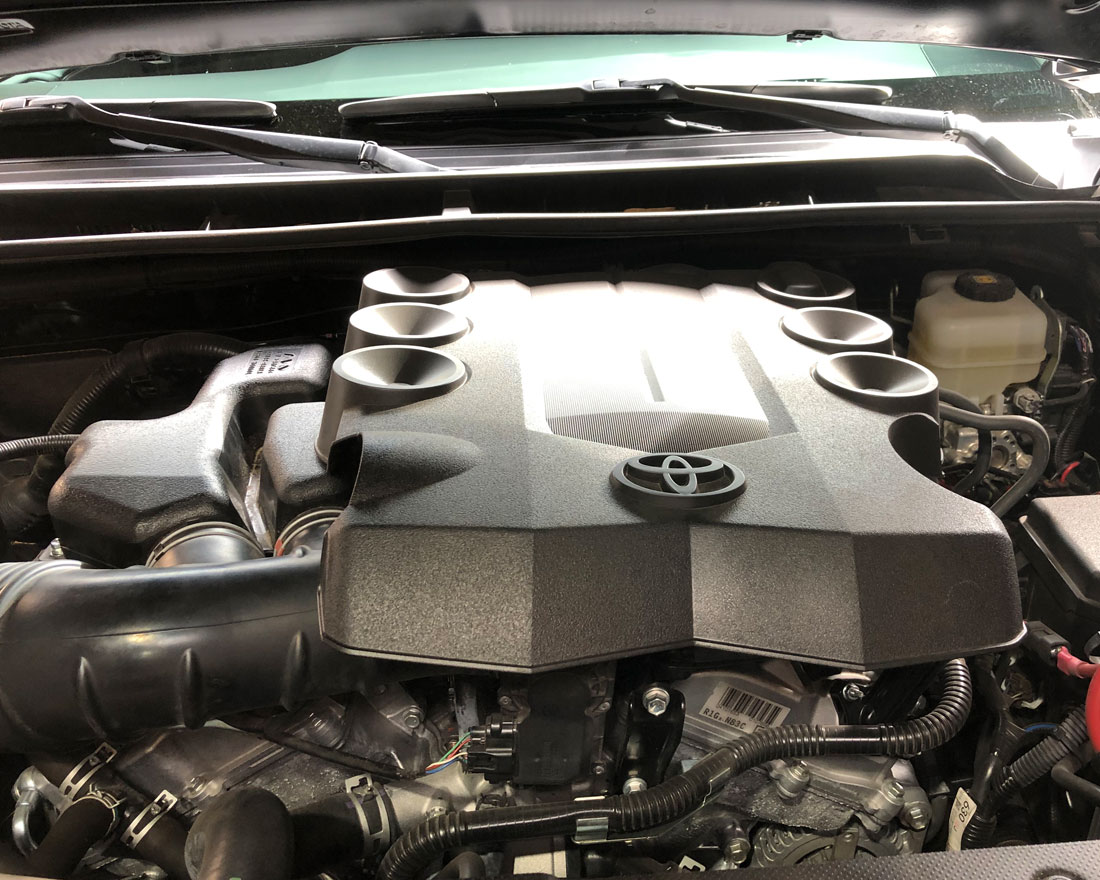 Step 1) Remove the engine cover.
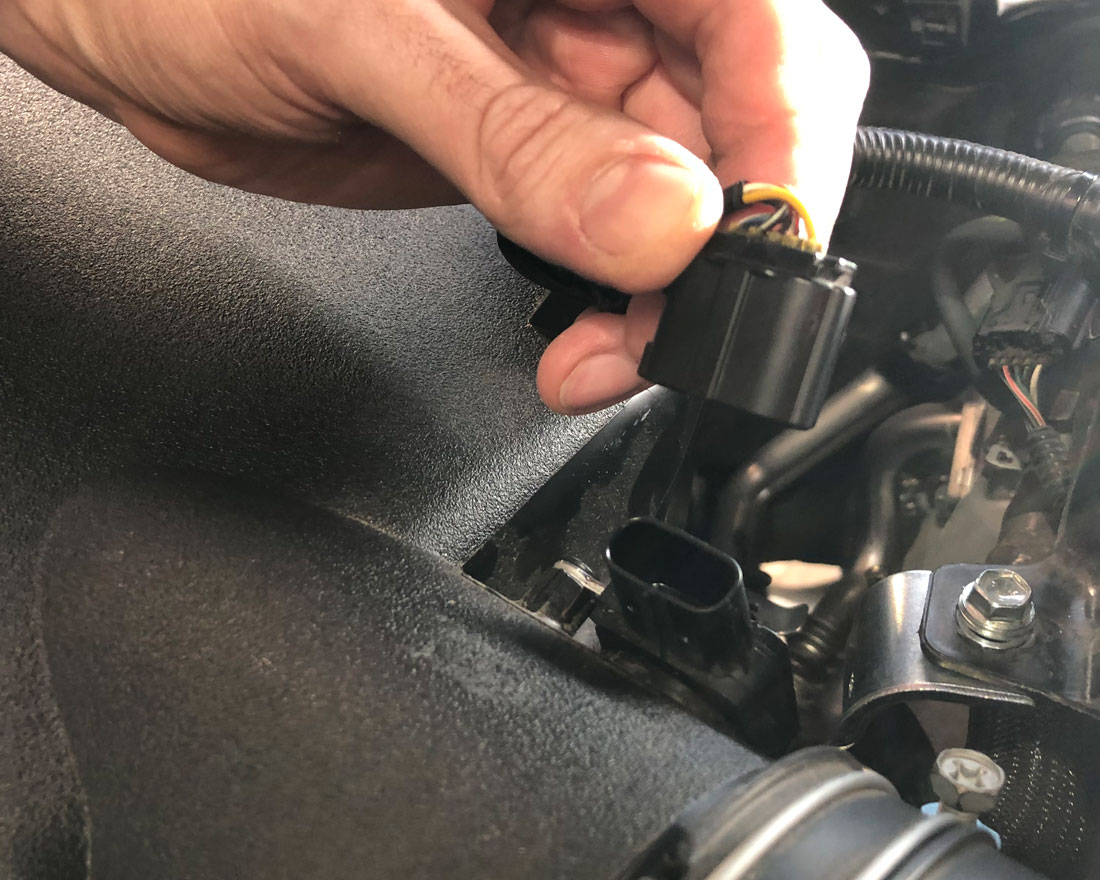
Step 2) Disconnect the air sensor.
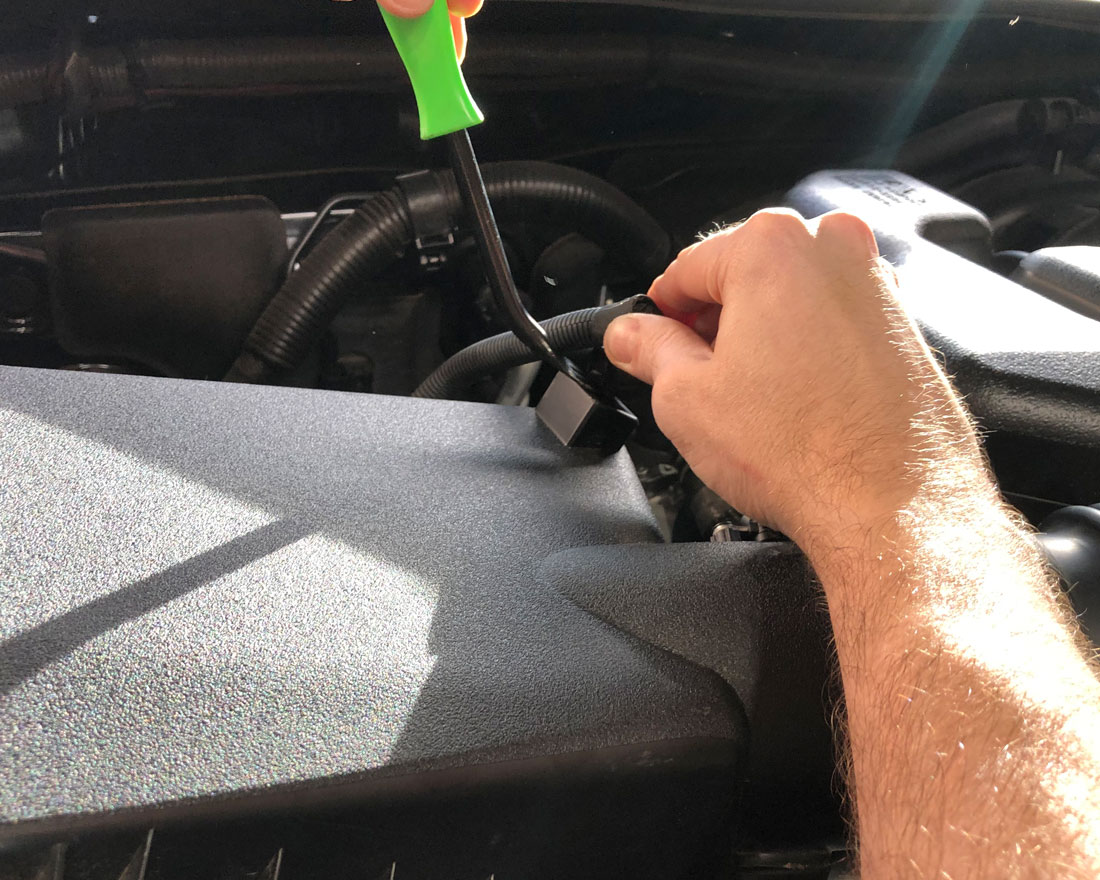
 Step 3) Unclip the wiring harness from the intake.
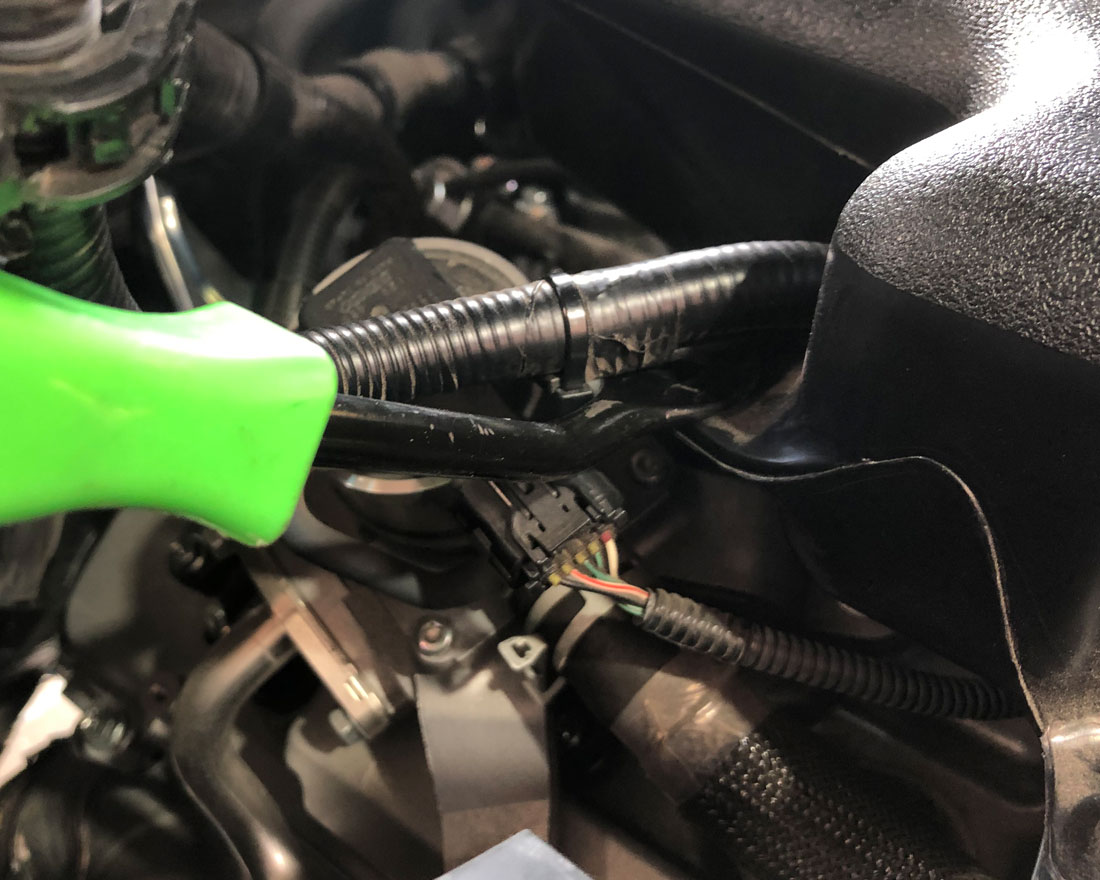
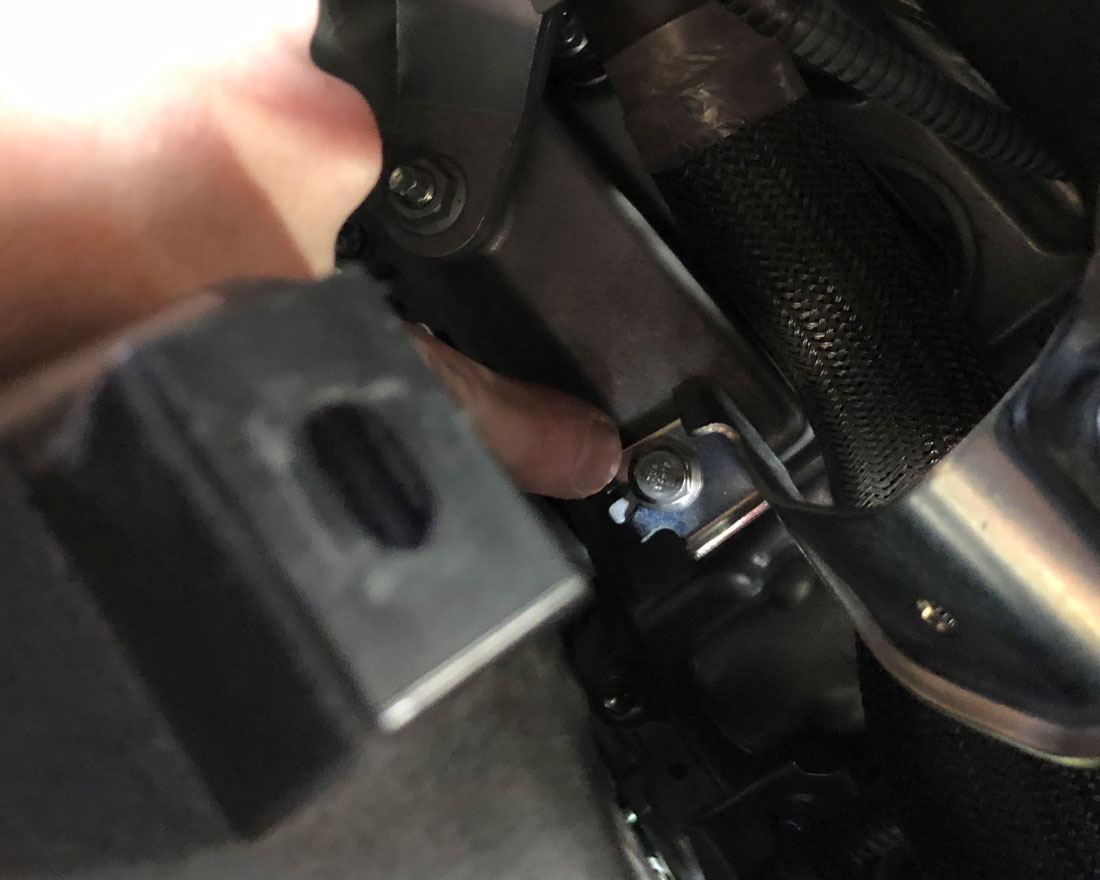
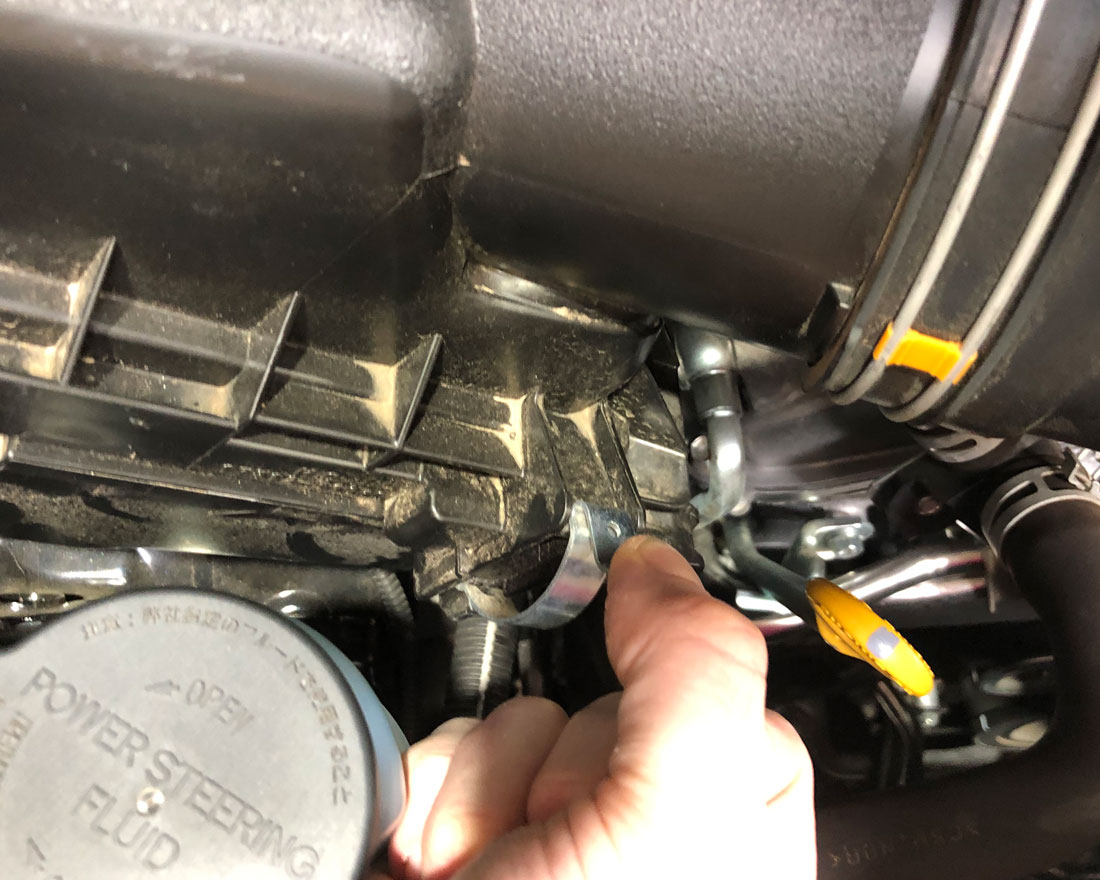
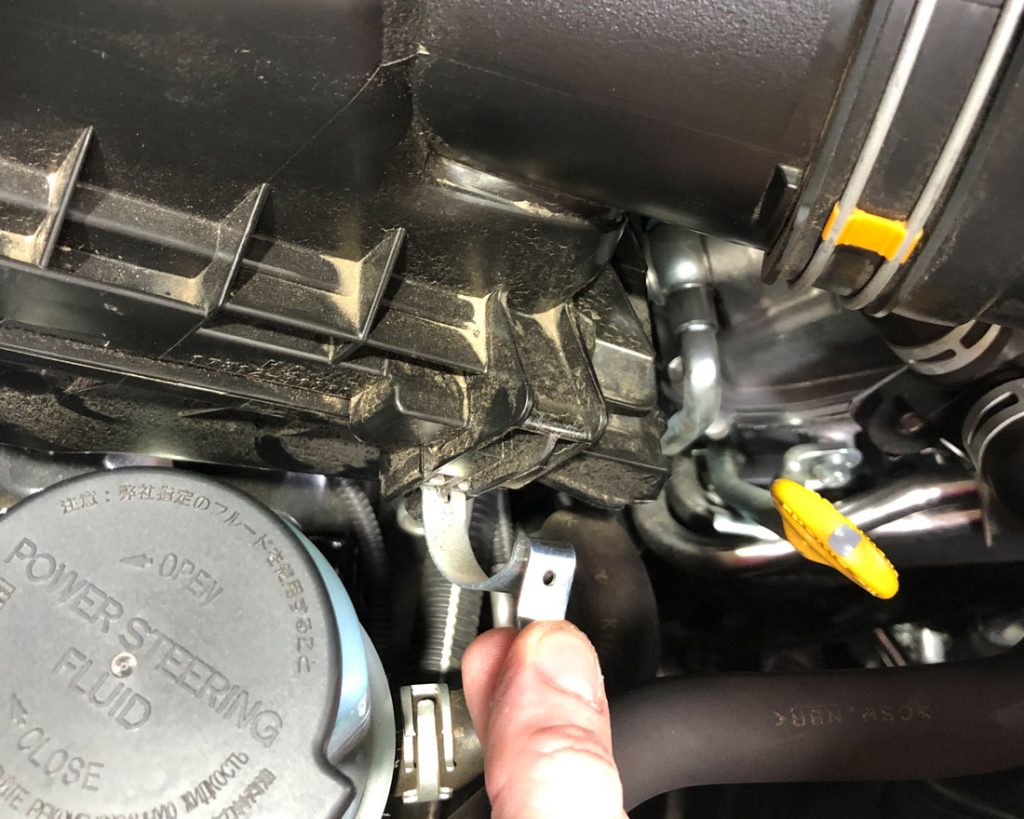
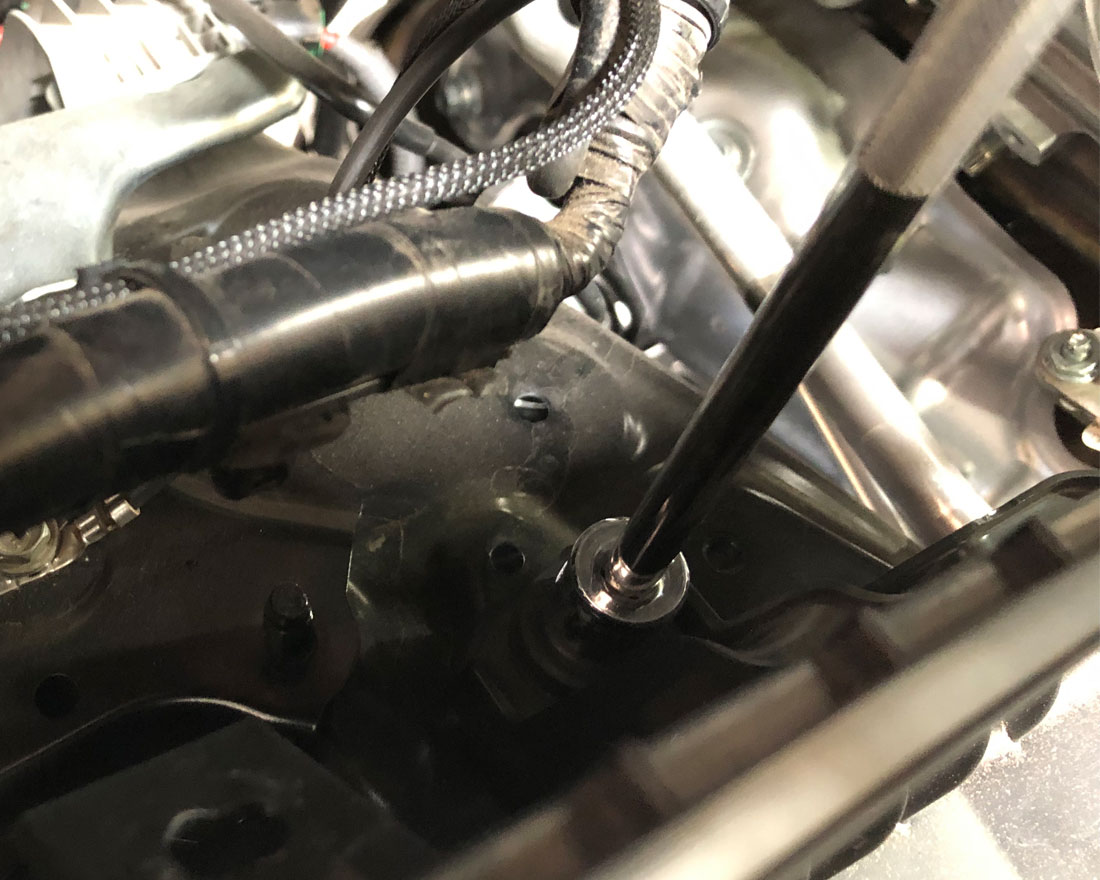
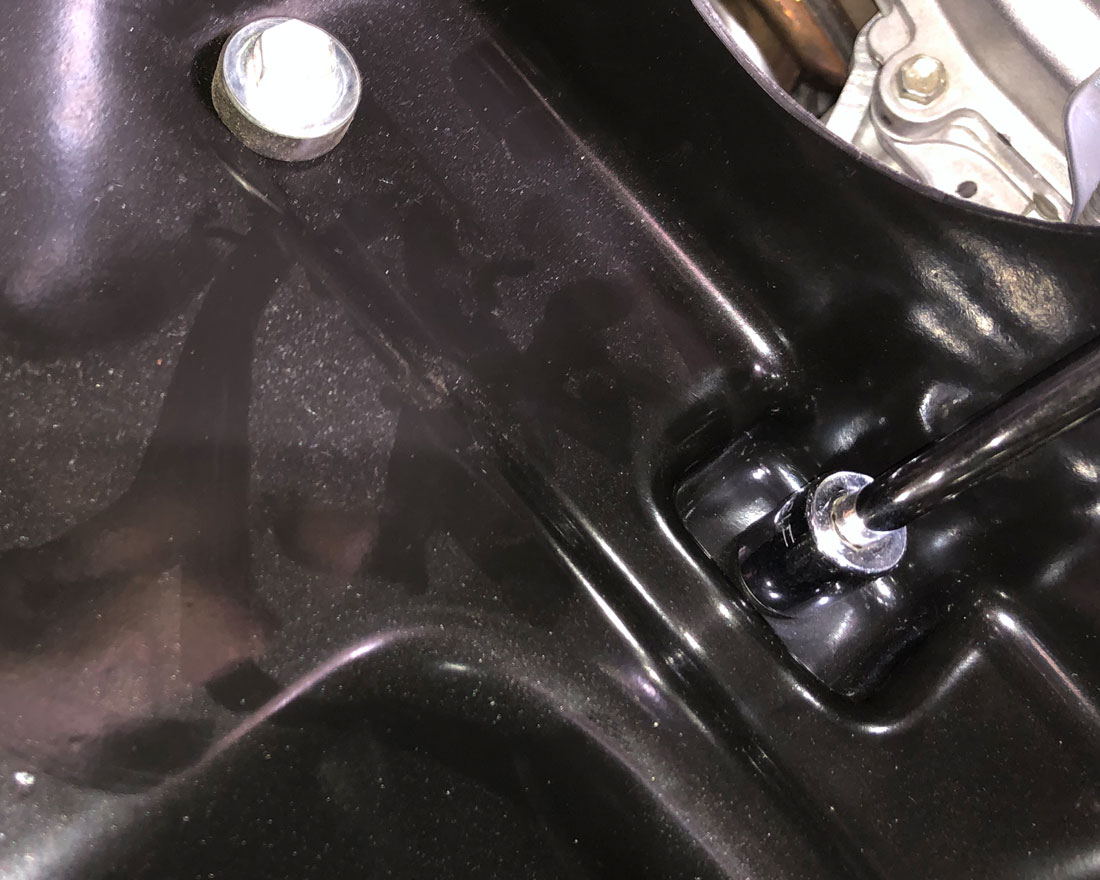
Step 4) Remove the 10mm bolt located on the bracket between the intake and the engine. You can leave the bracket attached to the OEM Intake.
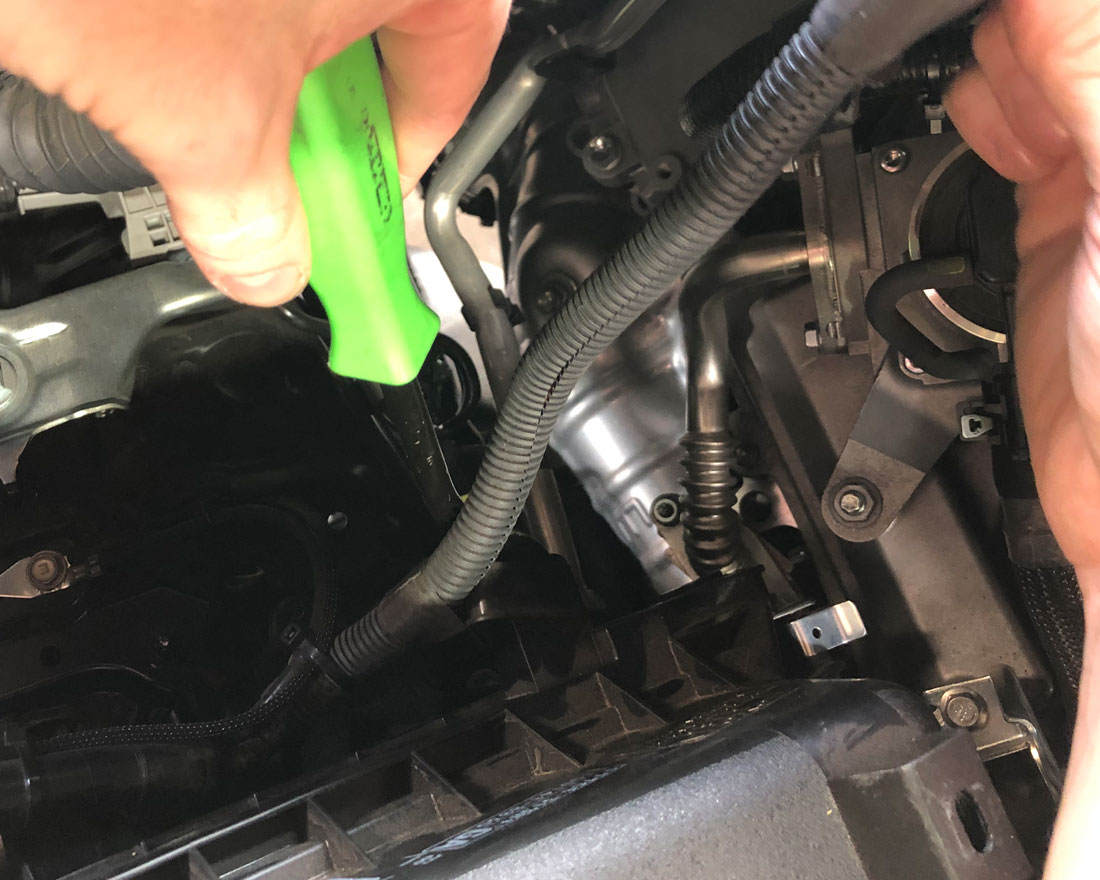
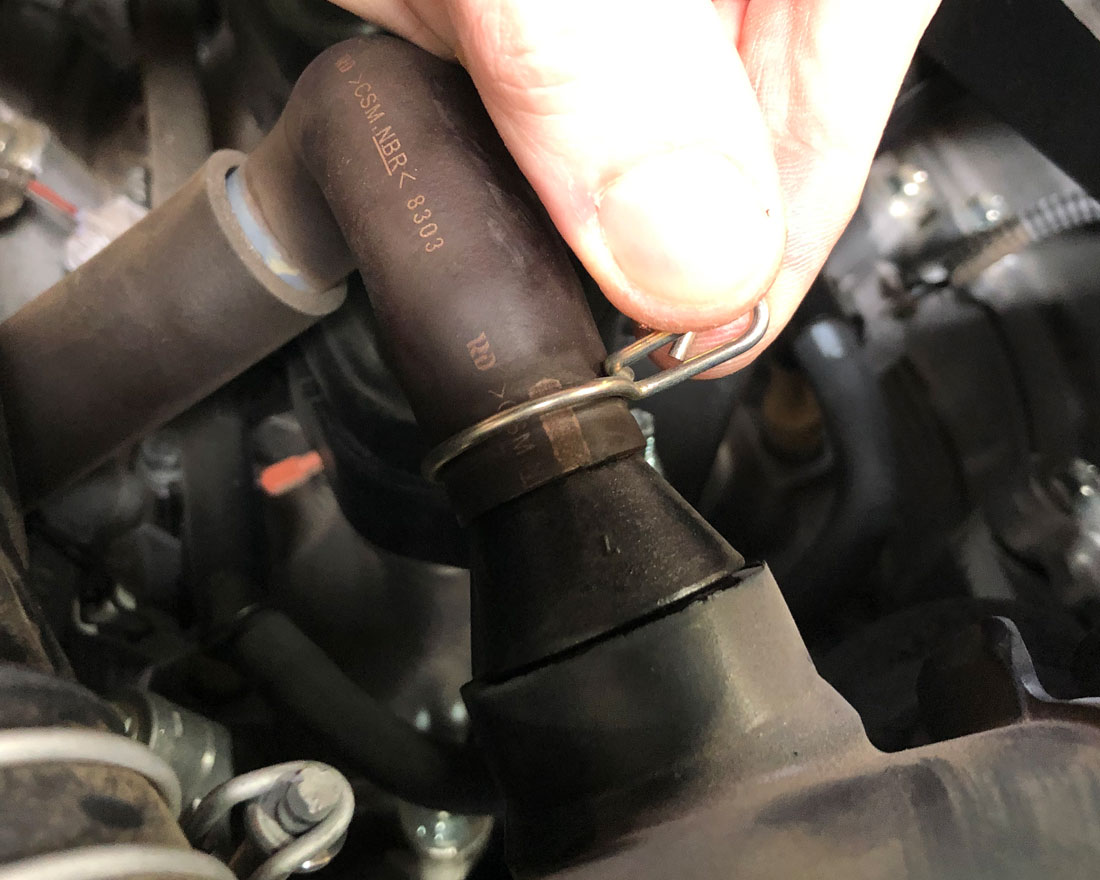
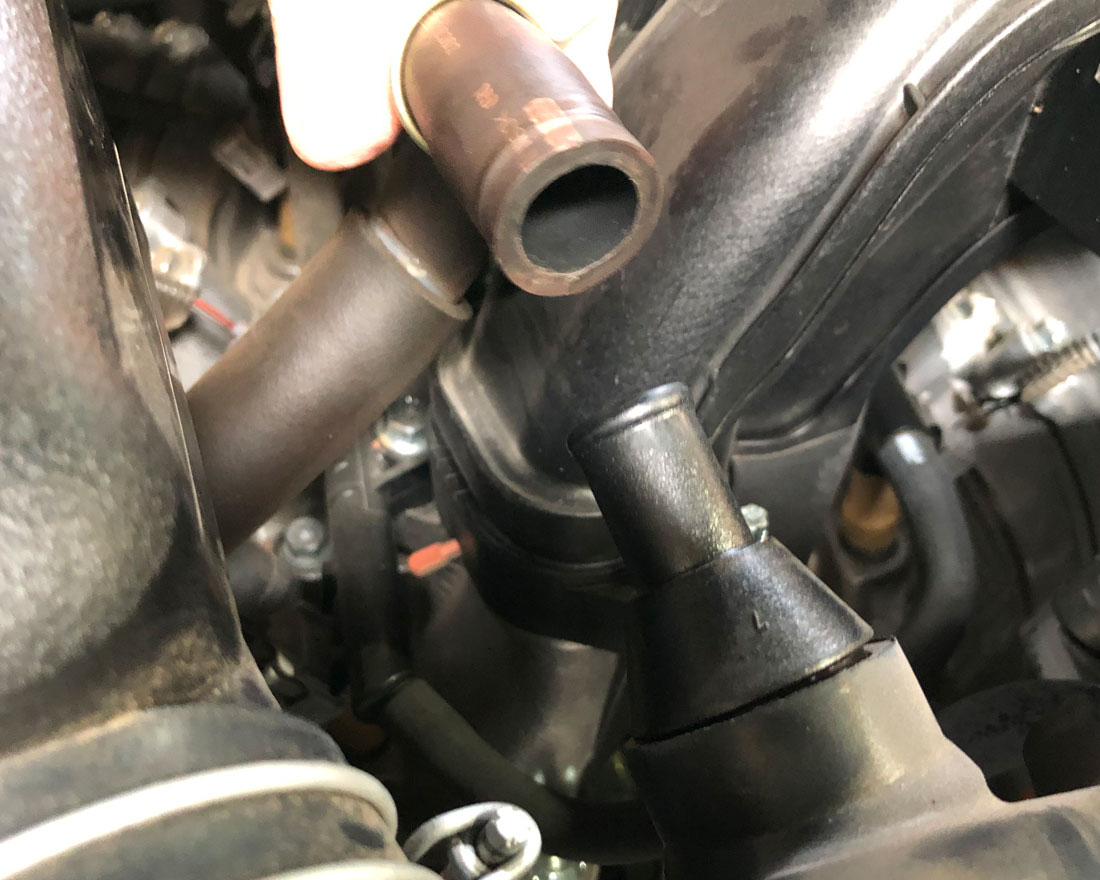
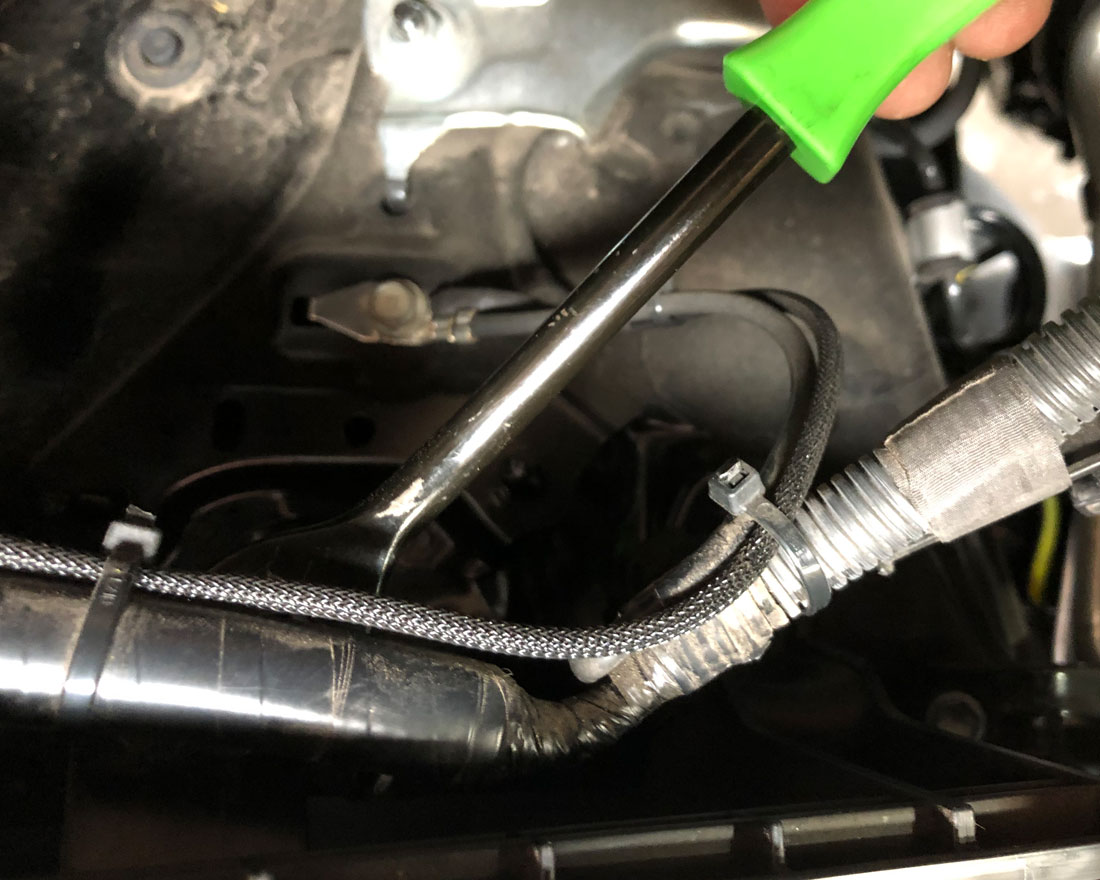
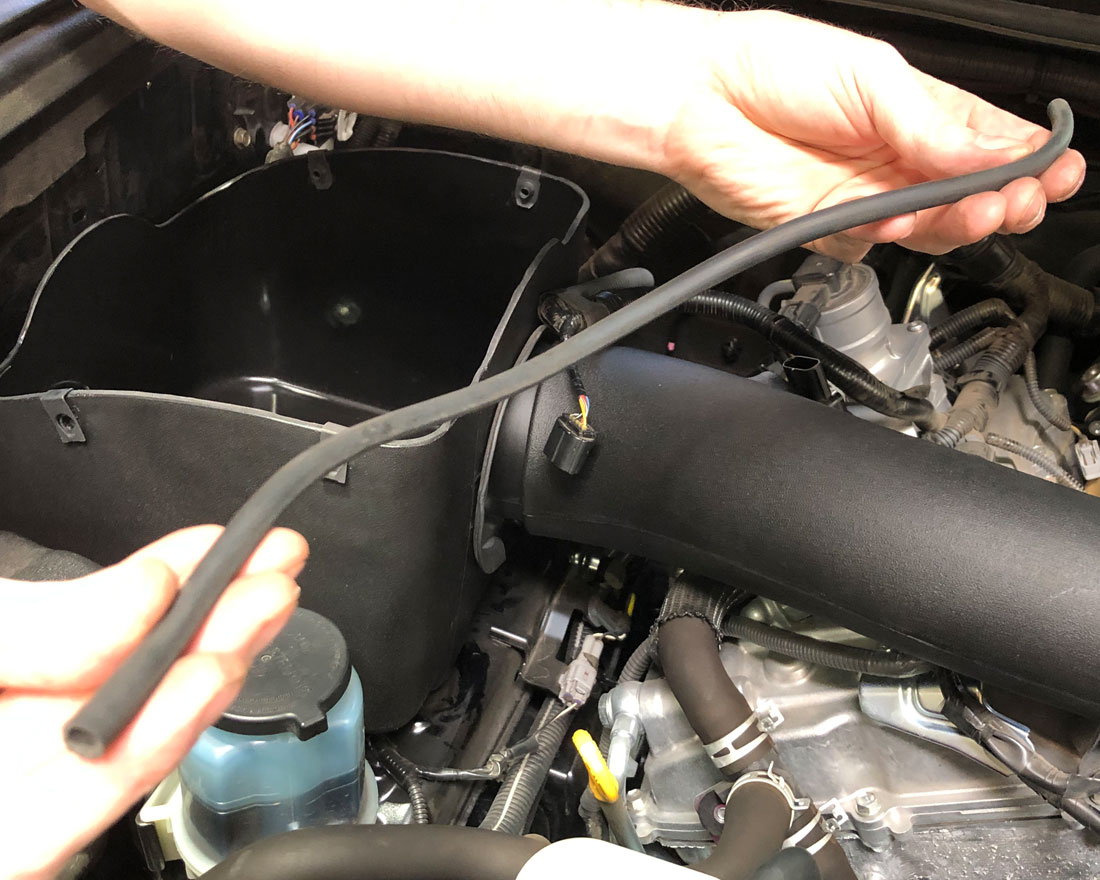
Step 5) Disconnect the vacuum hose and breather hose from the intake tube.

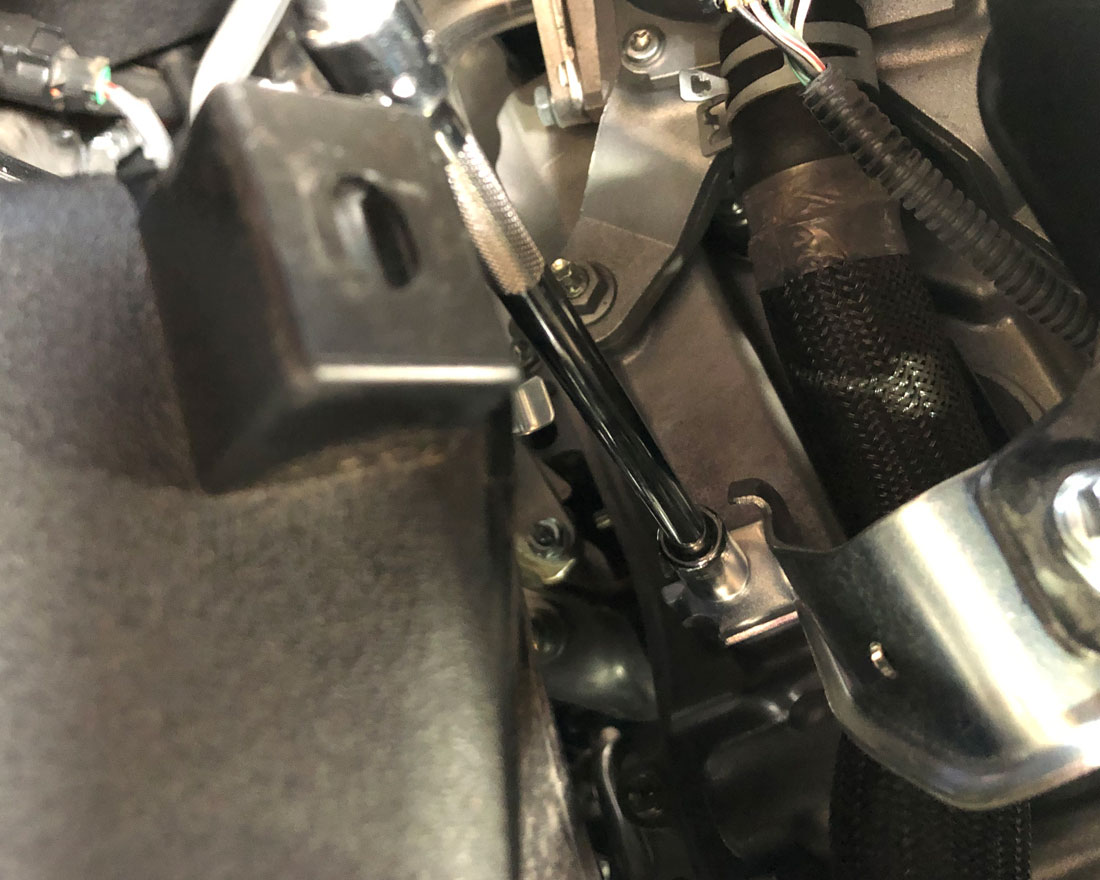
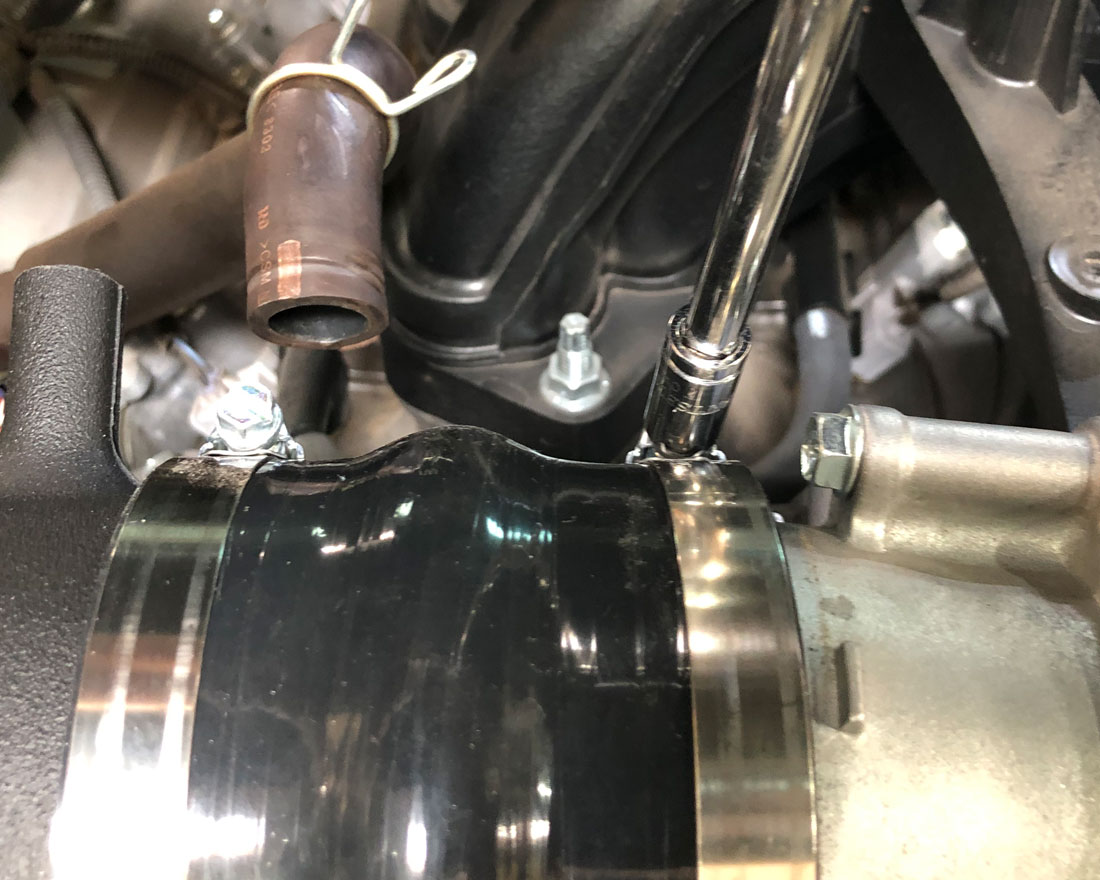
Step 6) Loosen the clamp at the throttle body.
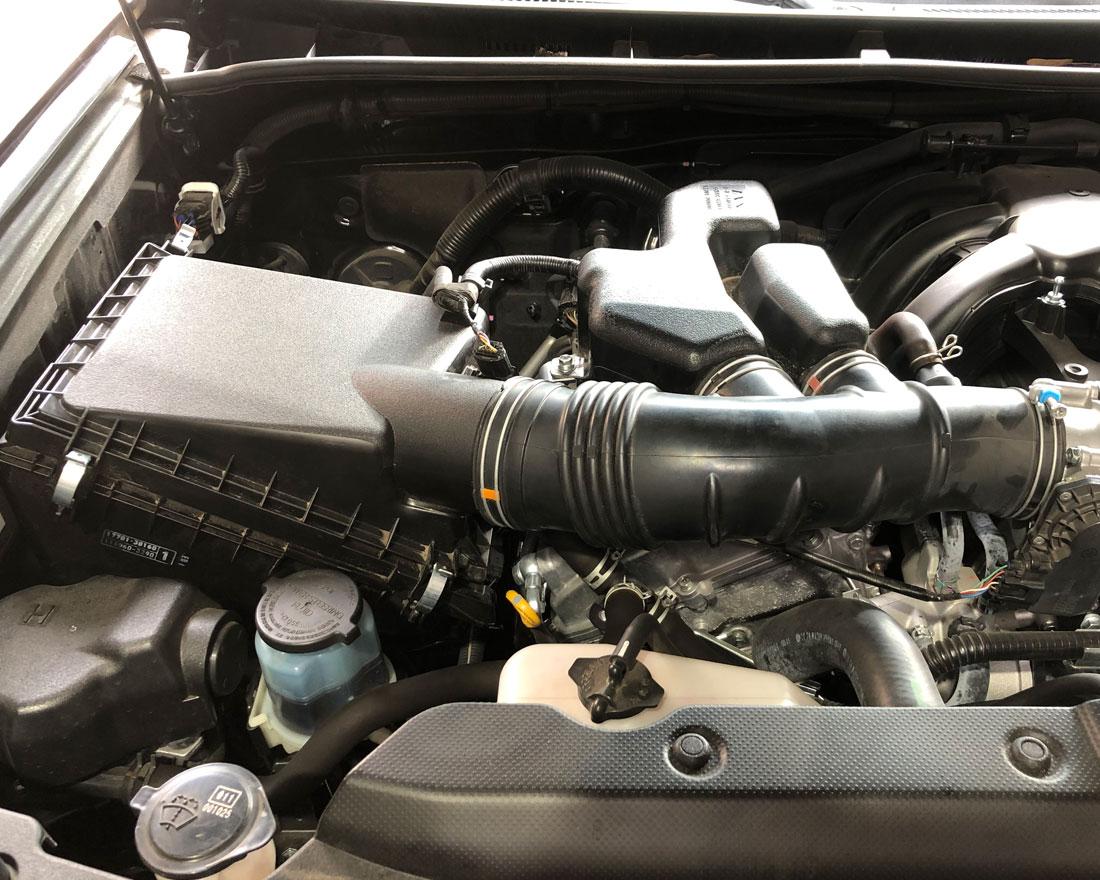
 Step 7) Unhook the 4 clips holding the air box lid in place.
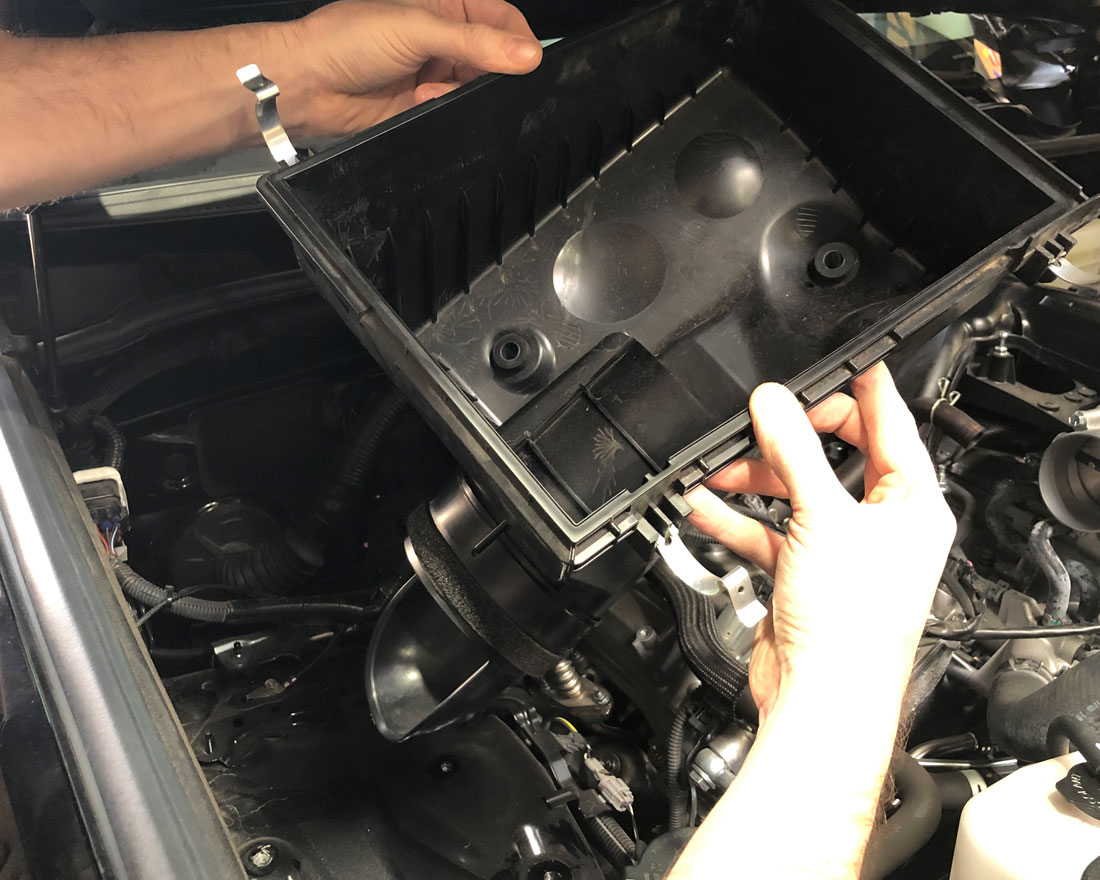
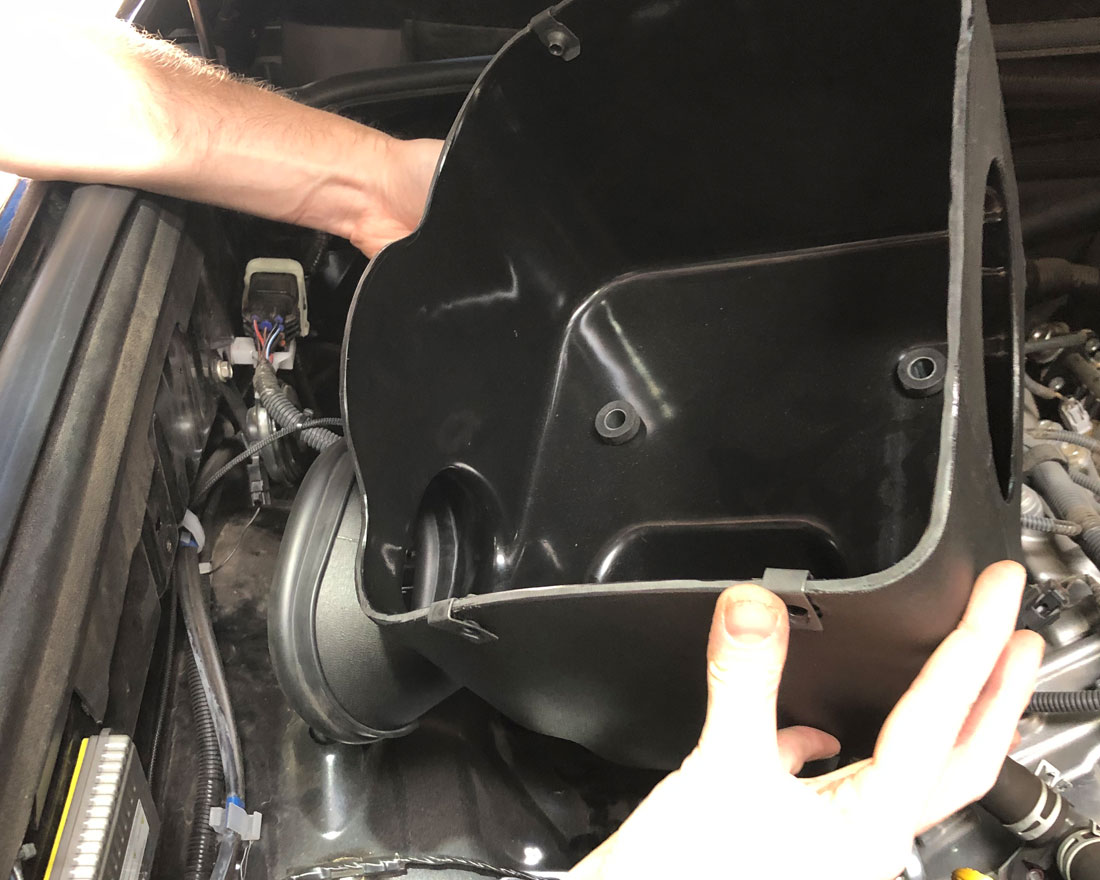
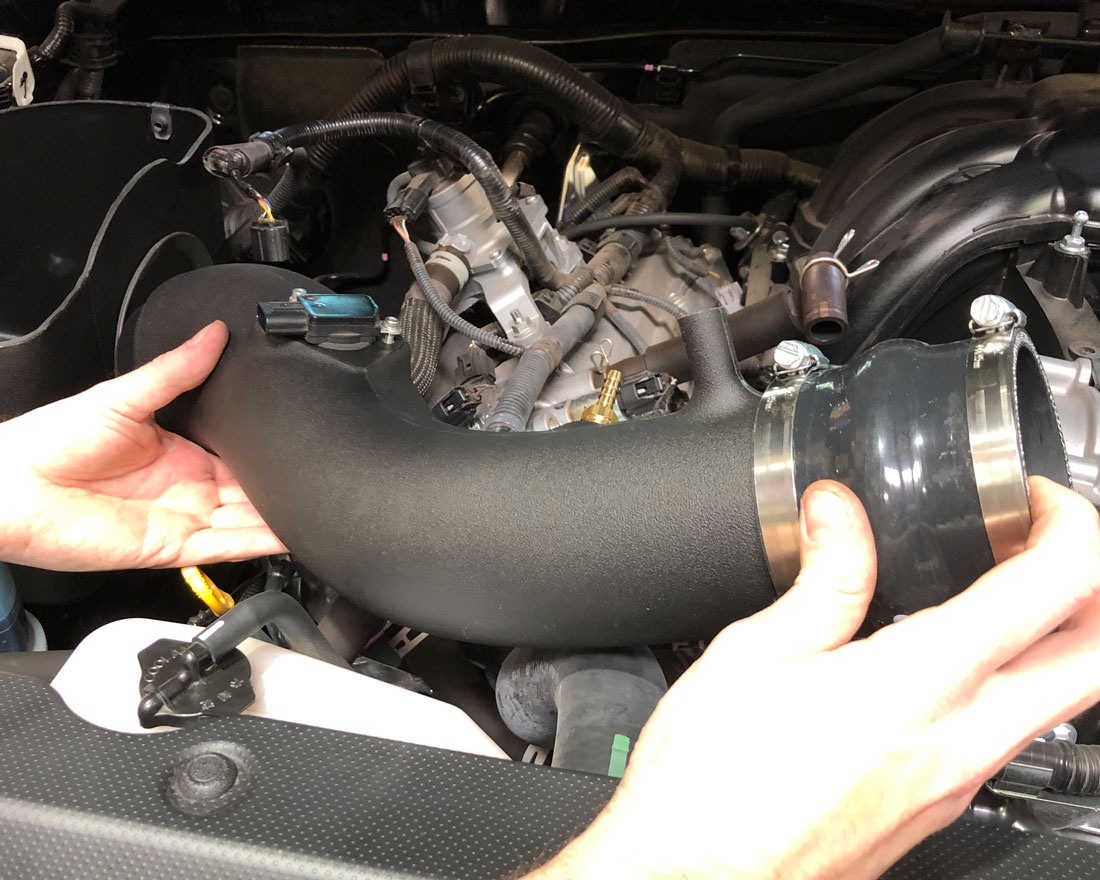
Step 8) Carefully remove the intake tube and air box lid.


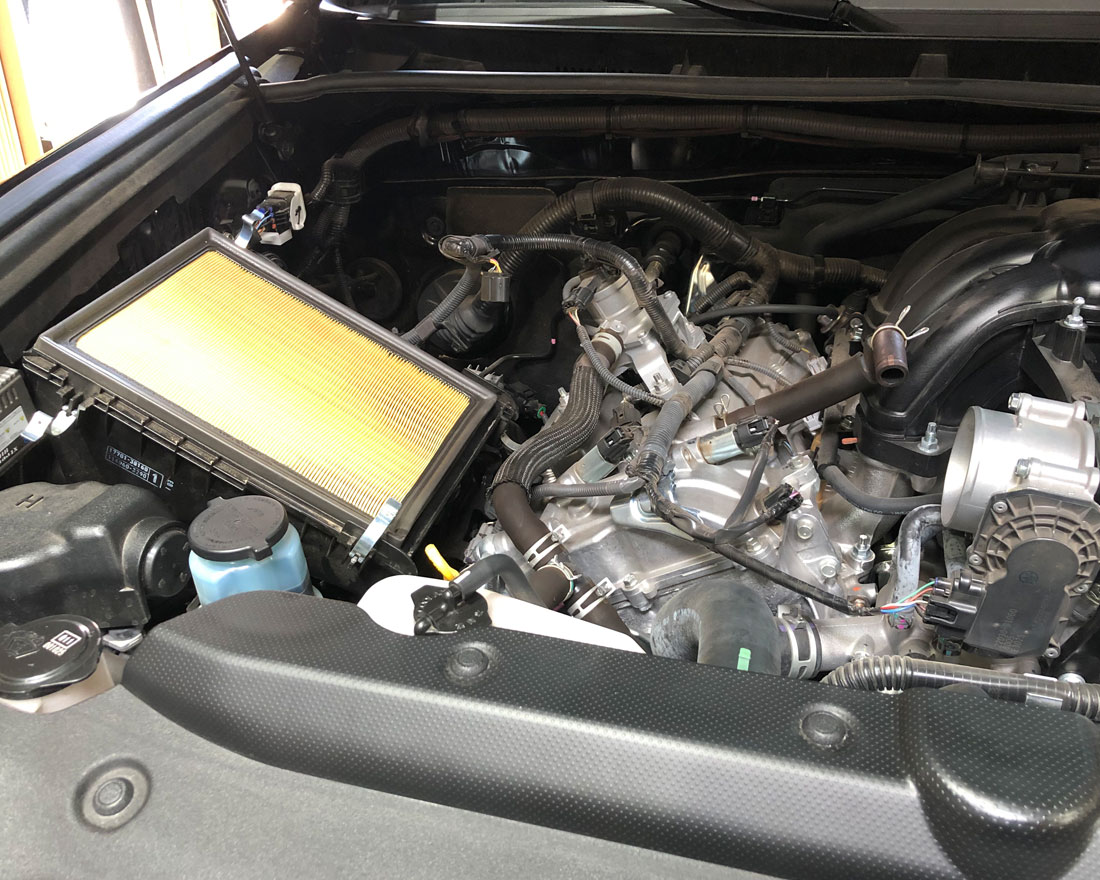
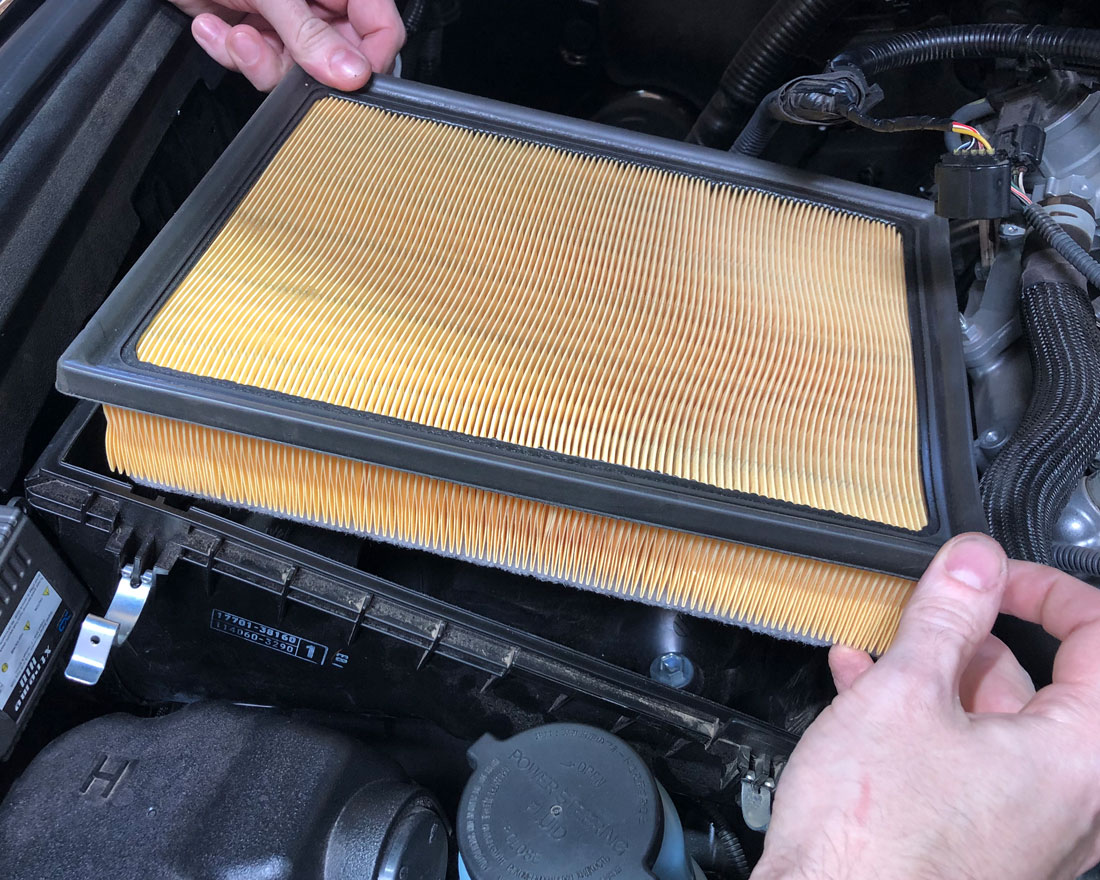
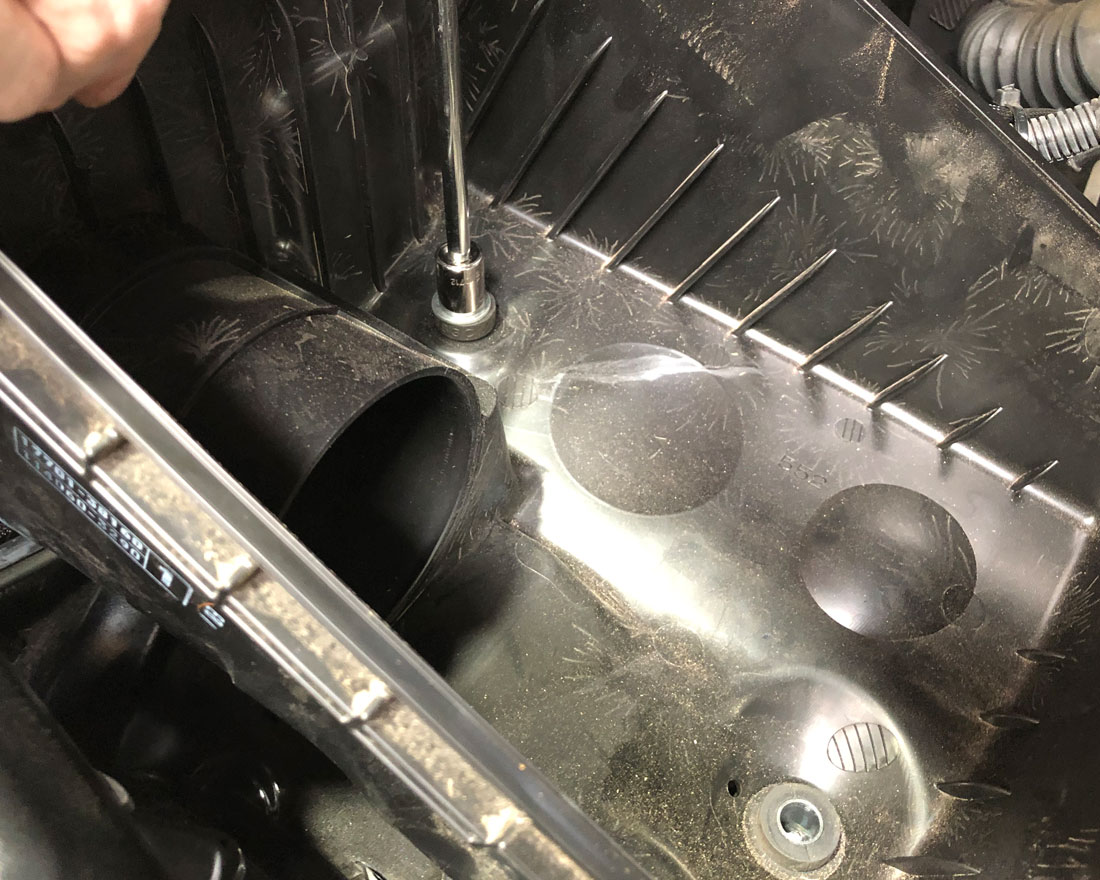
Step 9) Remove the factory air filter.
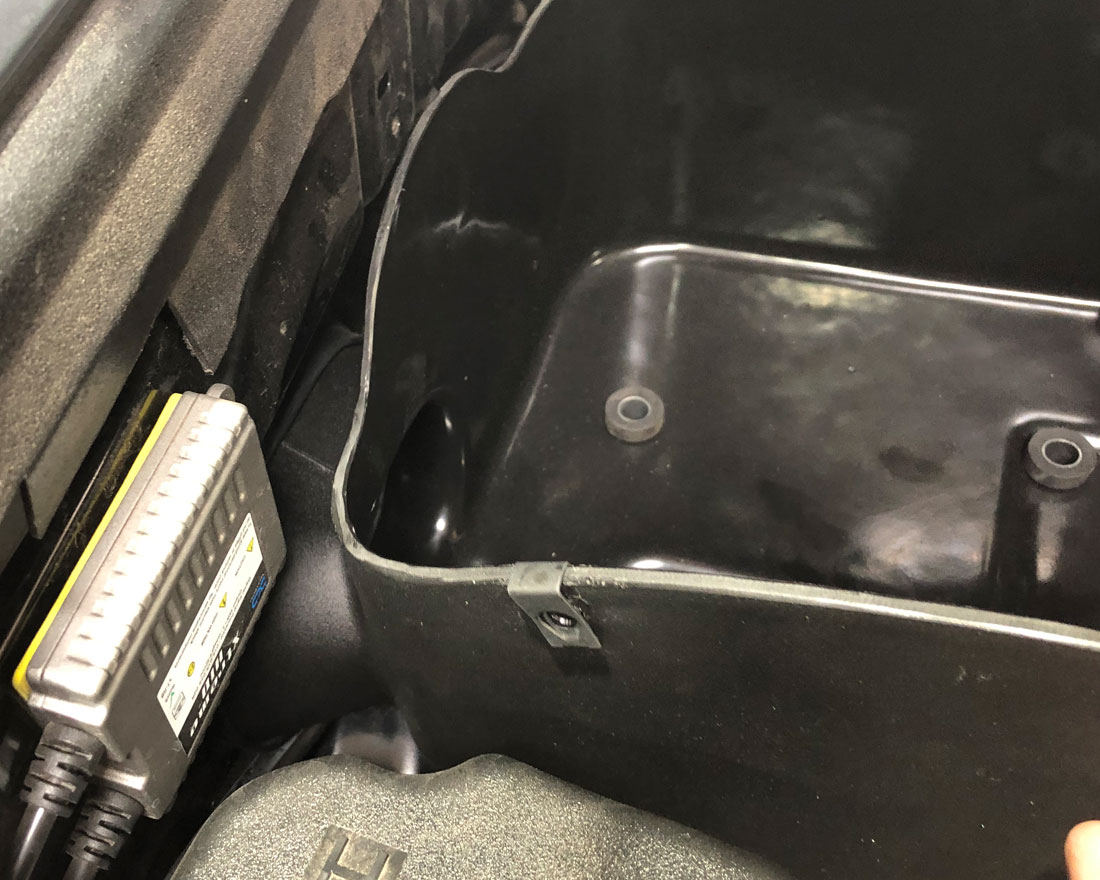
 Step 10) With the air filter removed from the air box housing you can now access 2 of the 12mm bolts that secure the lower portion of the air box tray to the vehicle. There is a third bolt located outside the airbox that you will need to unclip the wiring harness tie to gain access to.
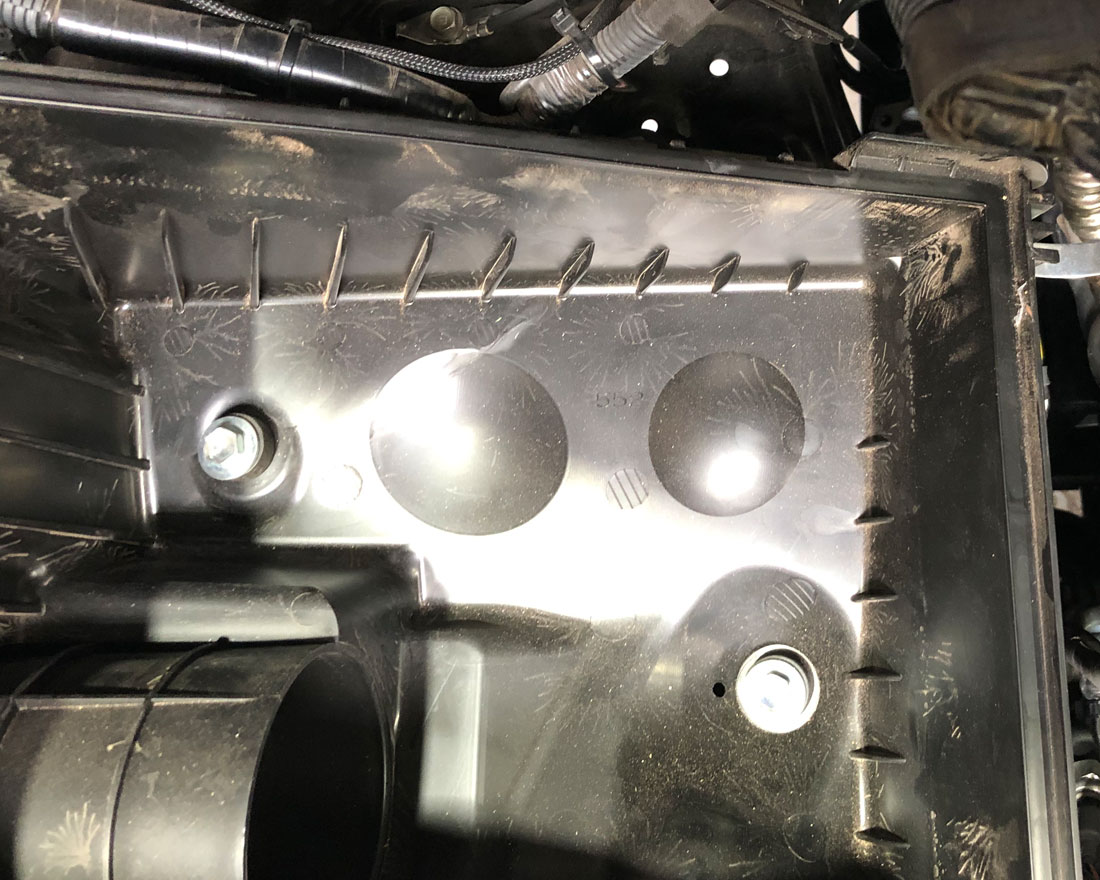
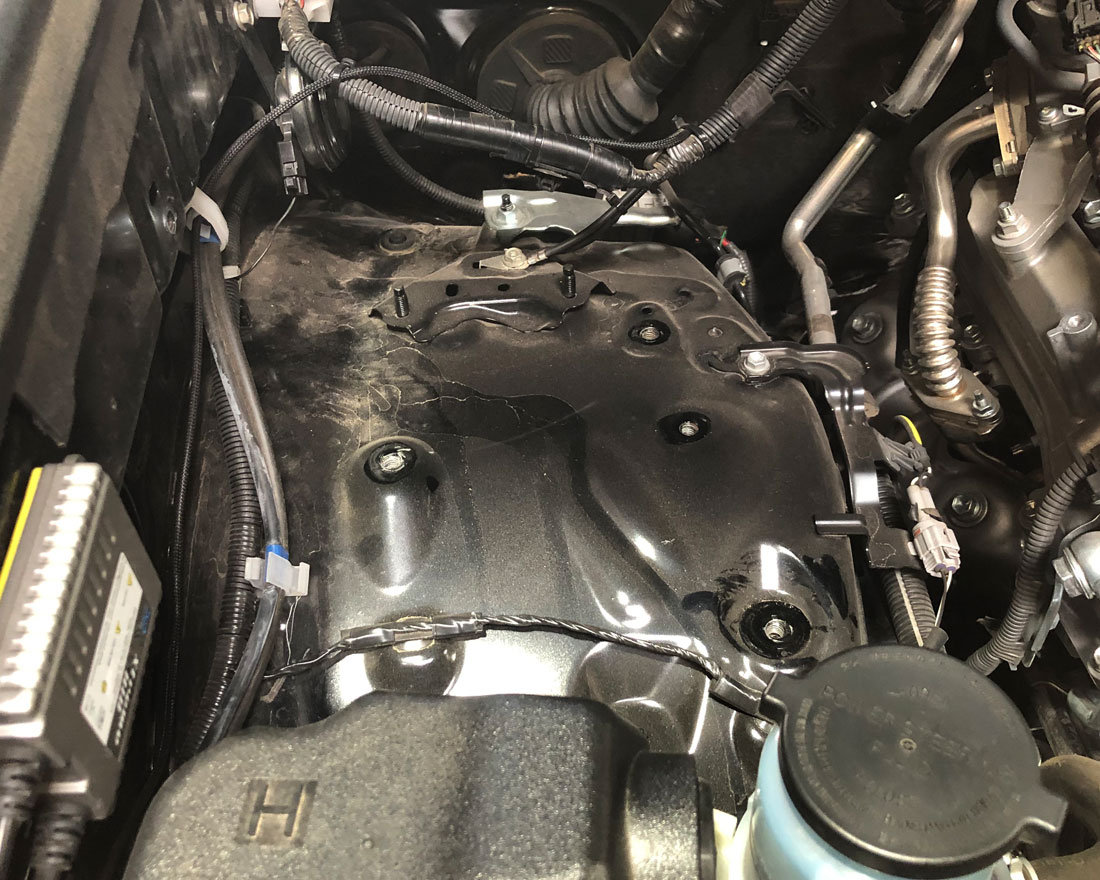
Step 11) Remove the lower air box tray from the vehicle.
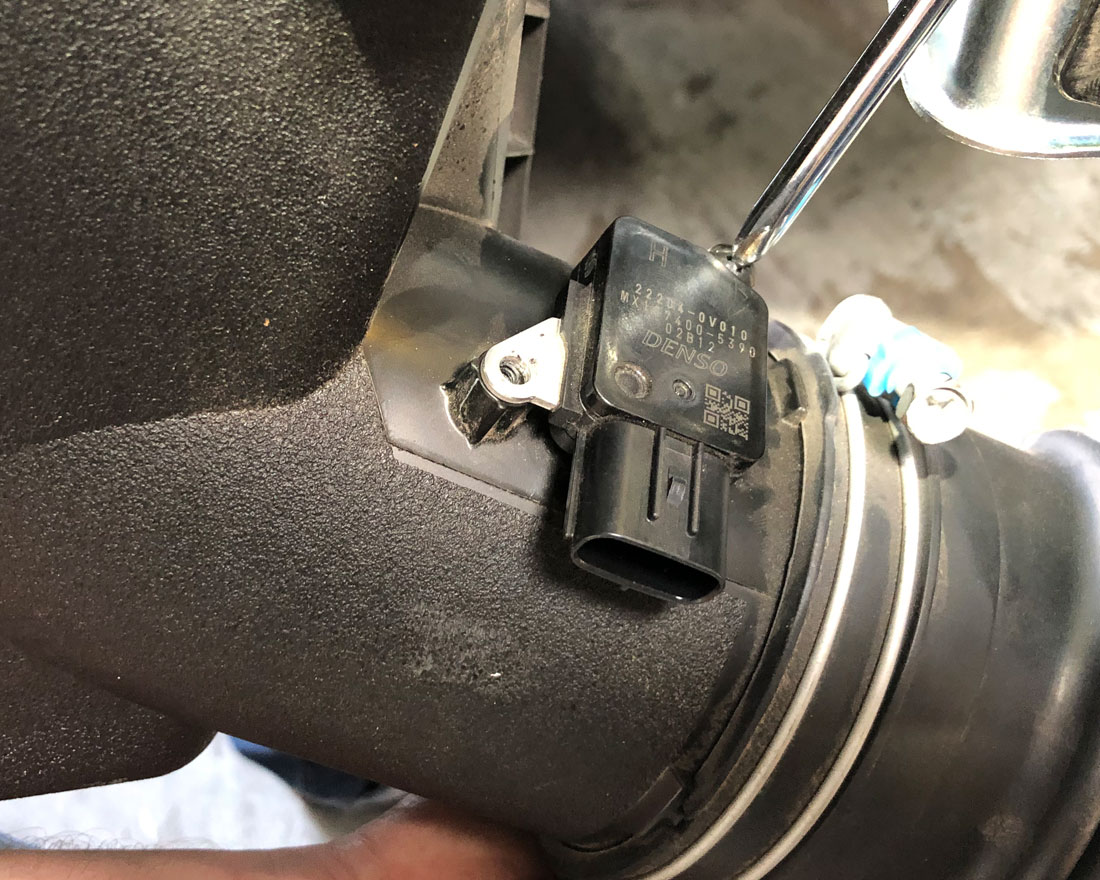
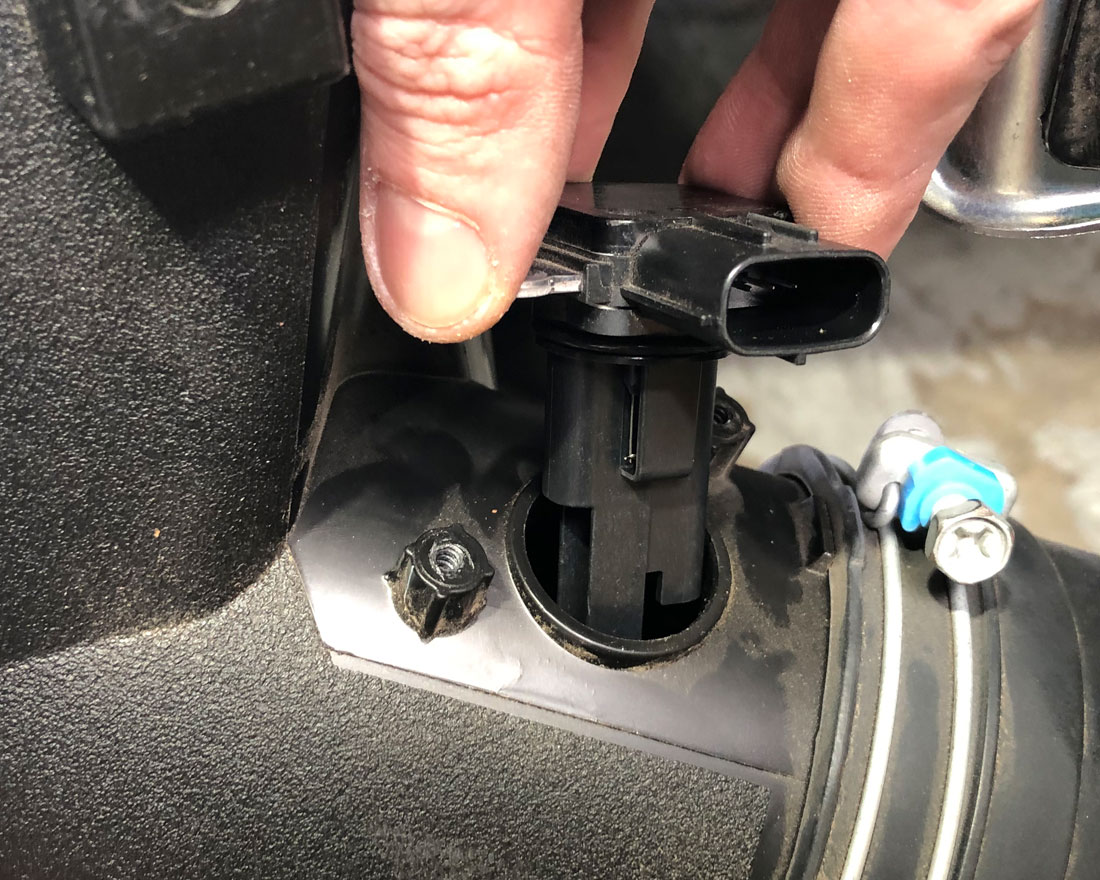
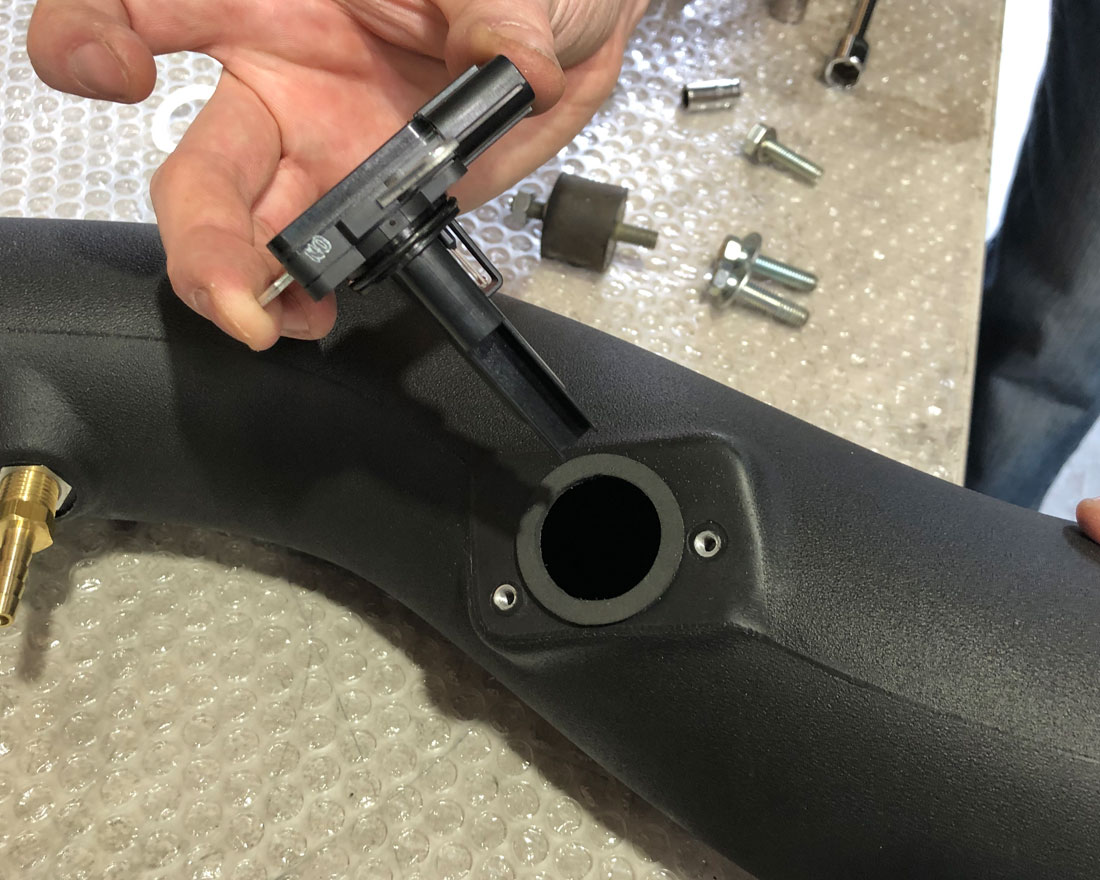
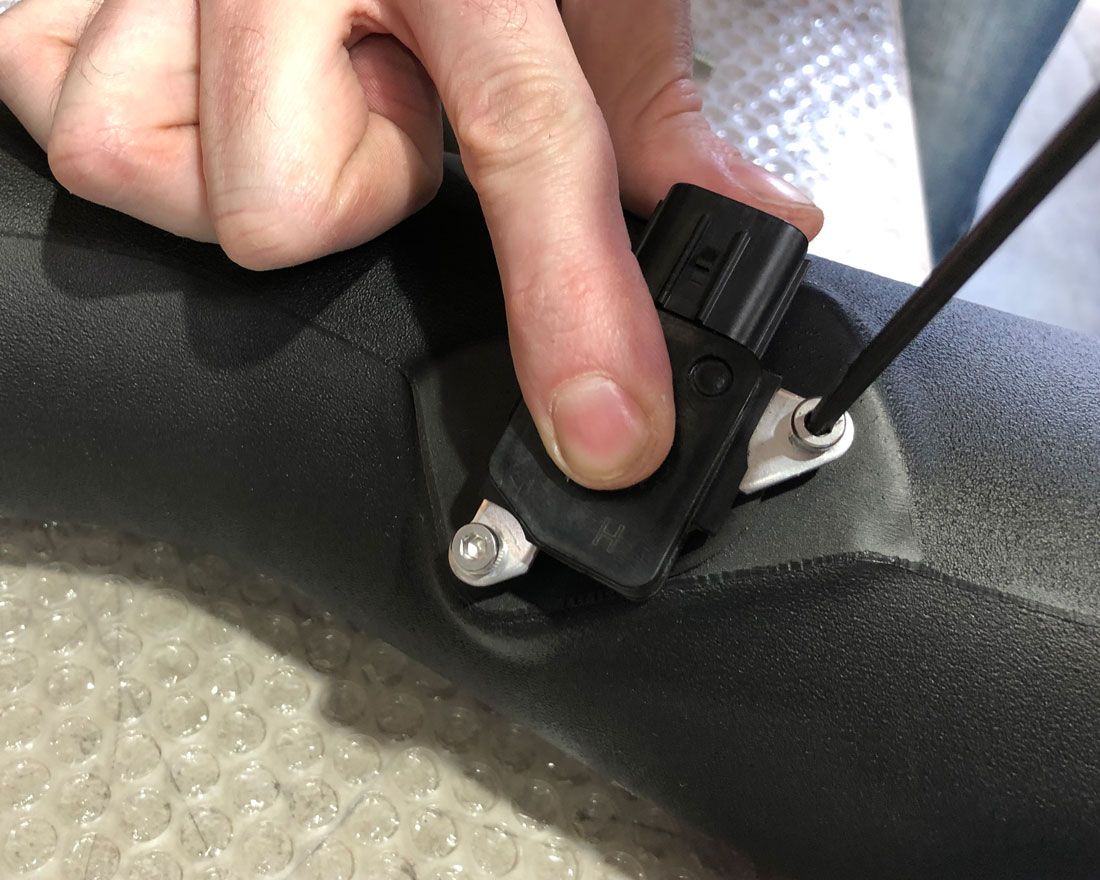
Step 12) Remove the air sensor from the stock intake tube.
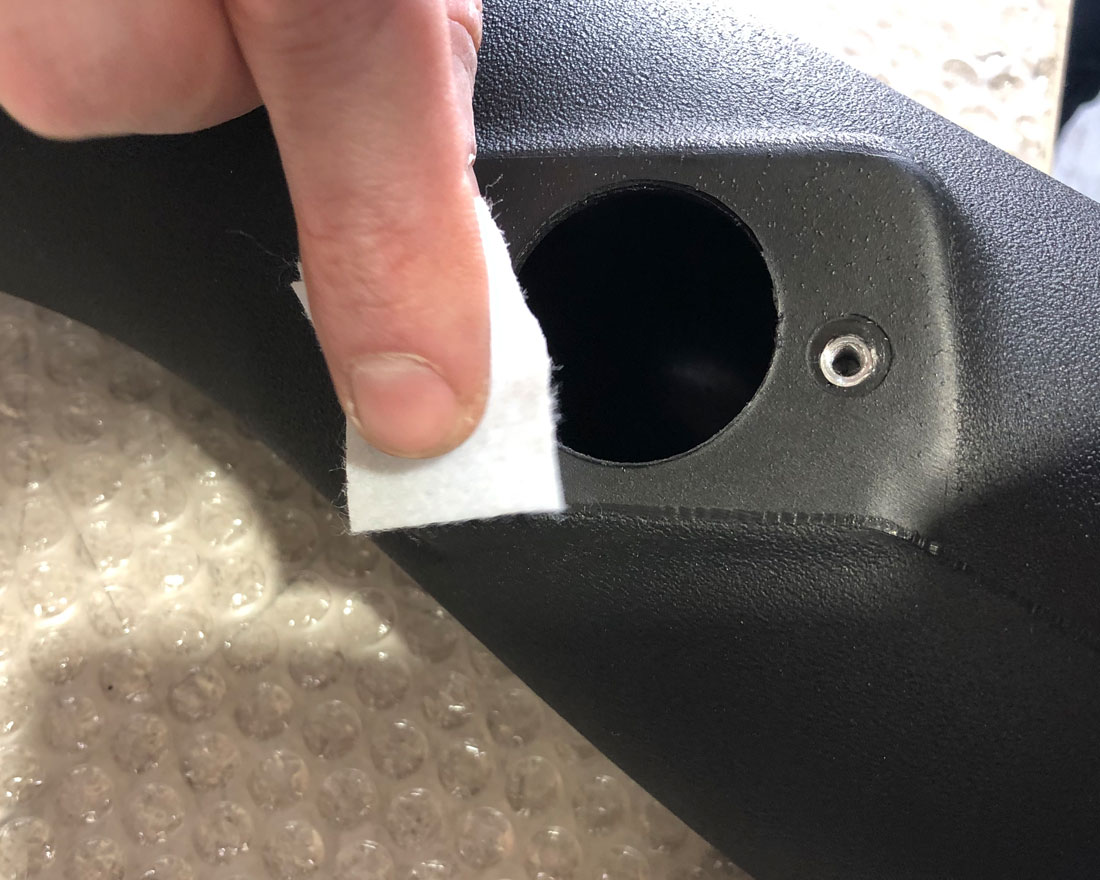
Step 13) Before inserting the sensor, add the rubber bushing to the tube. Clean the tube with an alcohol wipe. Then remove the paper backing and install the rubber bushing.
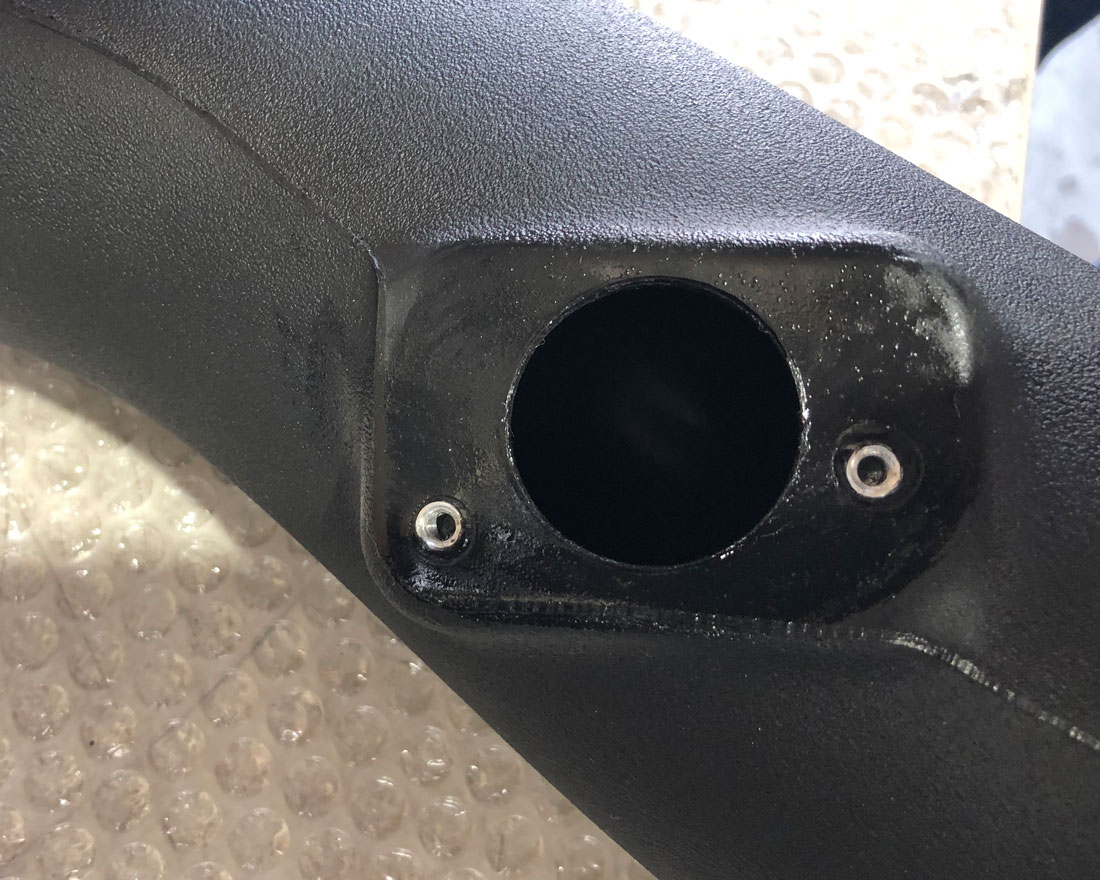
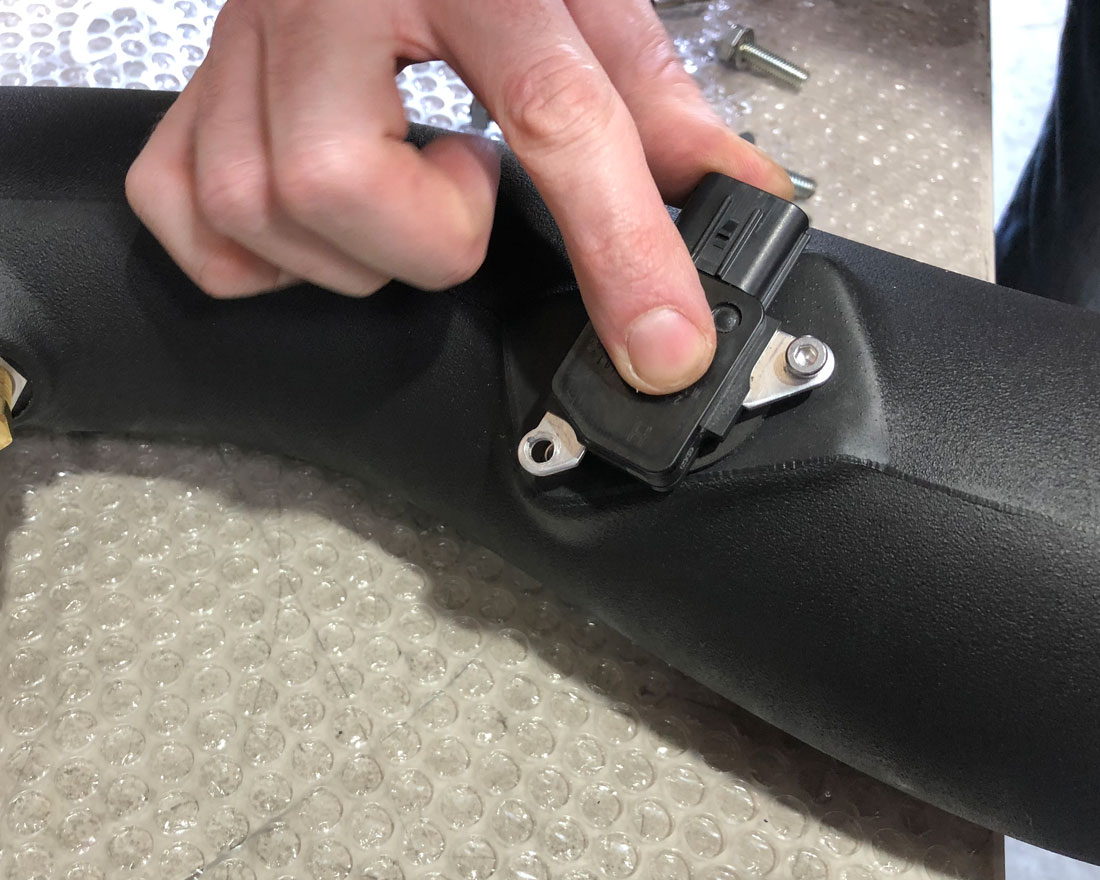
Step 14) Re-install the air sensor and use the 2 provided socket head cap screws to secure it. Do not over-tighten the hardware.
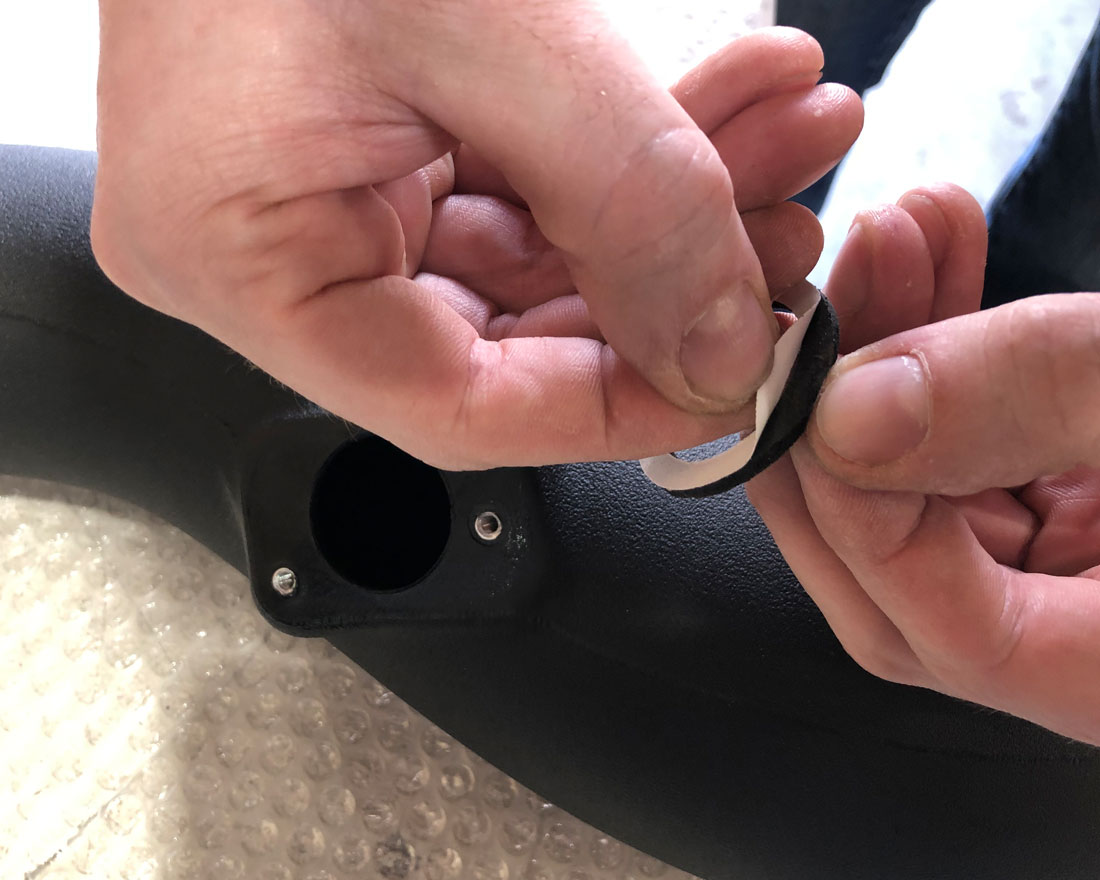
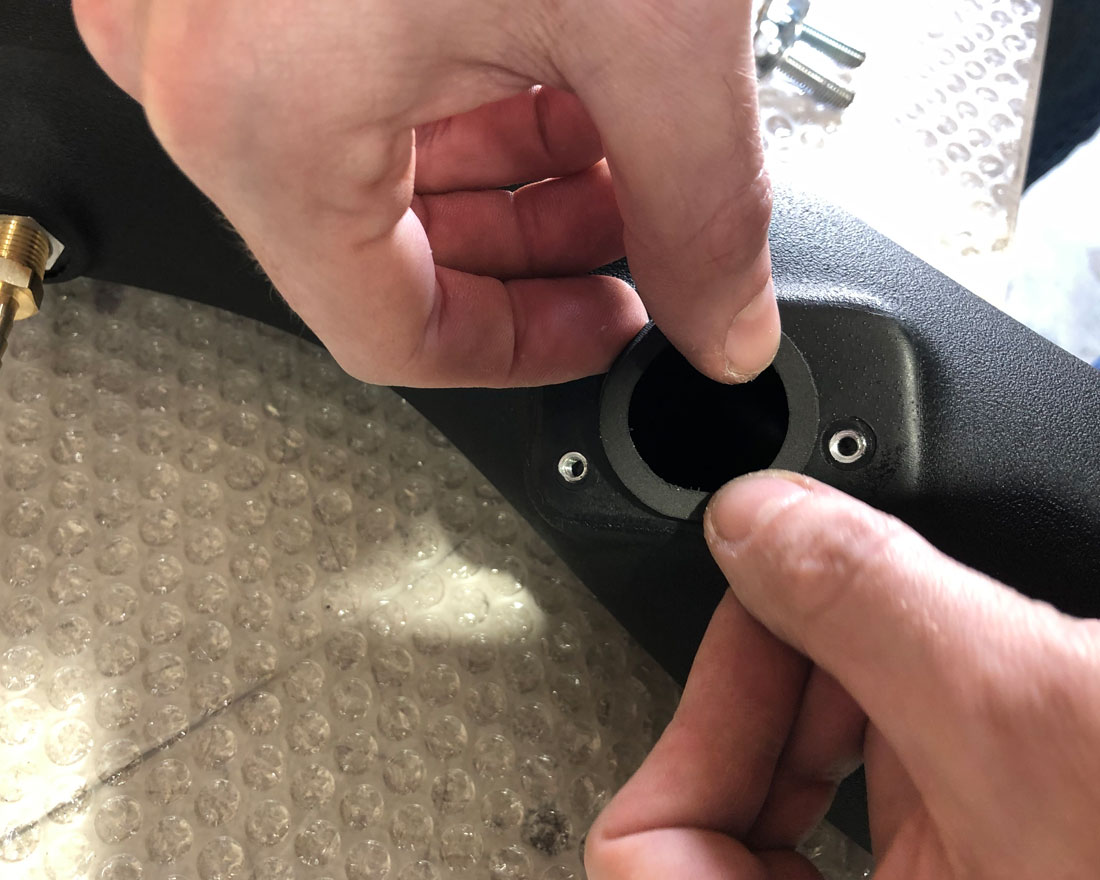
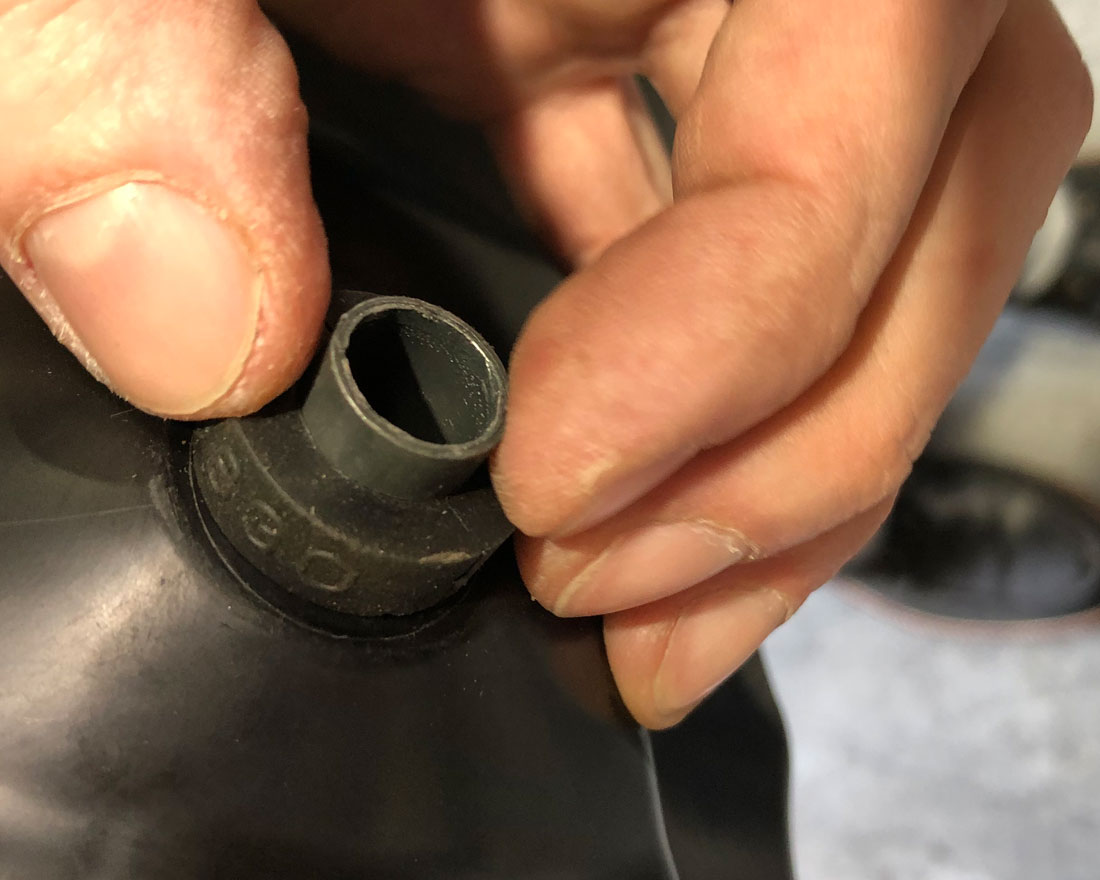
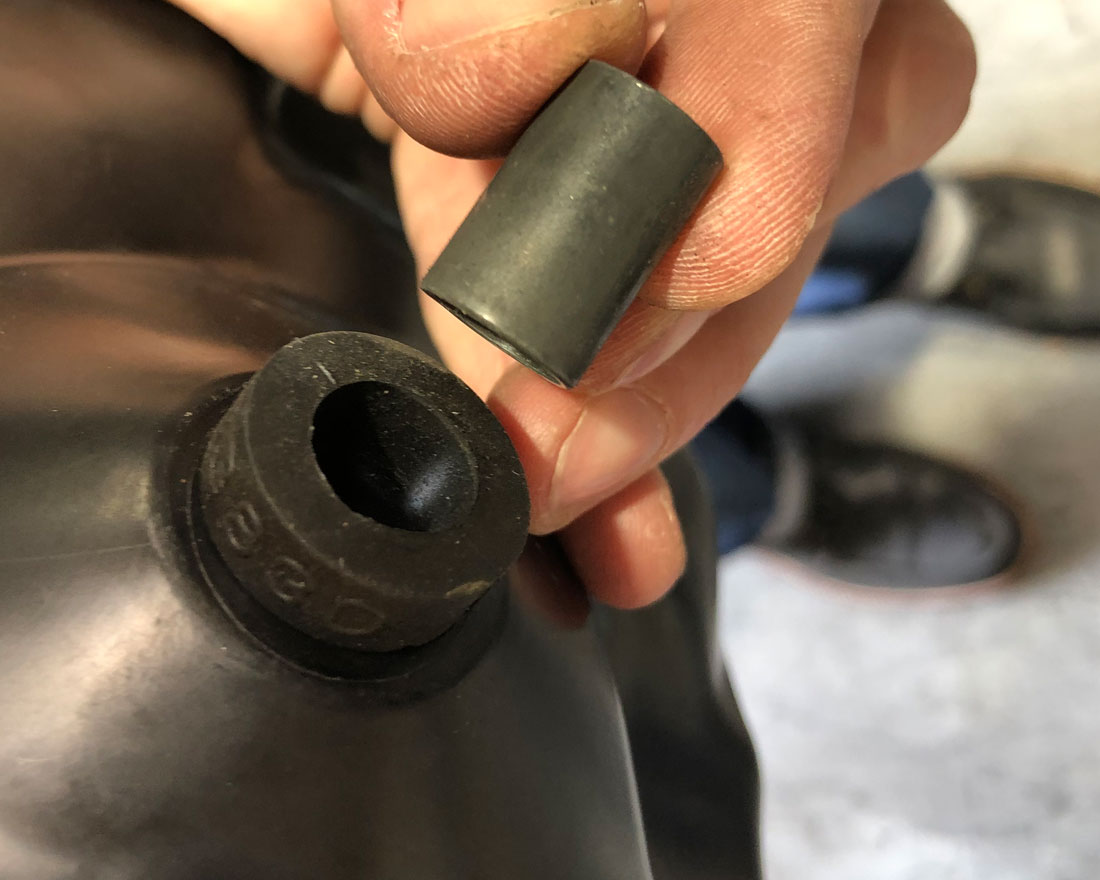
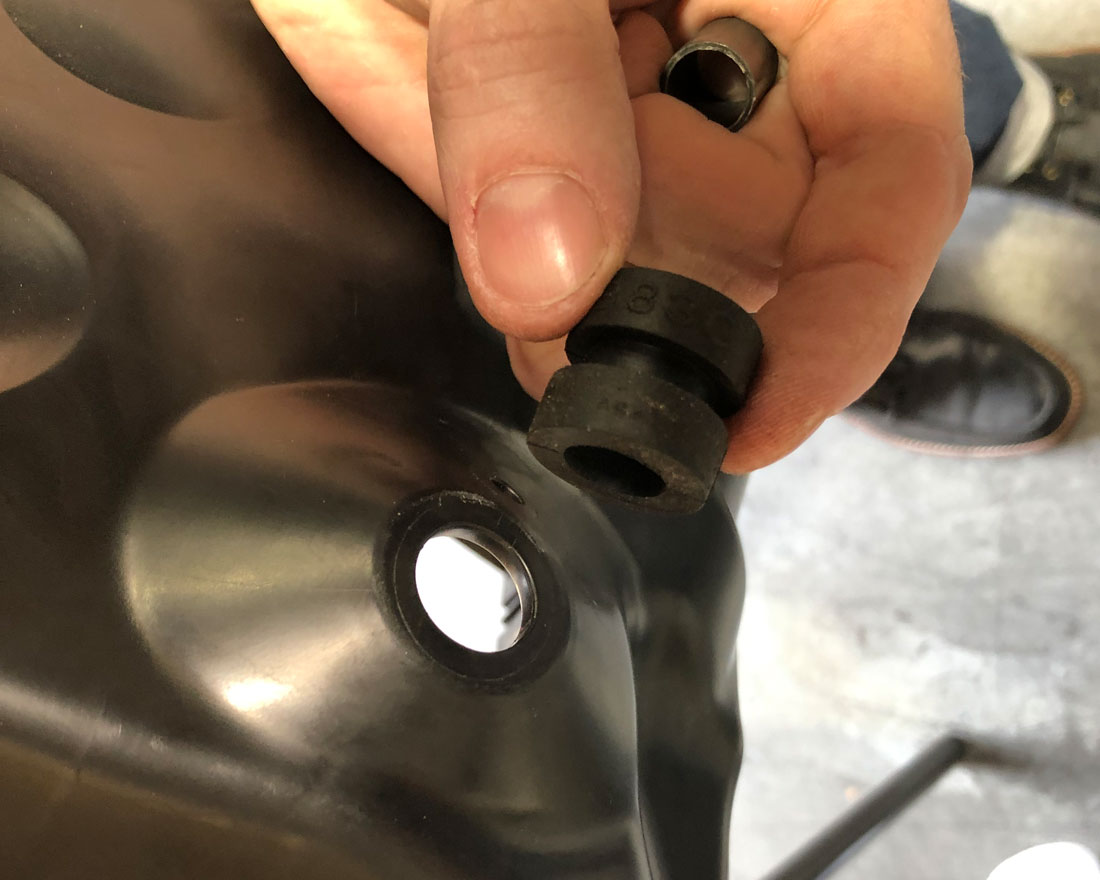
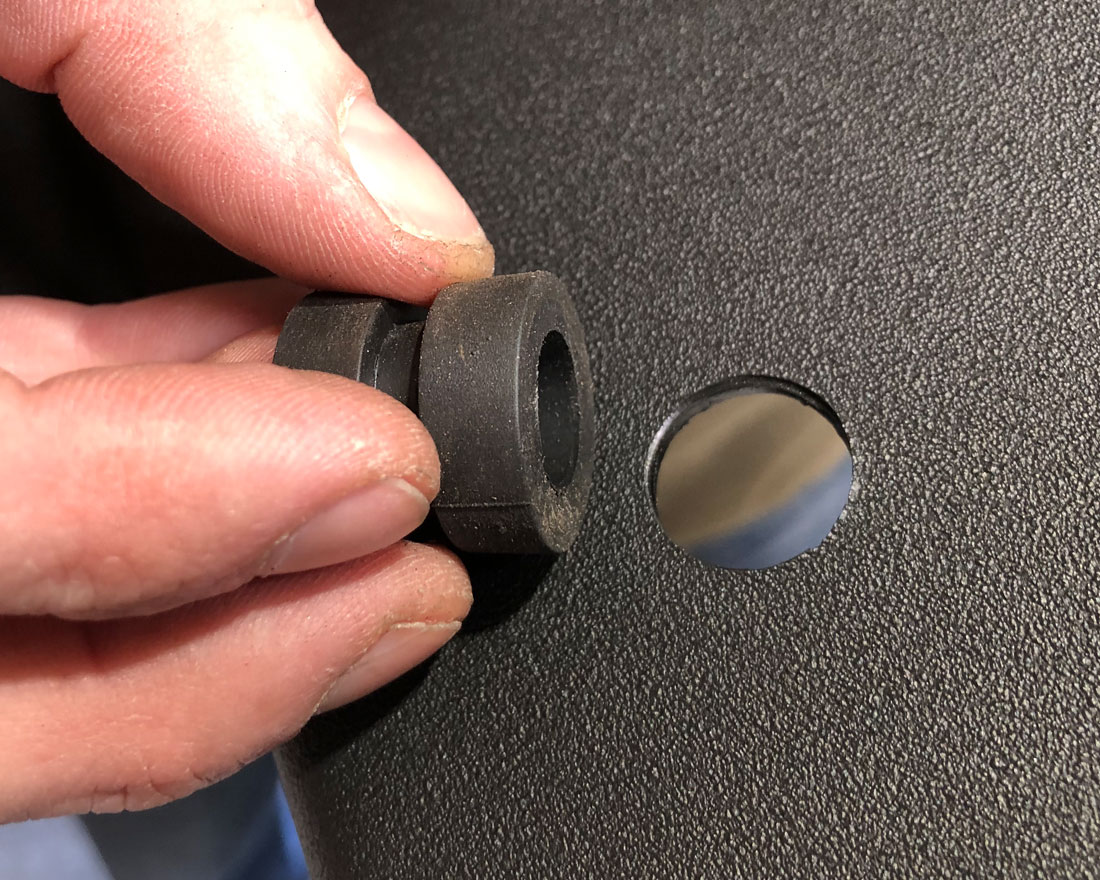
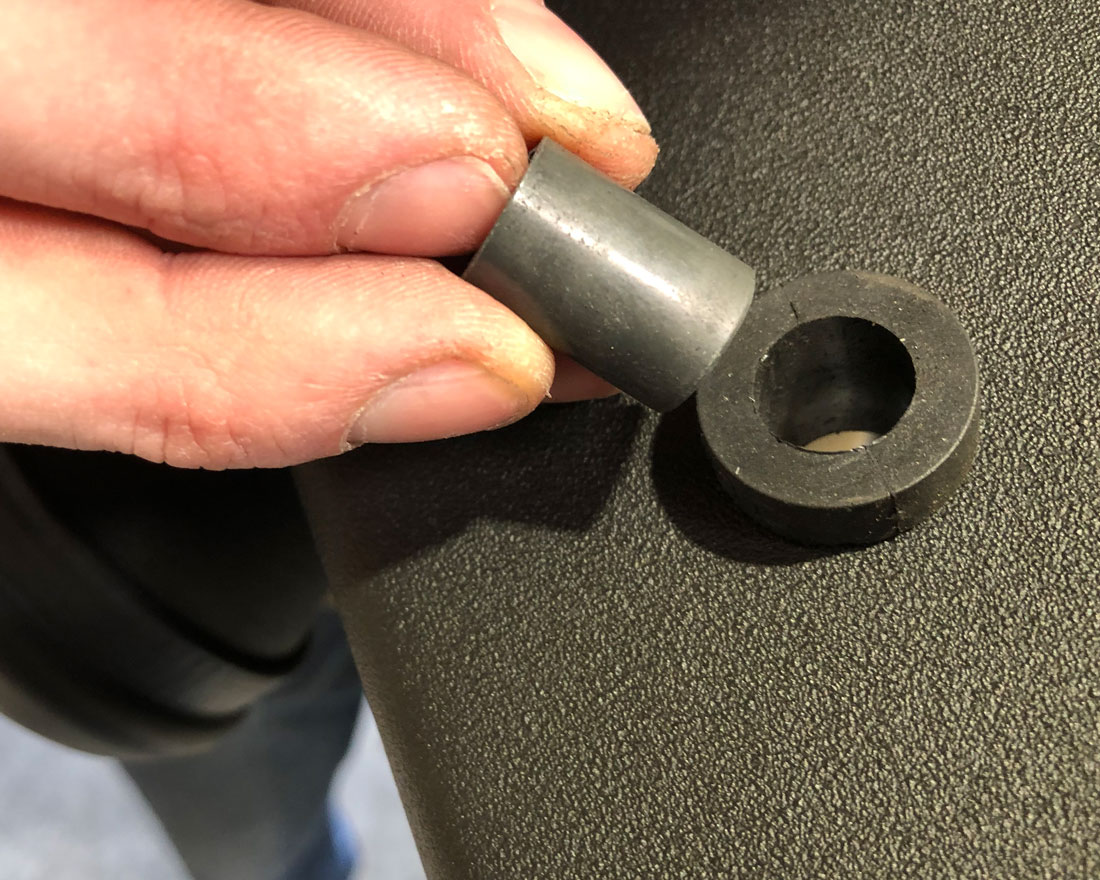
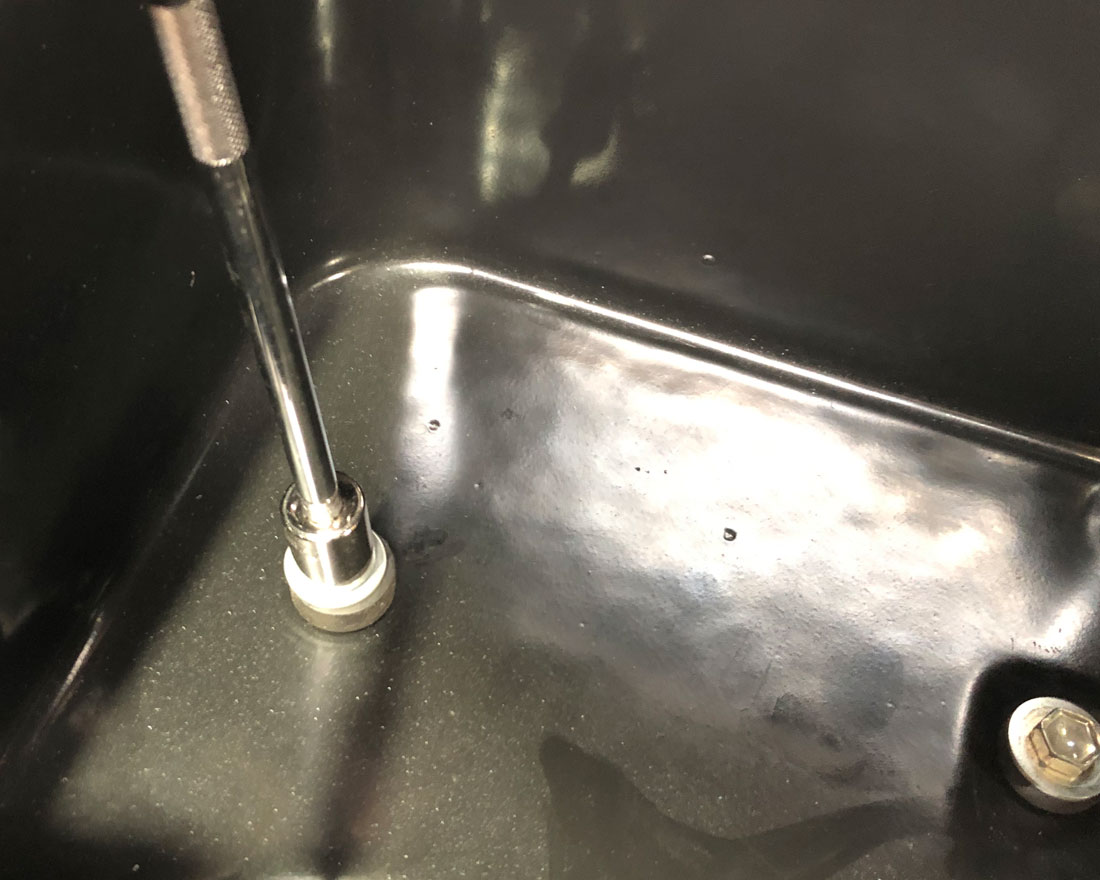
Step 15) On the factory air box tray remove the 2 rubber grommet bushings. To remove, push the metal sleeve out and then squeeze the bushing out of the hole as shown.
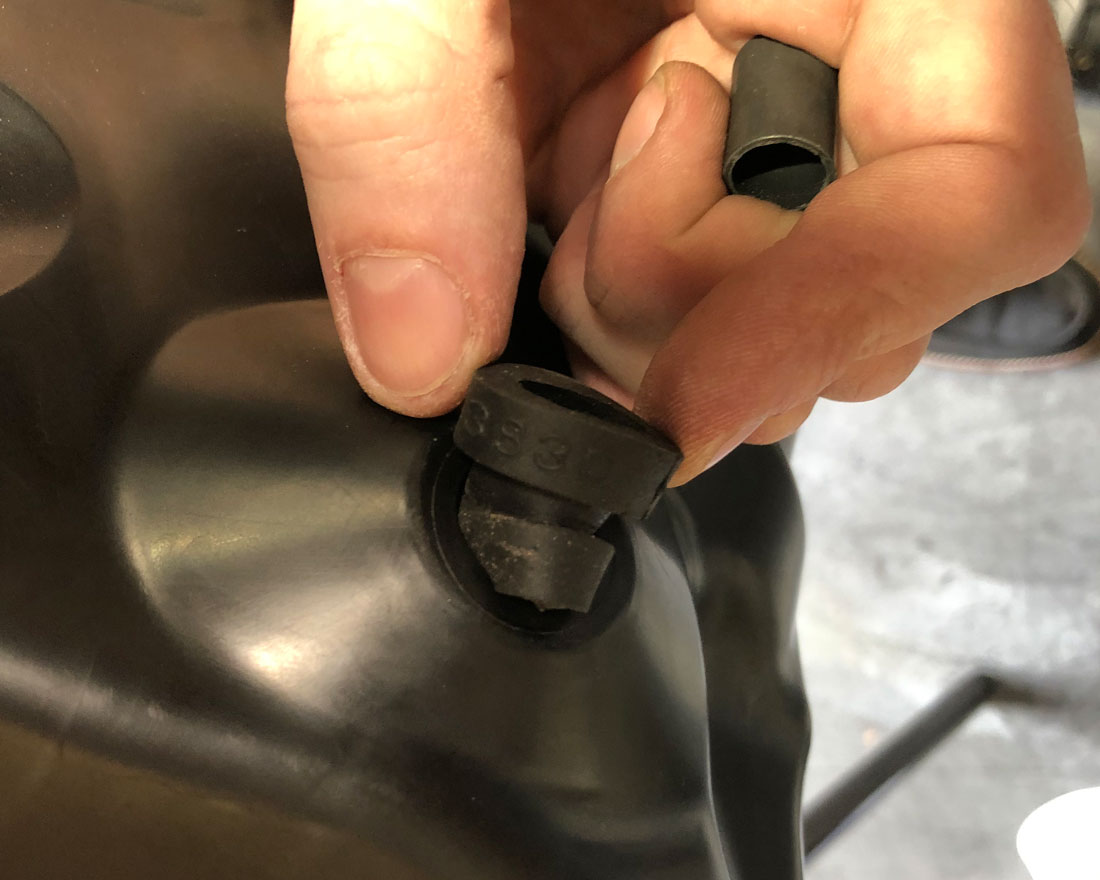
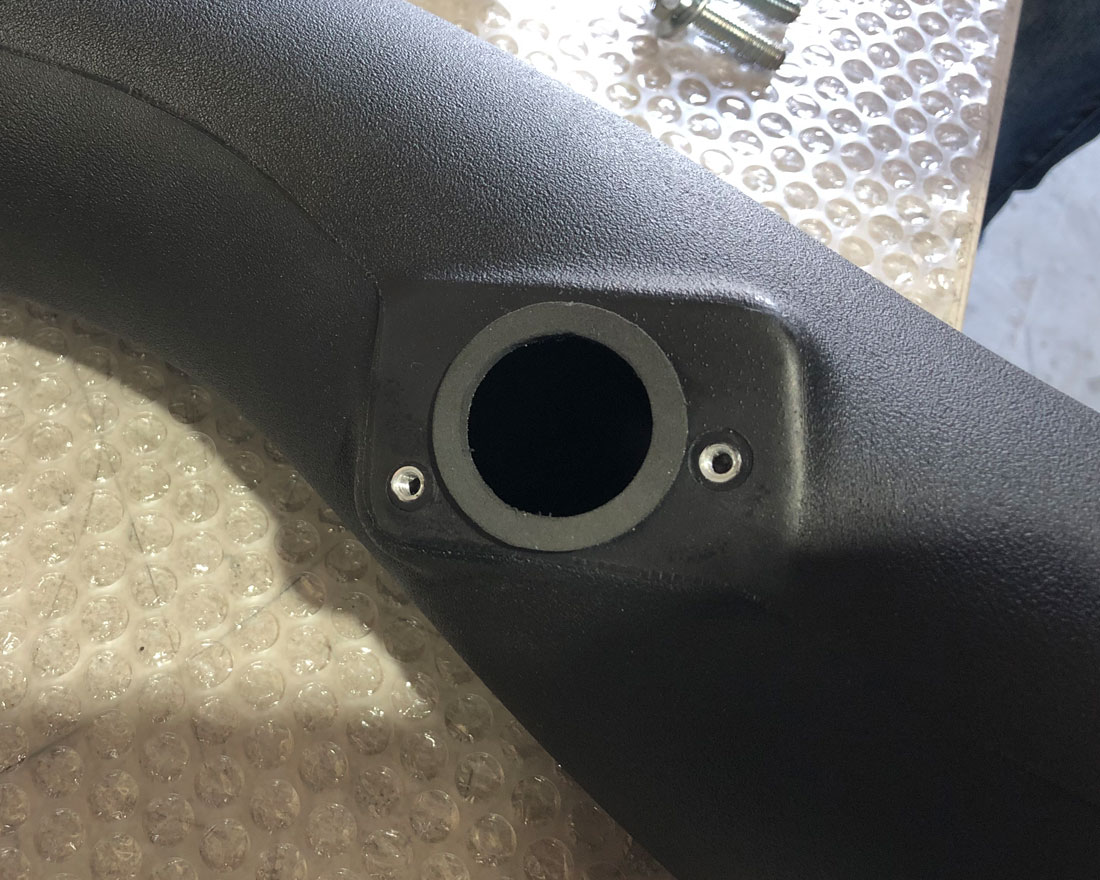
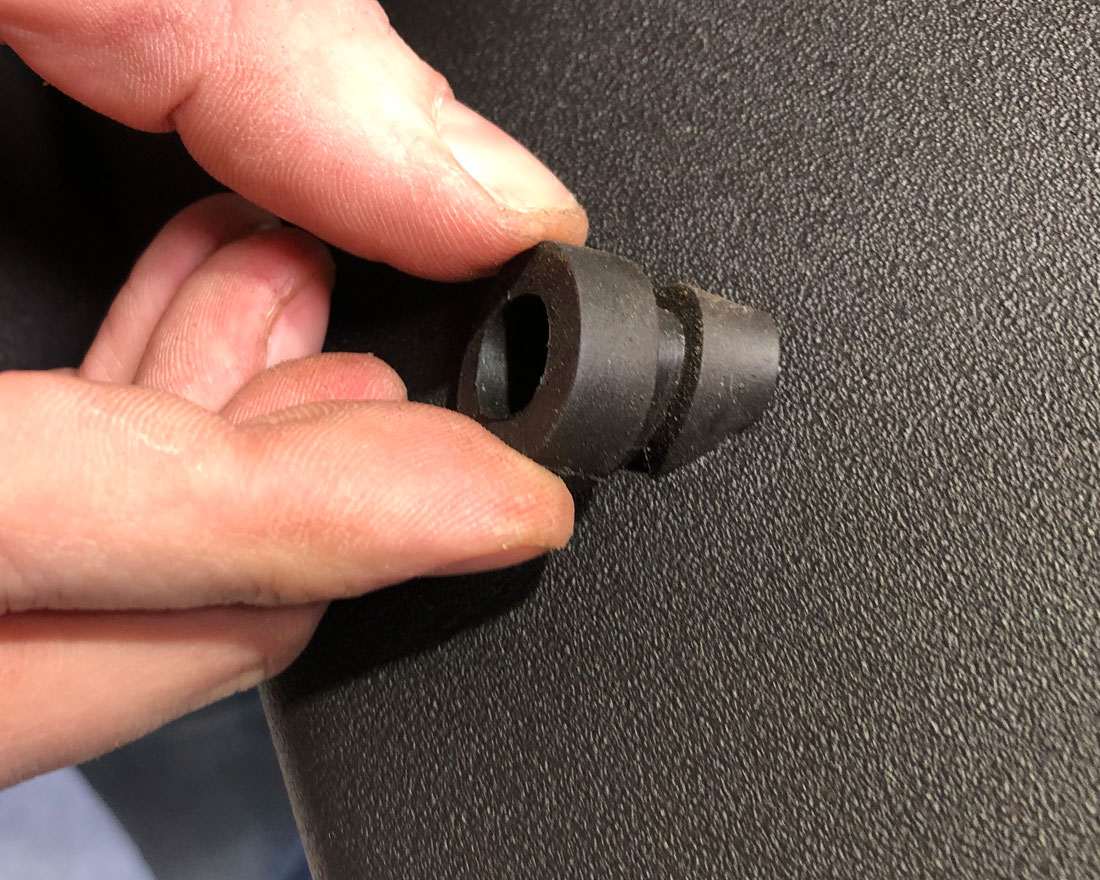
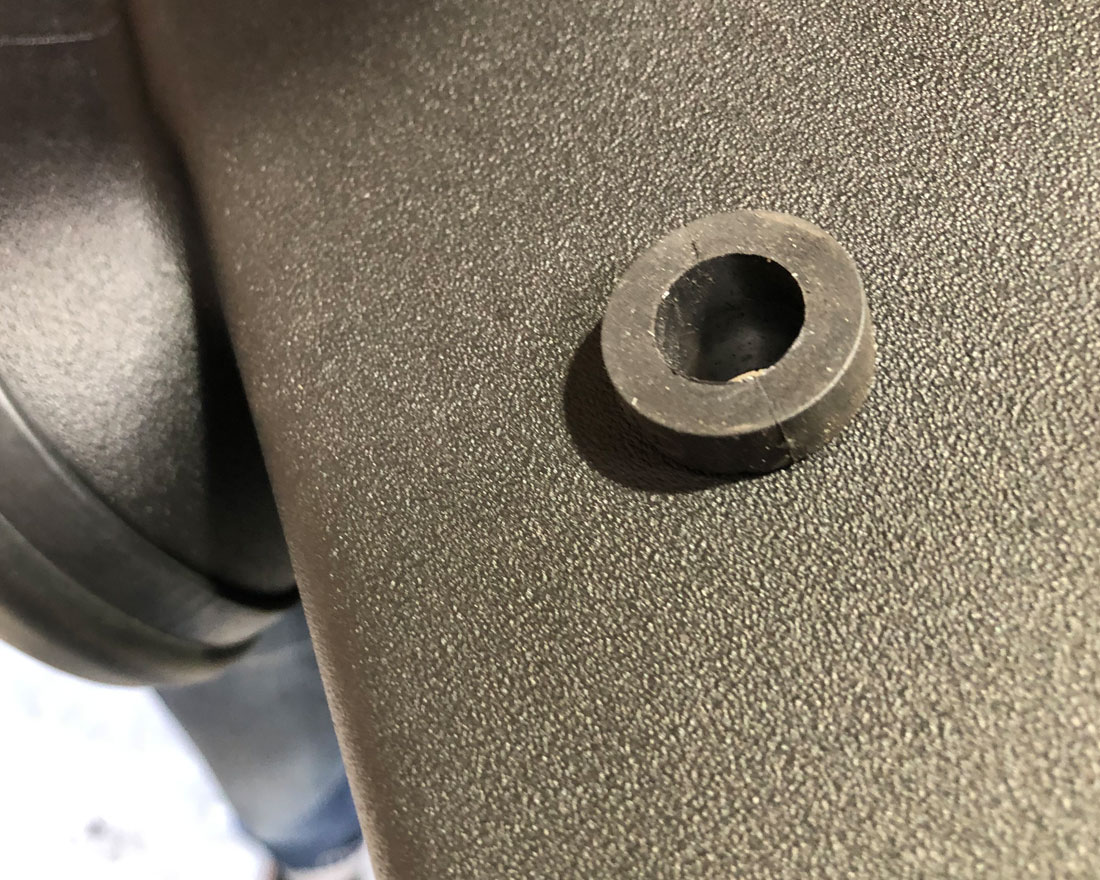
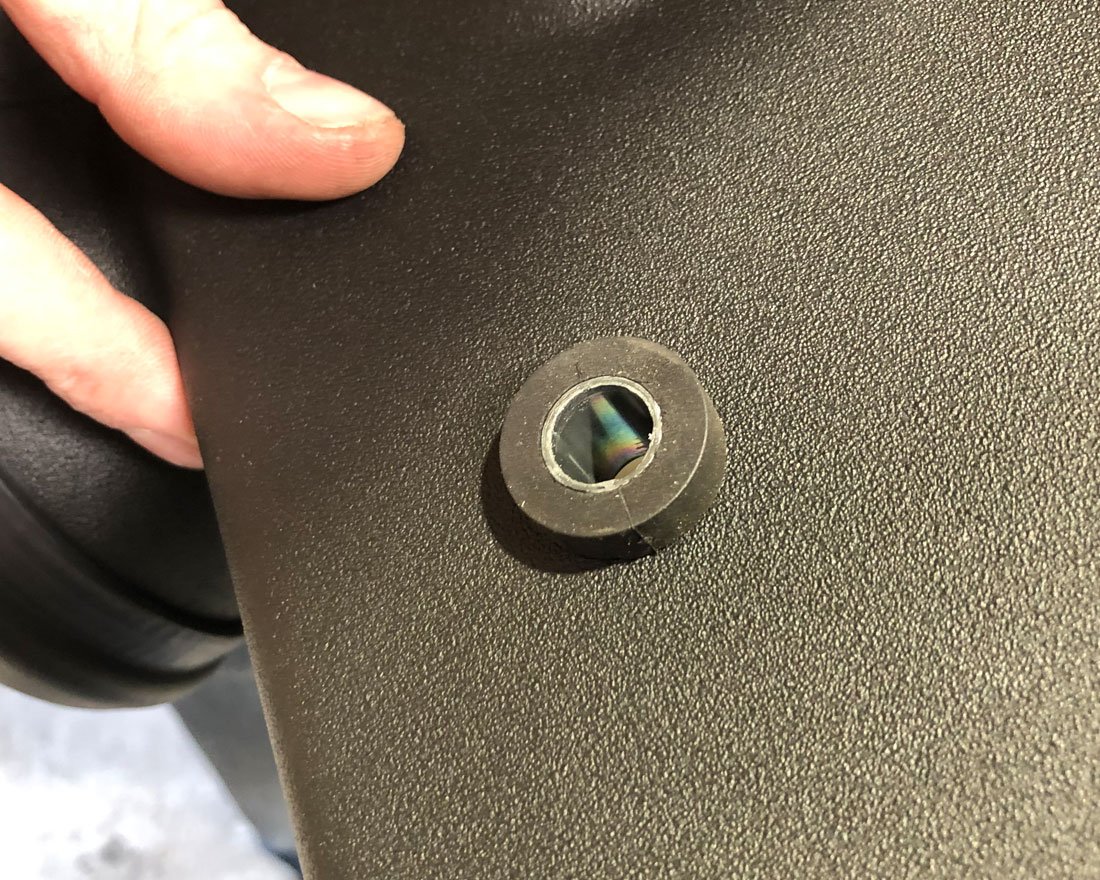
Step 16) Re-install the bushings and metal sleeves into the holes of the new air box tray.

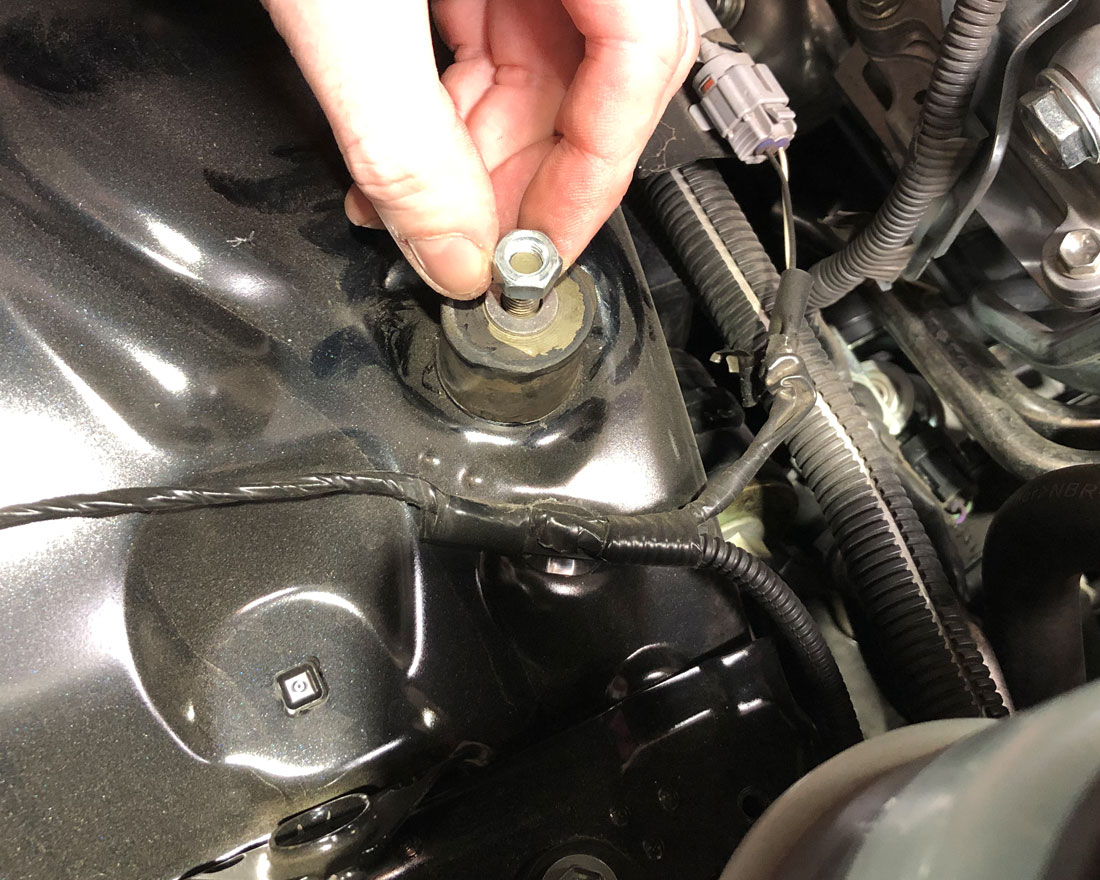
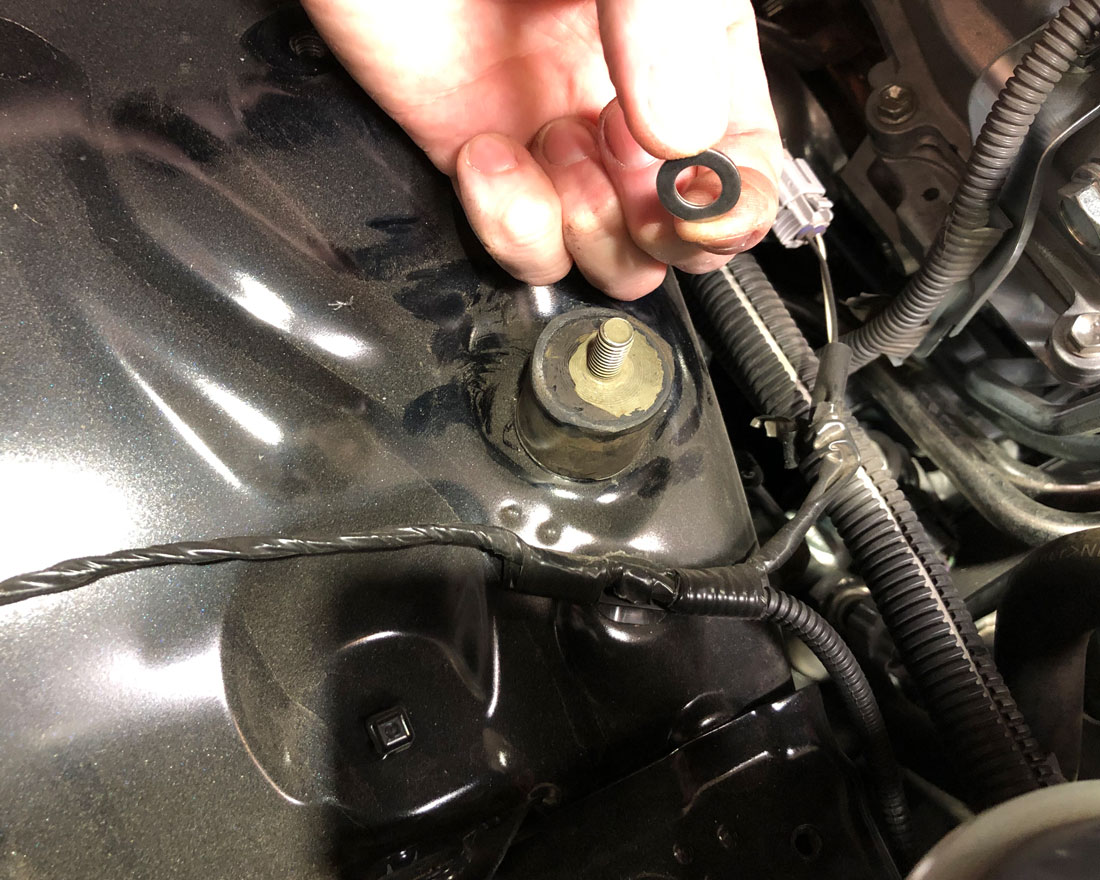
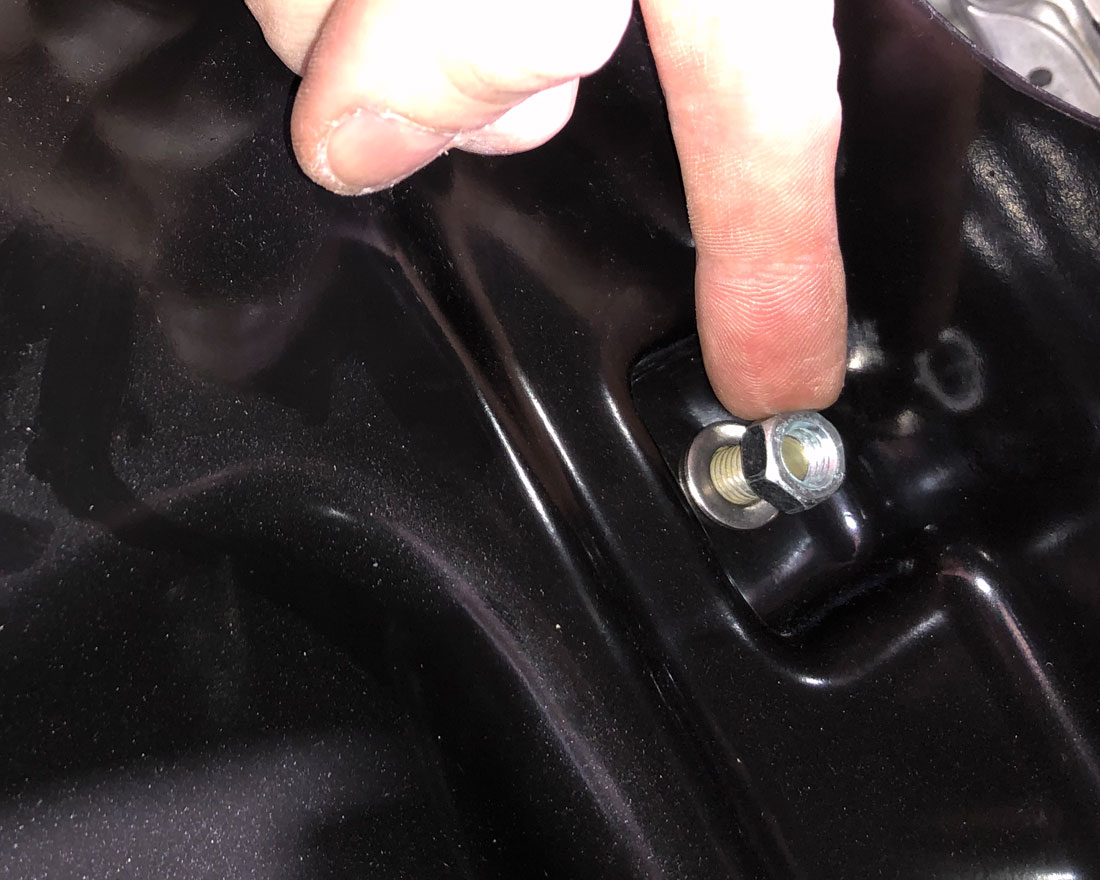
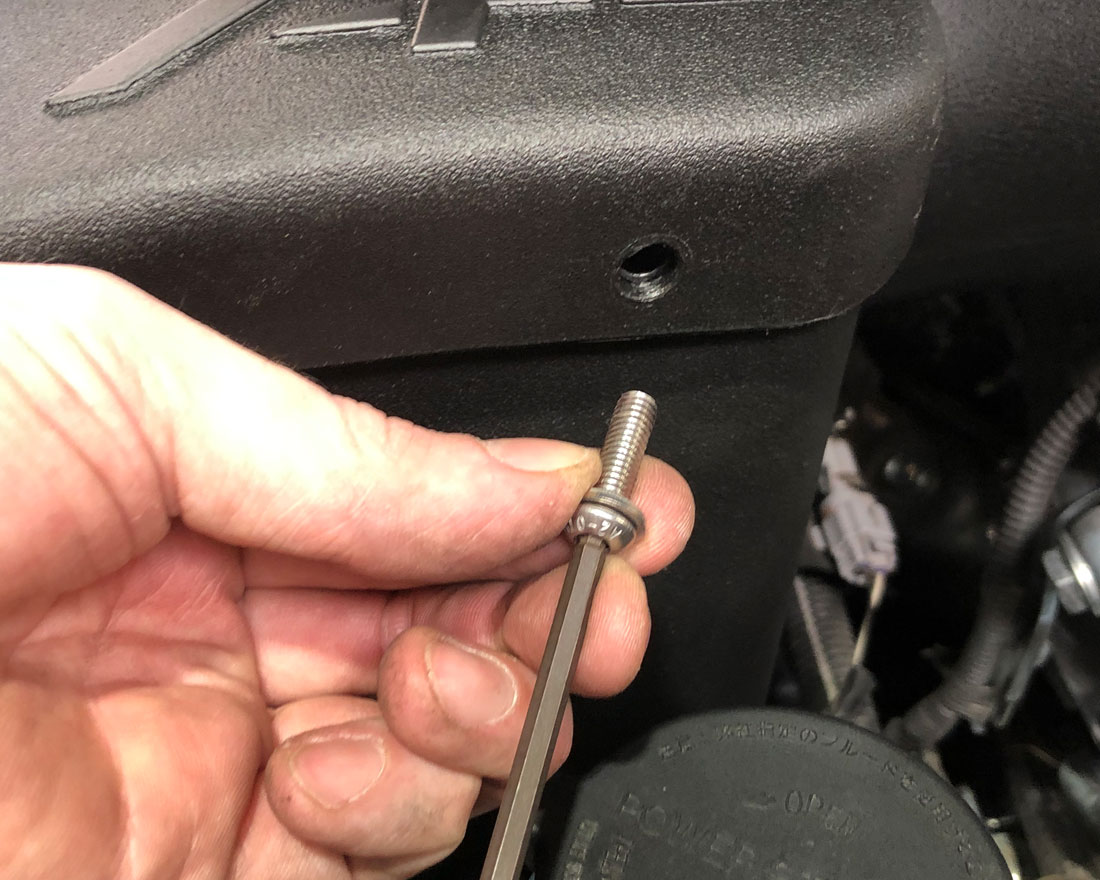
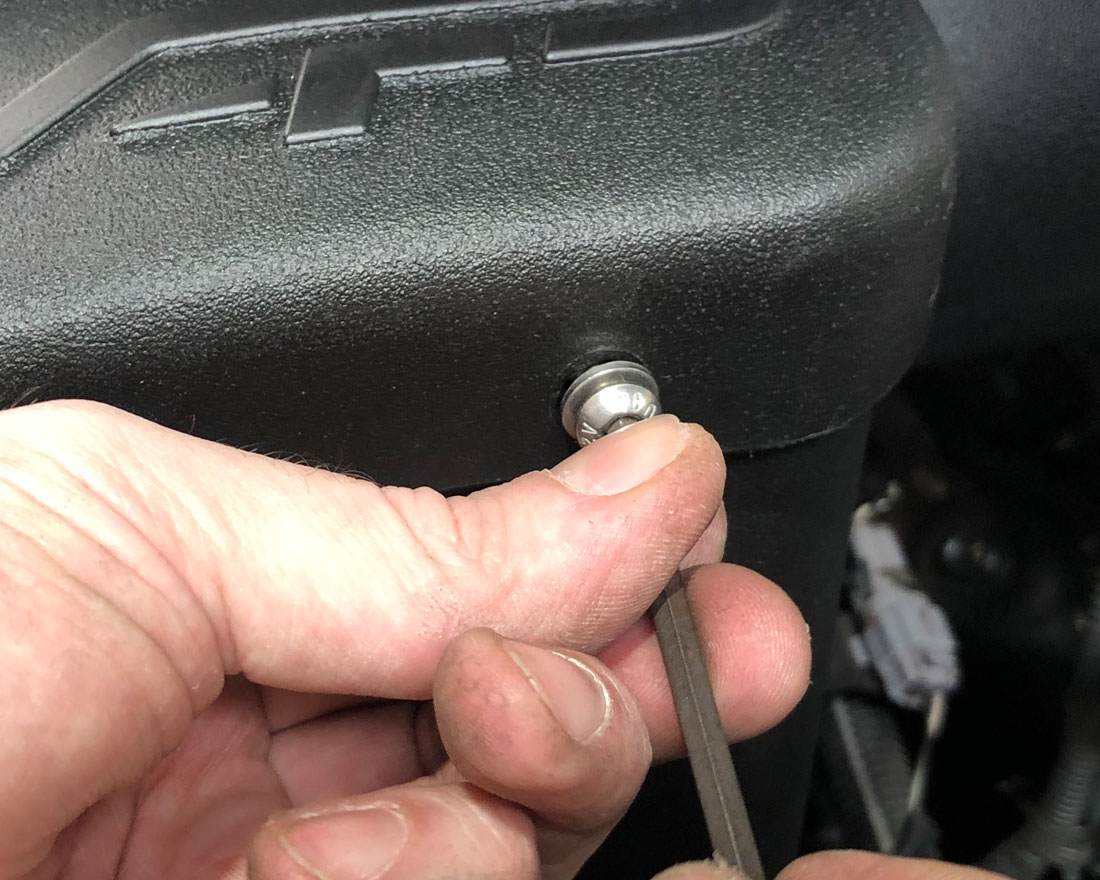
Step 17) Install the provided stud and bushing into the hole closest to the front of the vehicle. With the nut tighten the stud and bushing down. Then remove the nut and washer to be installed later.

Step 18) Place the lower tray into position. The scoop will tuck into the factory hole. The hole without the bushing closest to the front of the vehicle goes over the stud with the bushing.
Step 19) Align the holes on the bottom of the airbox to the screw holes on the vehicle. Re-install the factory 12mm bolts. Because of the rubber gasket on the intake vent port, it may be necessary to give the intake a bit of force to align the holes. Make sure the bolts are straight before tightening to avoid cross-threading the hardware during this step. Add the washer and nut to the stud and tighten.
Step 20) Install the included NPT brass barb fitting onto the intake tube and tighten it until snug. Next, place the included coupler onto the end of the intake tube at the throttle body. Feed the side of the intake tube without the coupler into the hole of the airbox and then place then slide the end with the coupler onto the throttle body.

Step 21) Tighten clamps on to secure the intake tube to the throttle body.
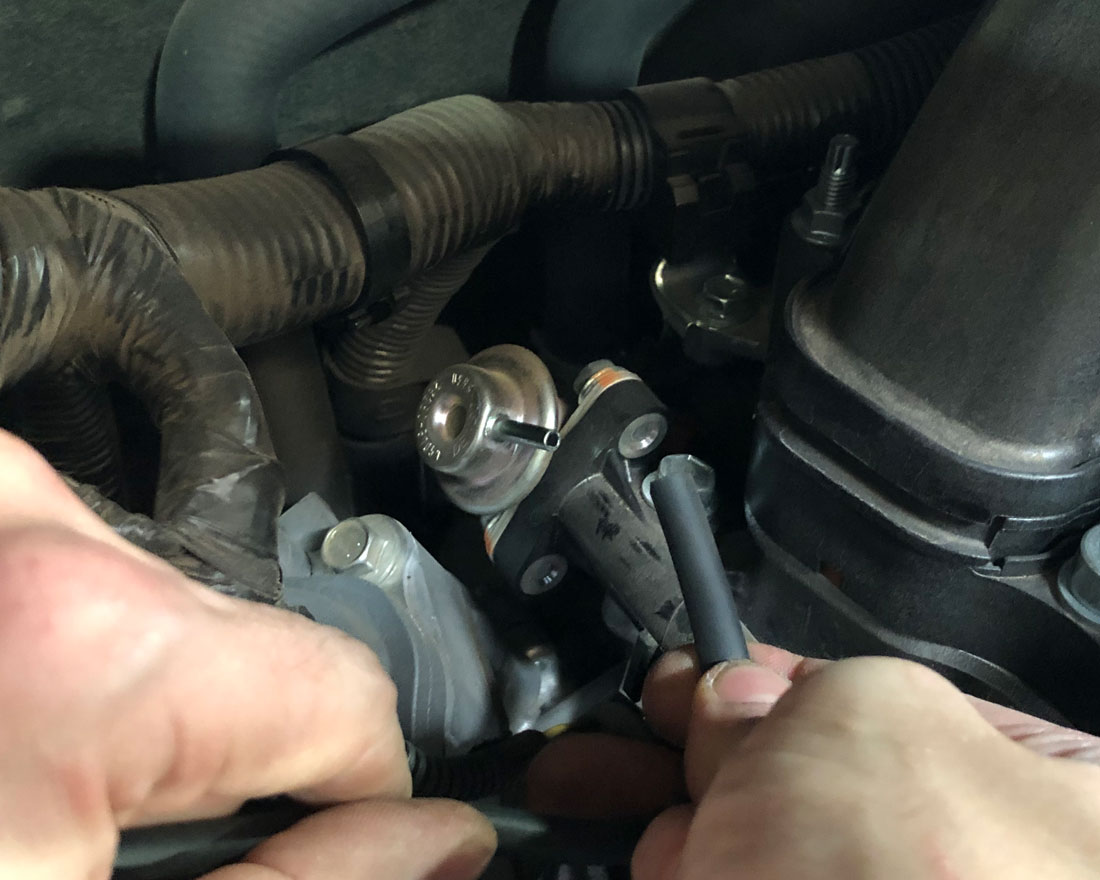
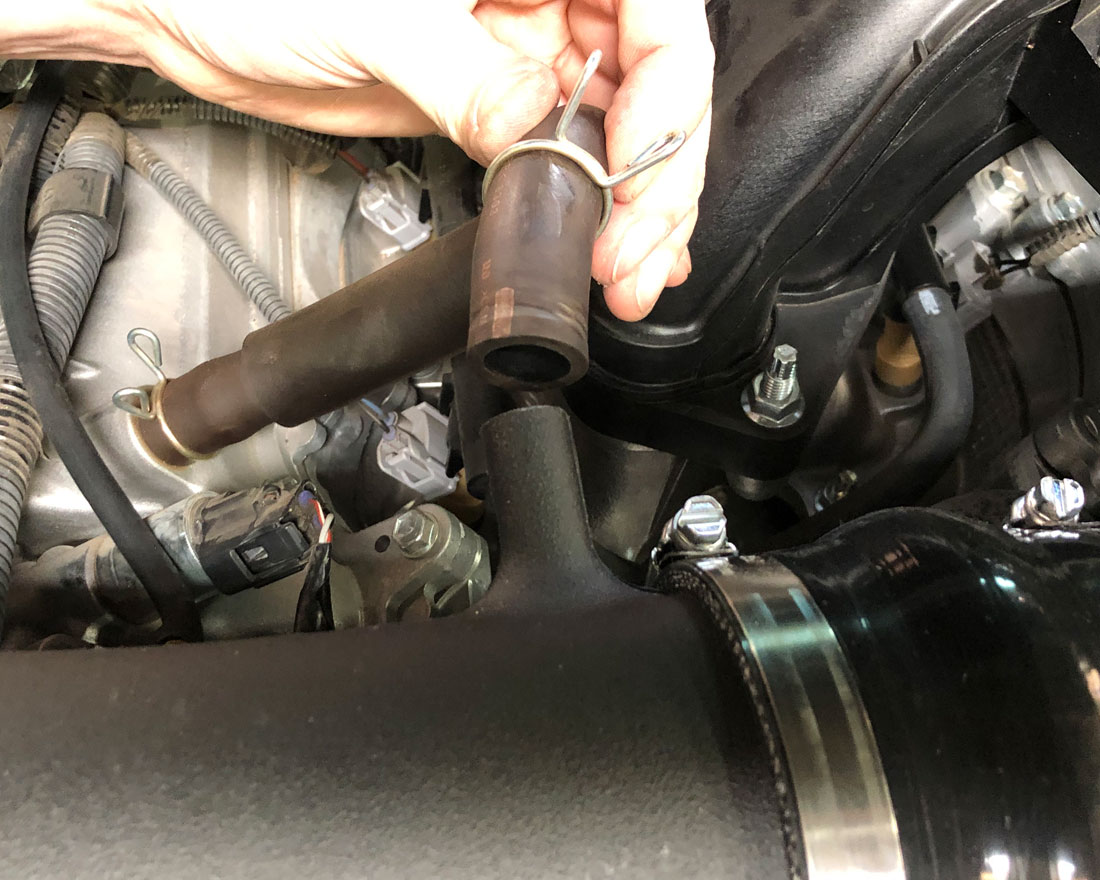
Step 22) Follow the small vacuum hose that was disconnected during the removal of the OEM intake and follow it up to the fuel pressure regulator. Remove the hose from the port on the fuel pressure regulator and replace it with the extended vacuum hose that is included in the kit. Secure lines with clamps. NOTE: These lines are only vacuum. No fuel is present.

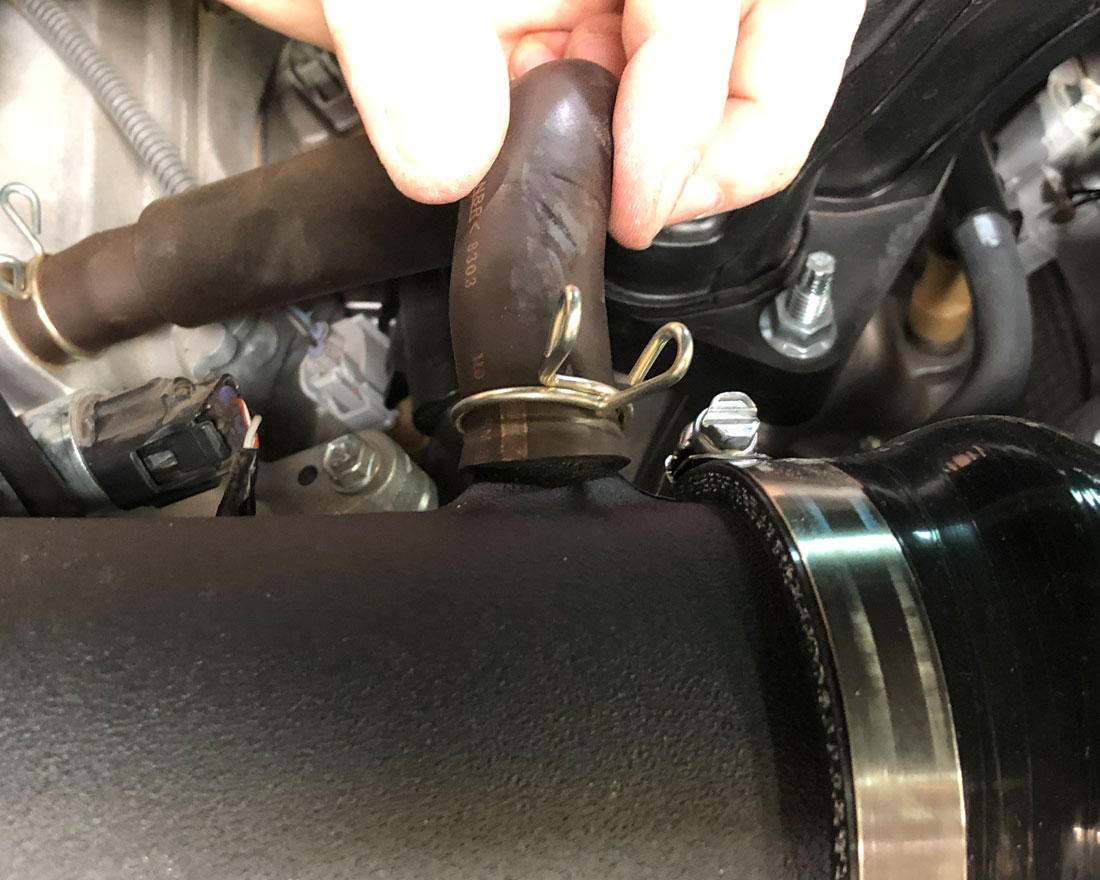
Step 23) Reconnect the factory hose line and clamp.
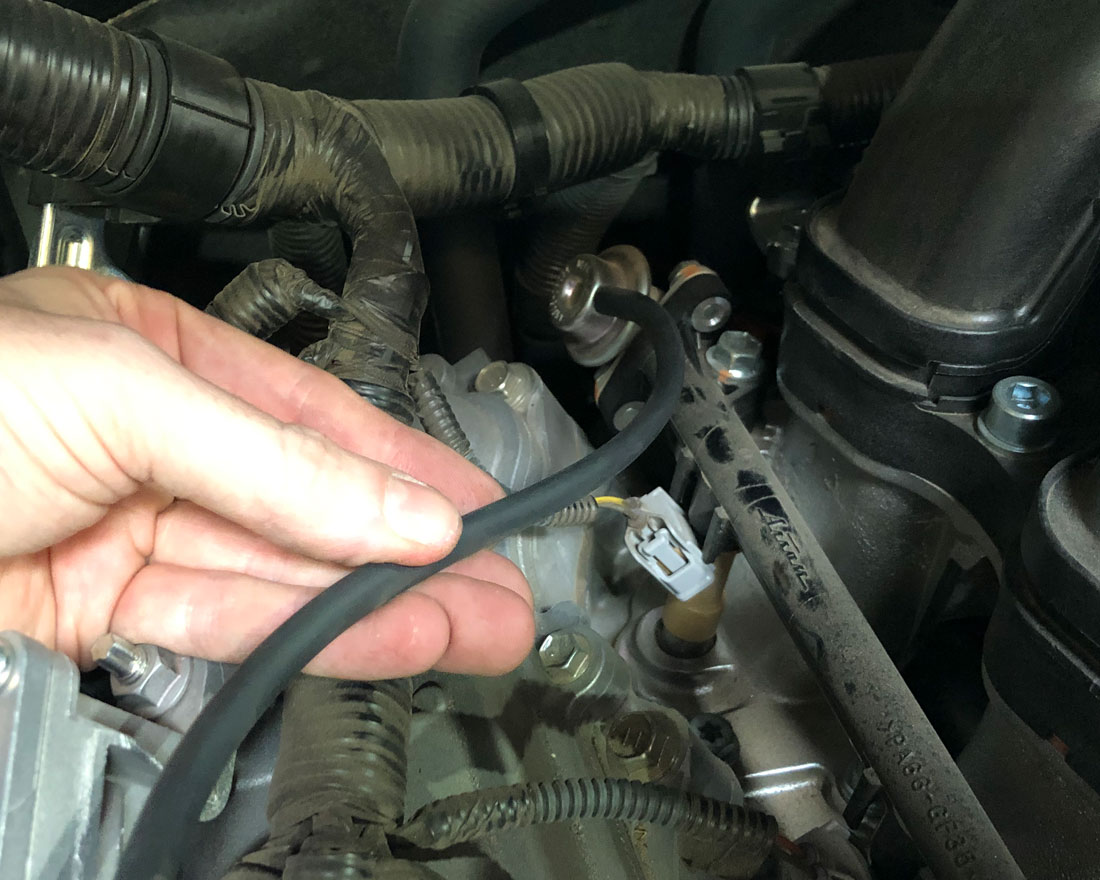
Step 24) Re-plug in the air sensor.
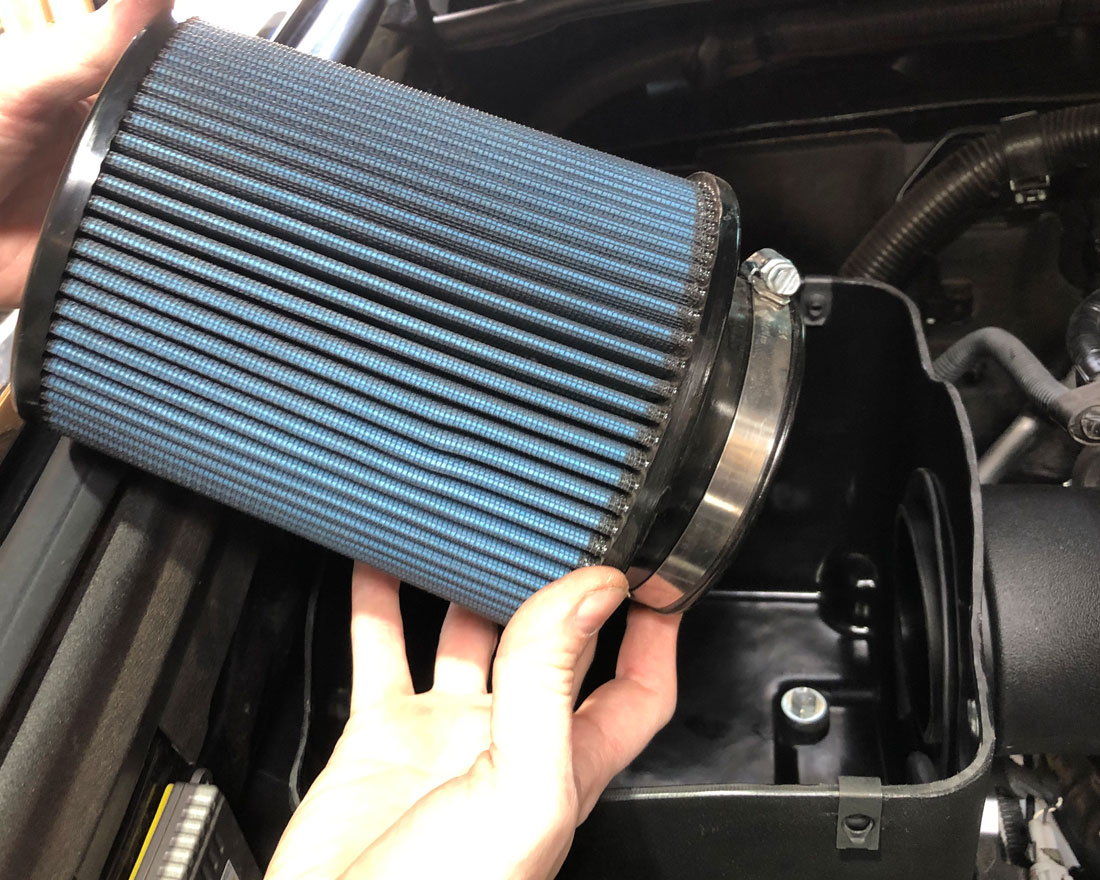
 Step 25) Place the new filter on the end of the new tube. The clamp should be on the outside of the new air box. Push the filter up against the trim lock rubber gasket and tighten the clamp.
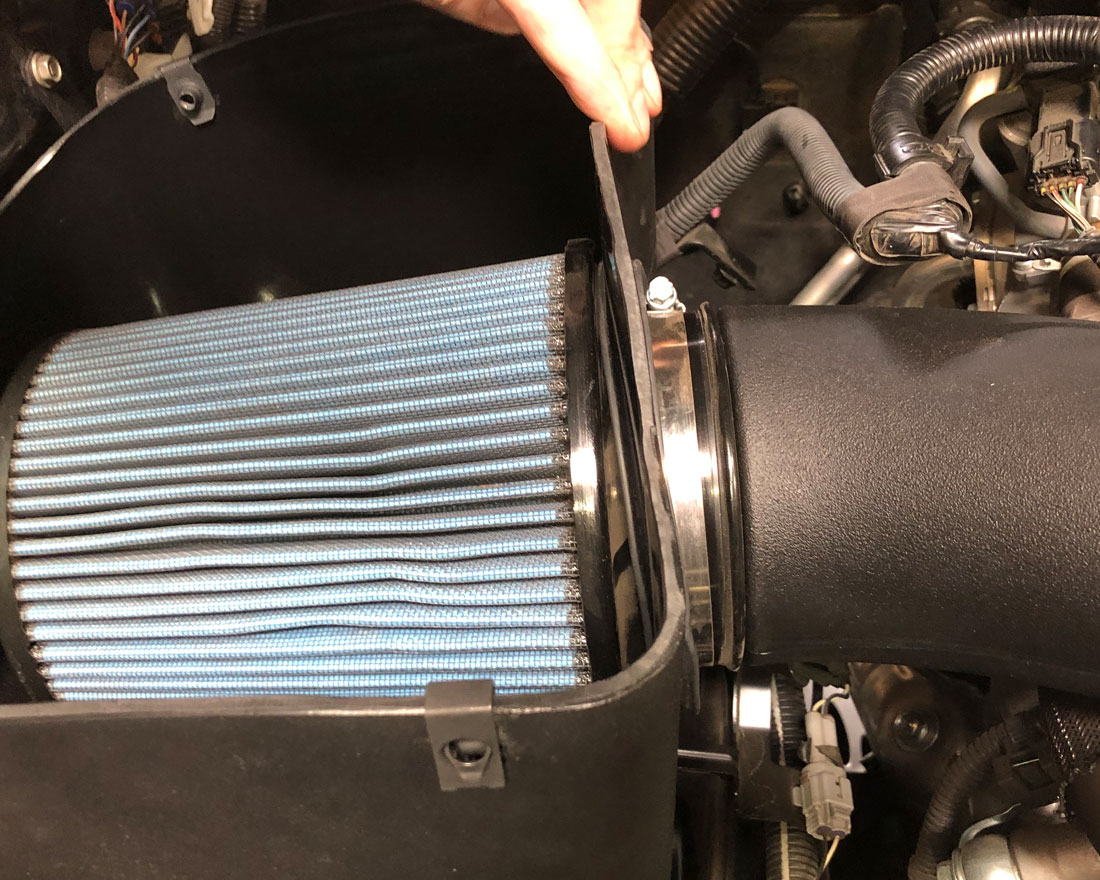
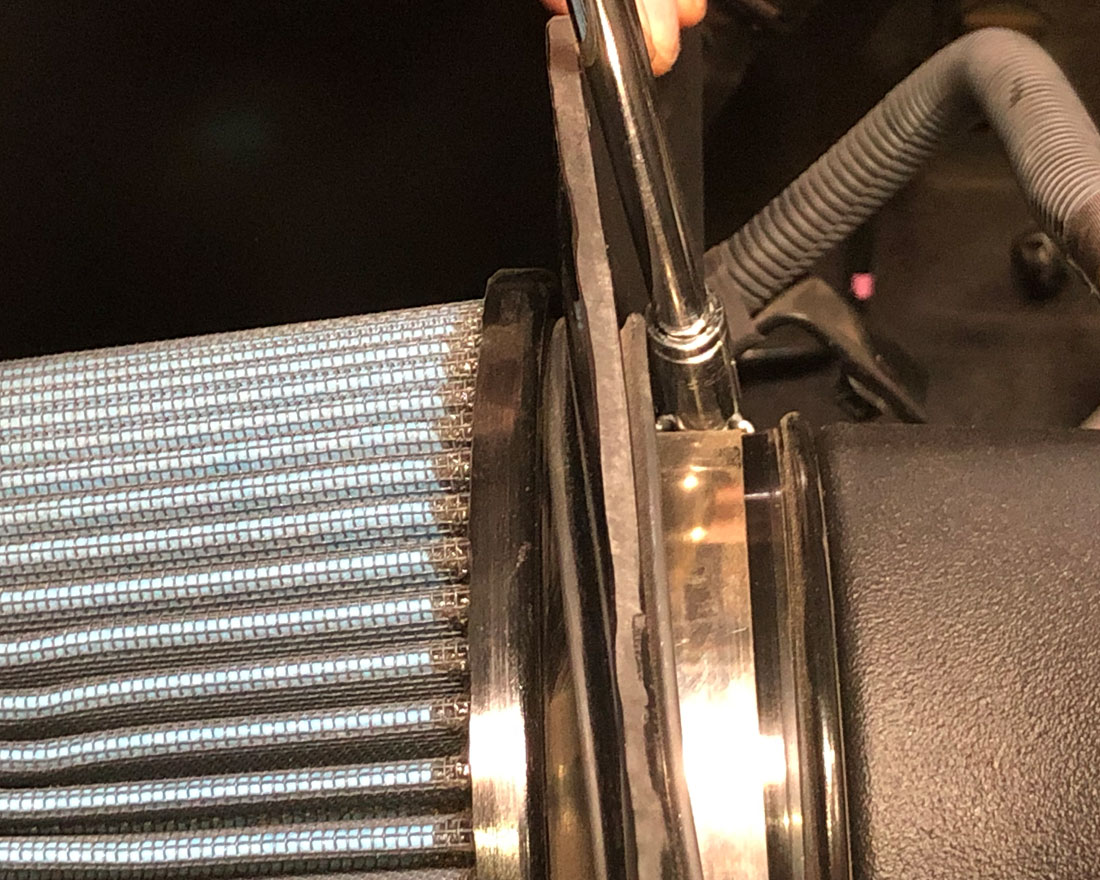
Step 26) With the air filter in place tighten all clamps and check connections. Install the air box lid by placing it on top of the lower intake tray.
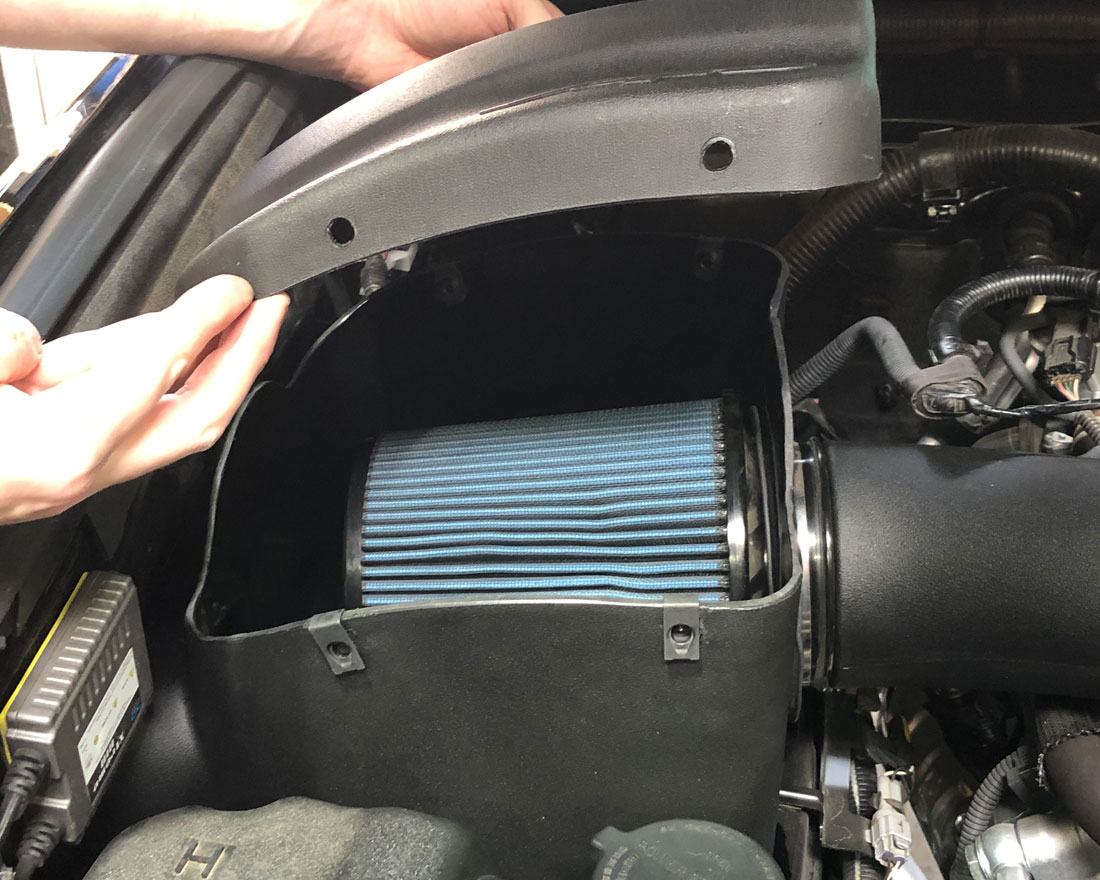 Step 27) Secure the lid with the 4 provided button head screws.

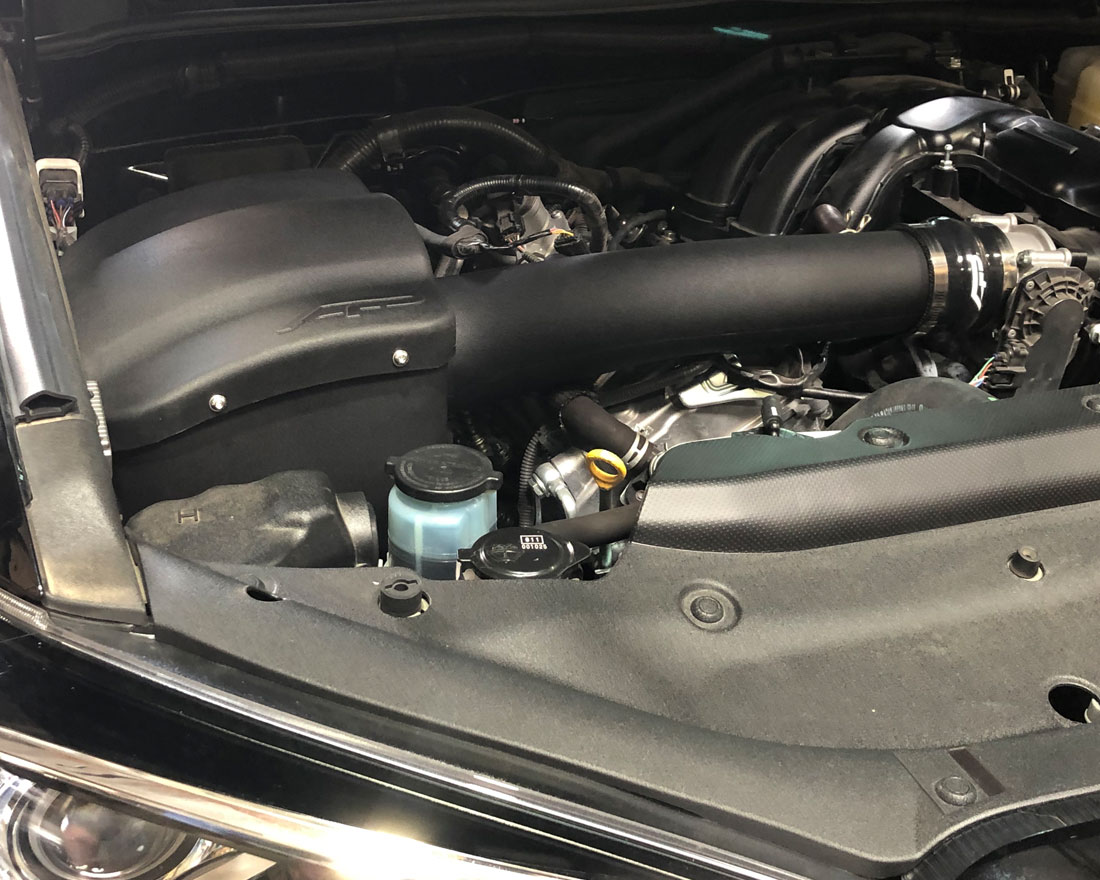
Step 28) You have now installed the VR Performance Cold Air Intake for Toyota 4Runner